Supported Features
The Okta/CloudSaver – Tag Manager SAML integration currently supports the following features:
- IDP-Initiated SSO
- SP-Initiated SSO
- SLO
- JIT (Jist-In-Time) Provisioning
For more information on the listed features, visit the Okta Glossary.
IDP-Initiated SSO
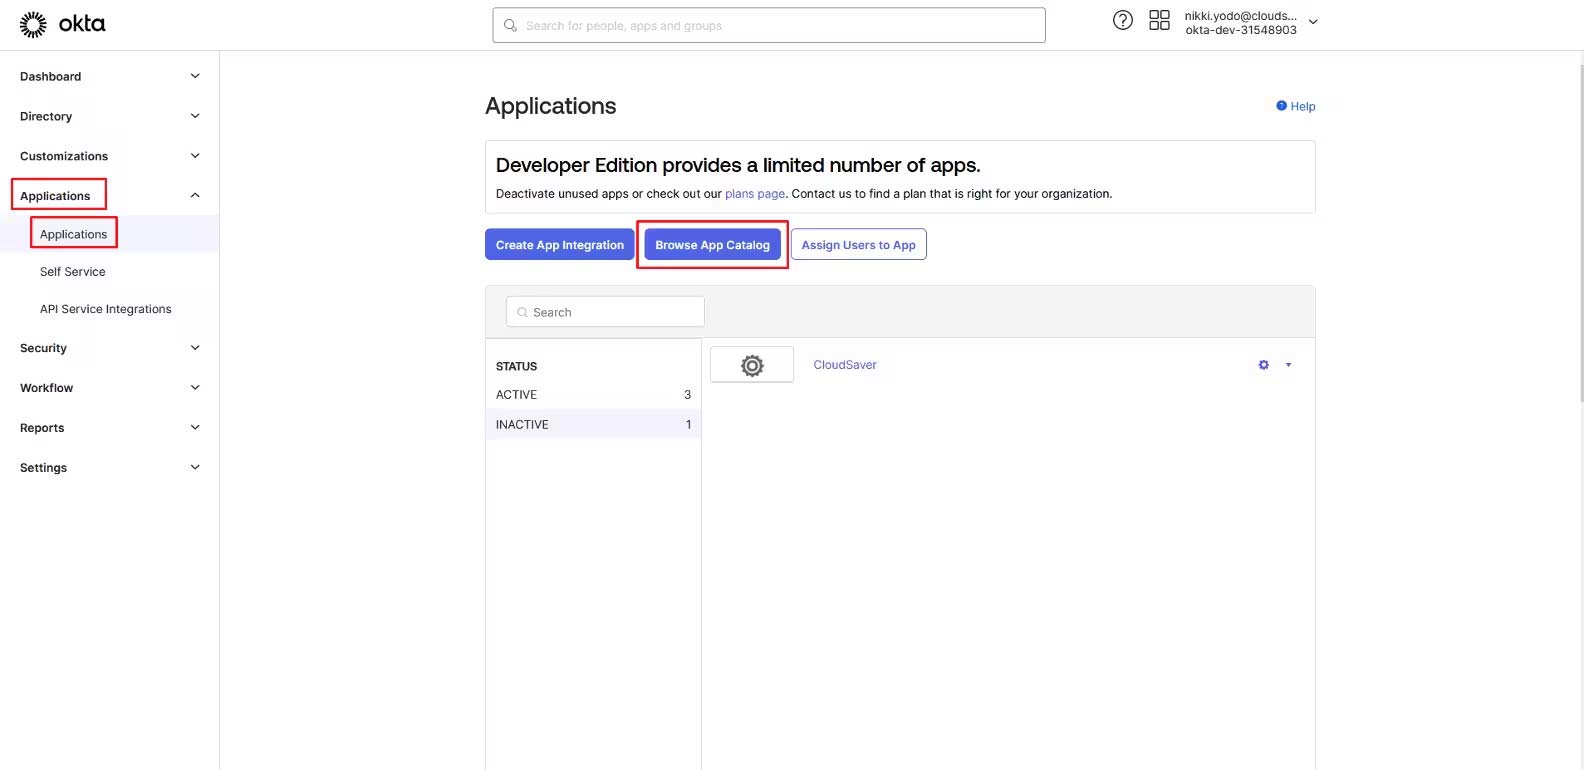
1. In the Okta Admin console, go to Applications > Applications and click Browse App Catalog.
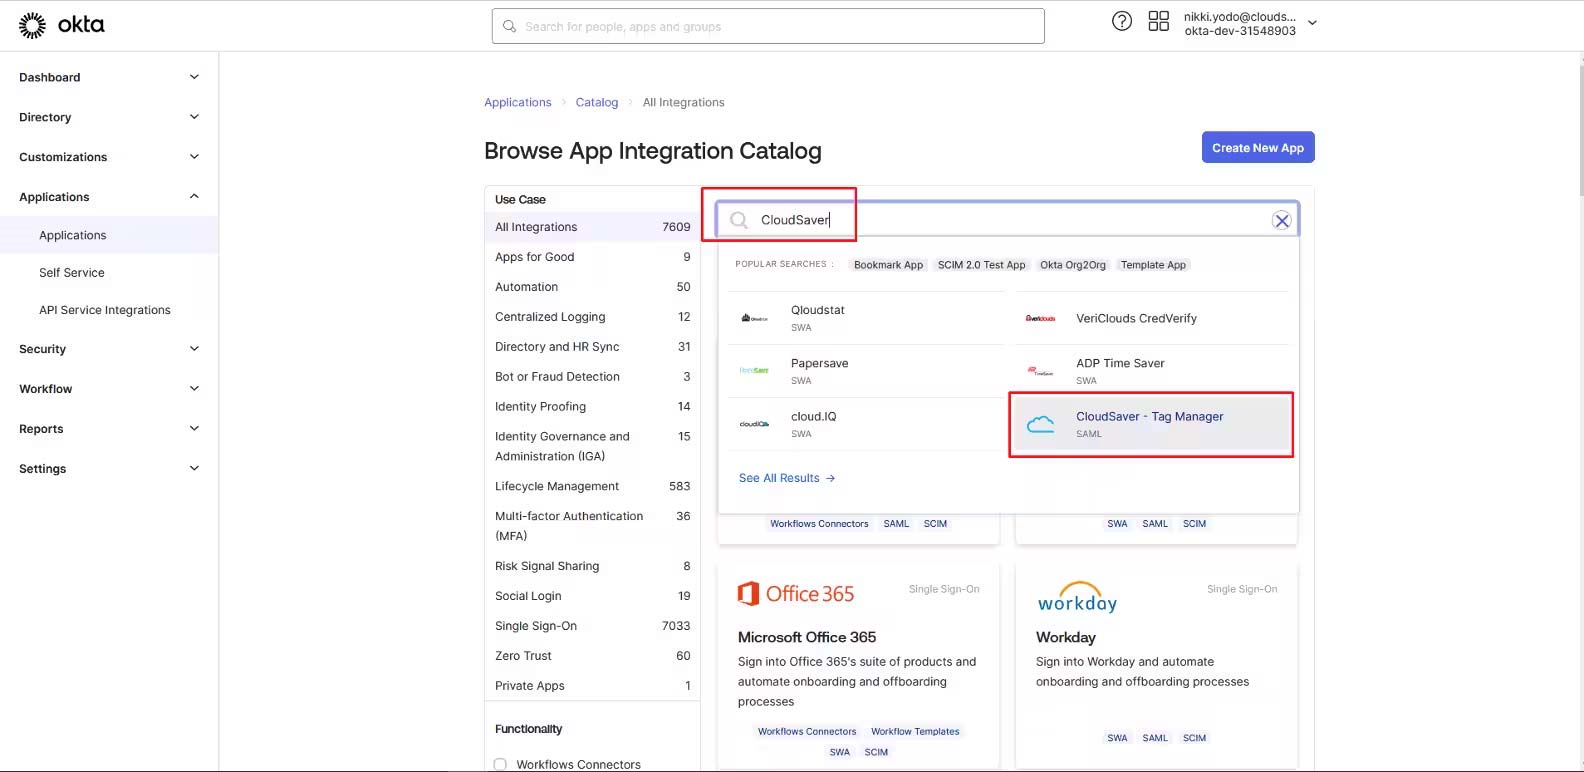
2. Enter “CloudSaver” on the search box and select CloudSaver – Tag Manager tile.
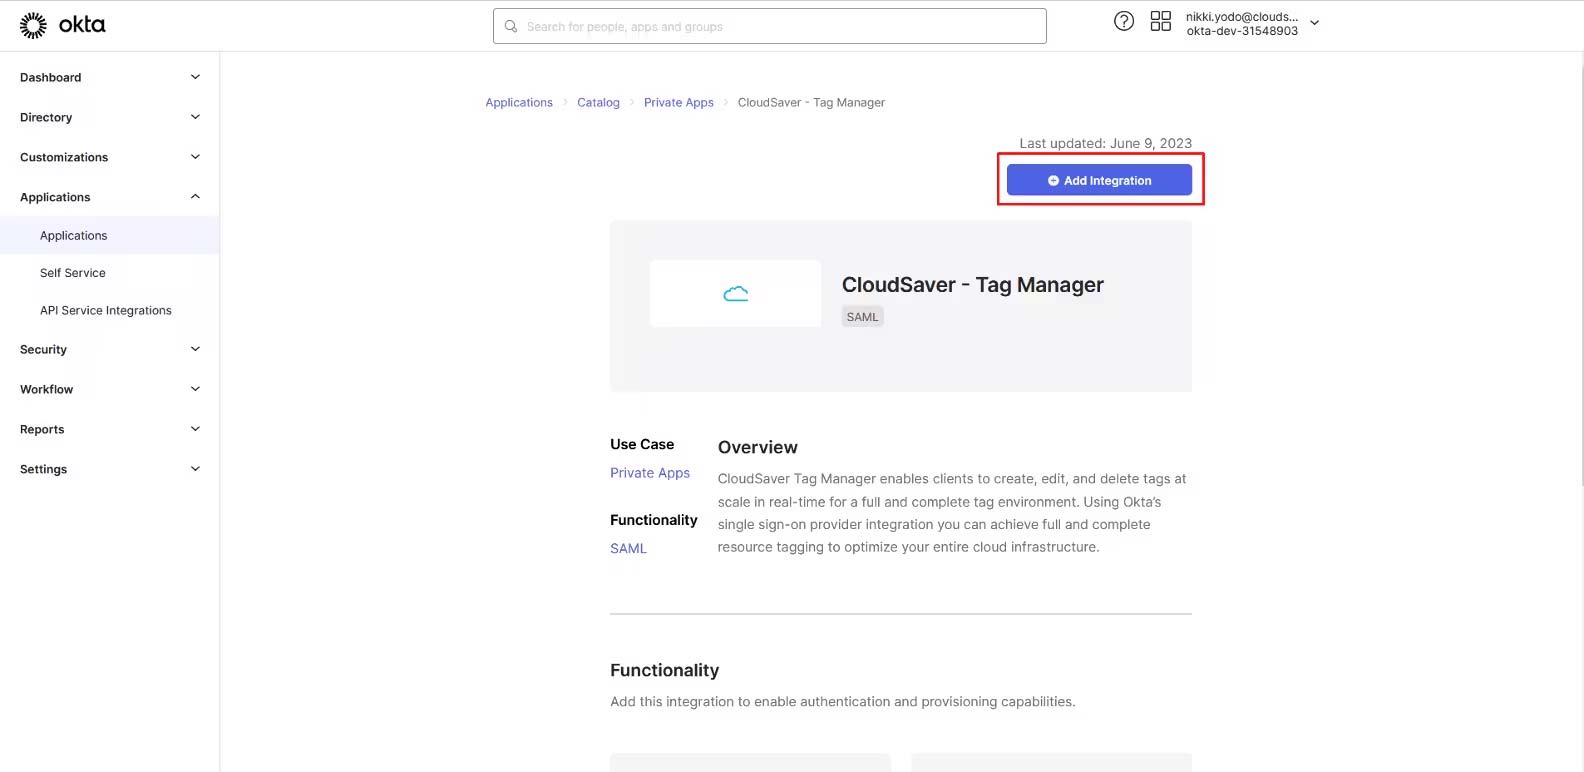
3. Click Add Integration to start configuring.
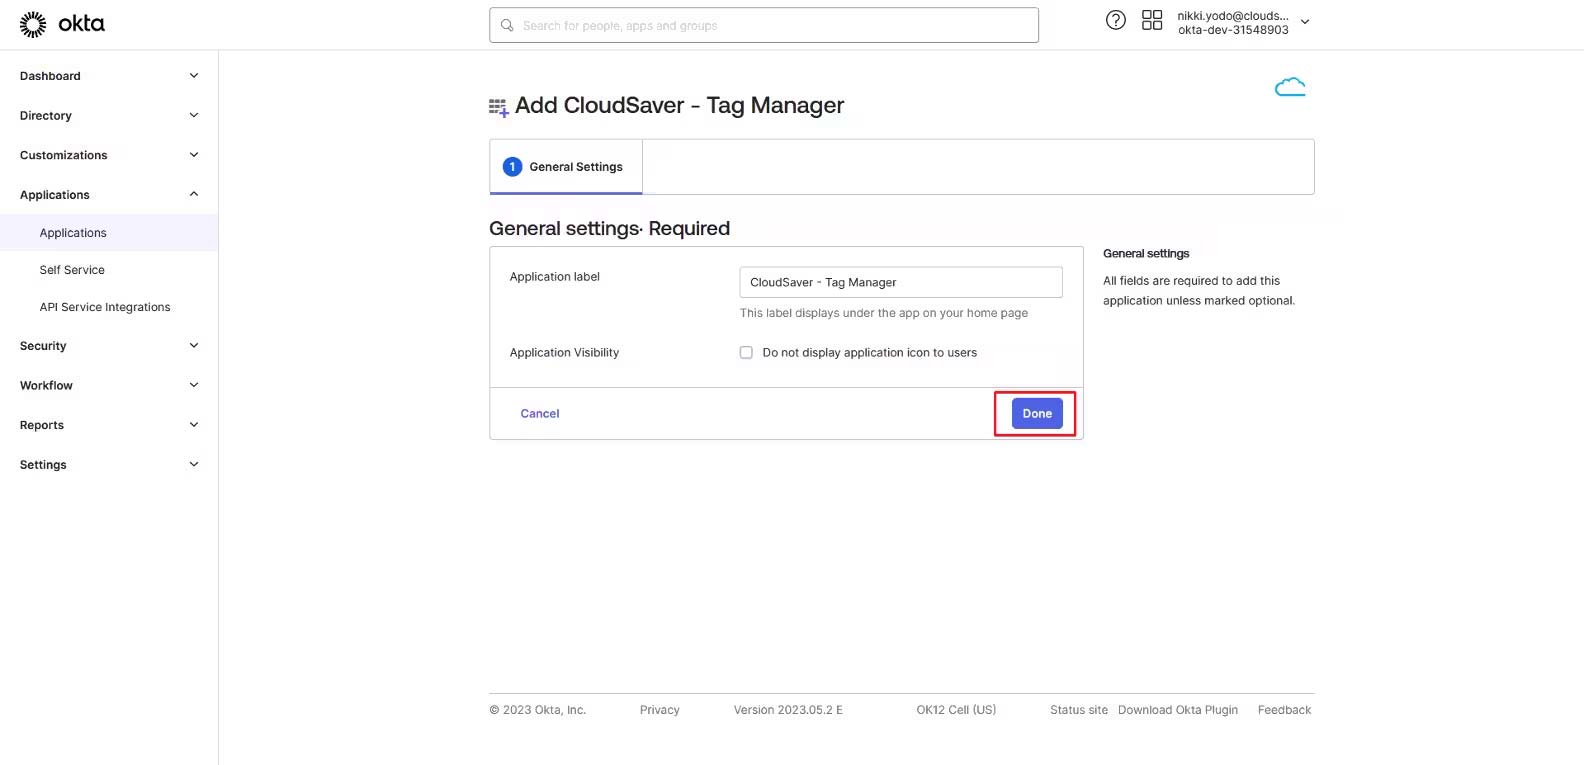
4. Under General Settings, verify that the application name is correct and click Done.
5. In CloudSaver, go to Settings > Single Sign-On.
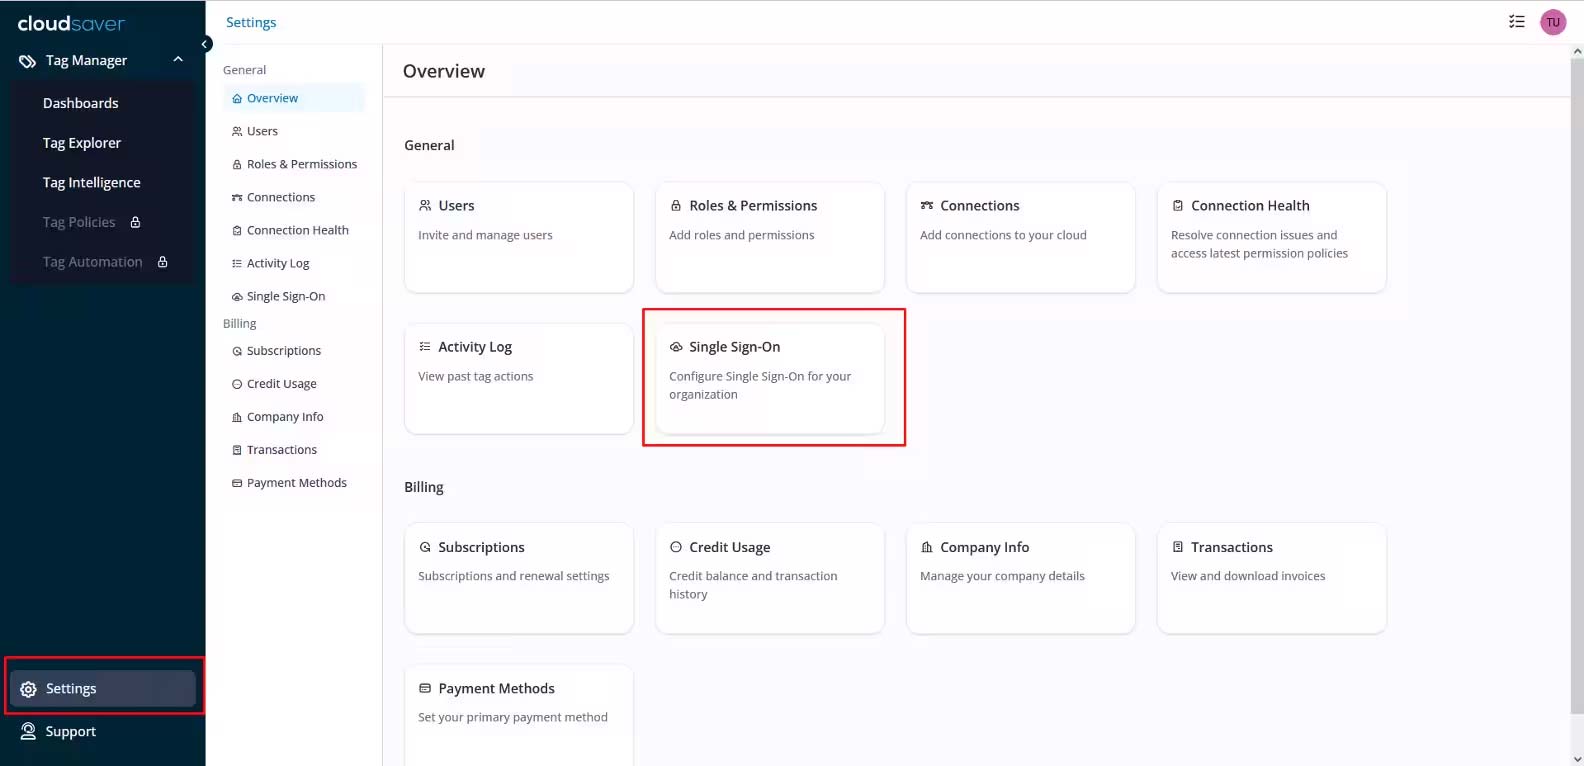
6. Click Set Up SSO and the Configure Single Sign-On page will be displayed.
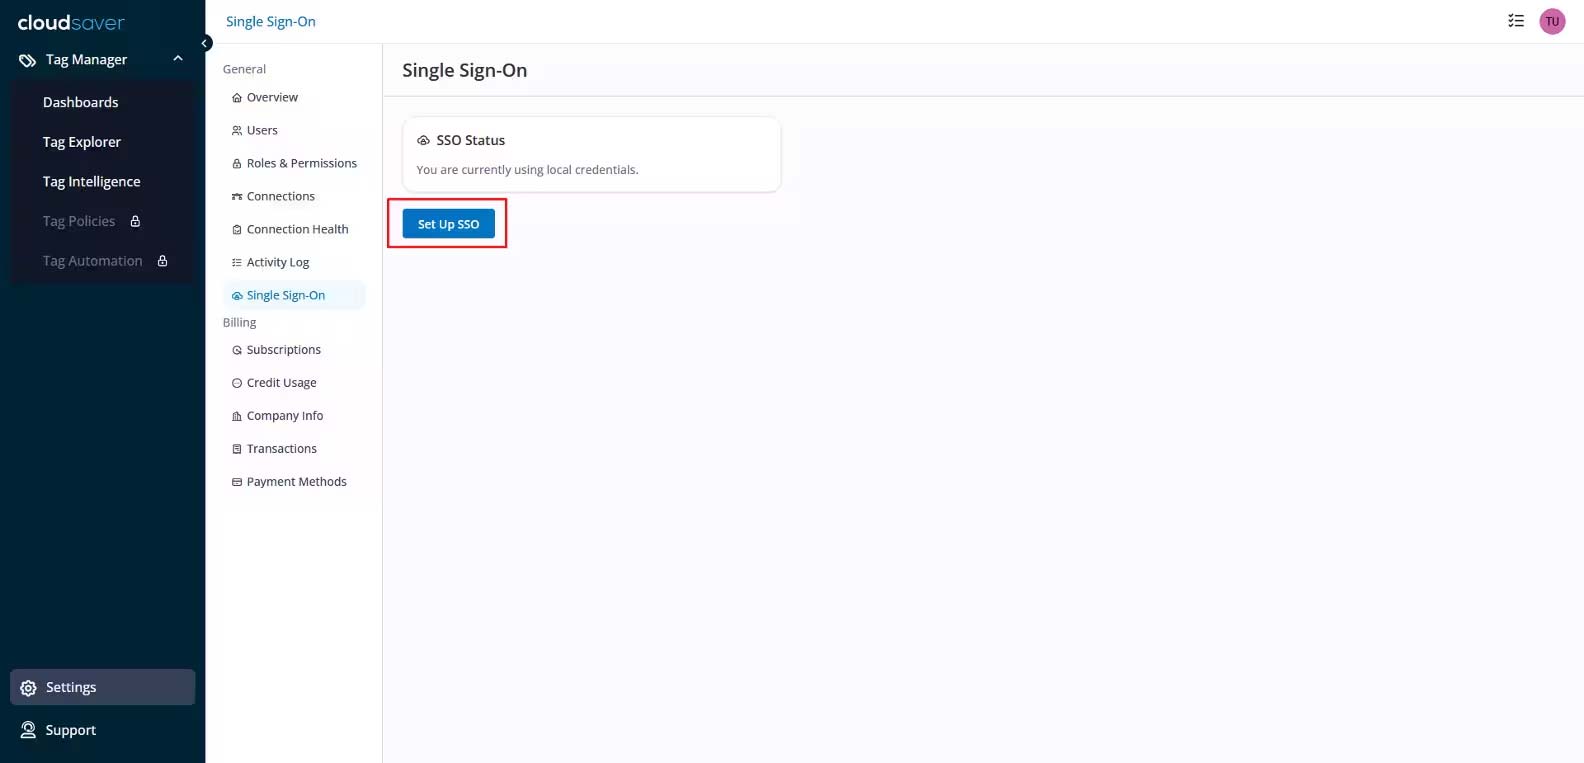
7. In Configure Single-Sign On page, enter “Okta” as Identity Provider.
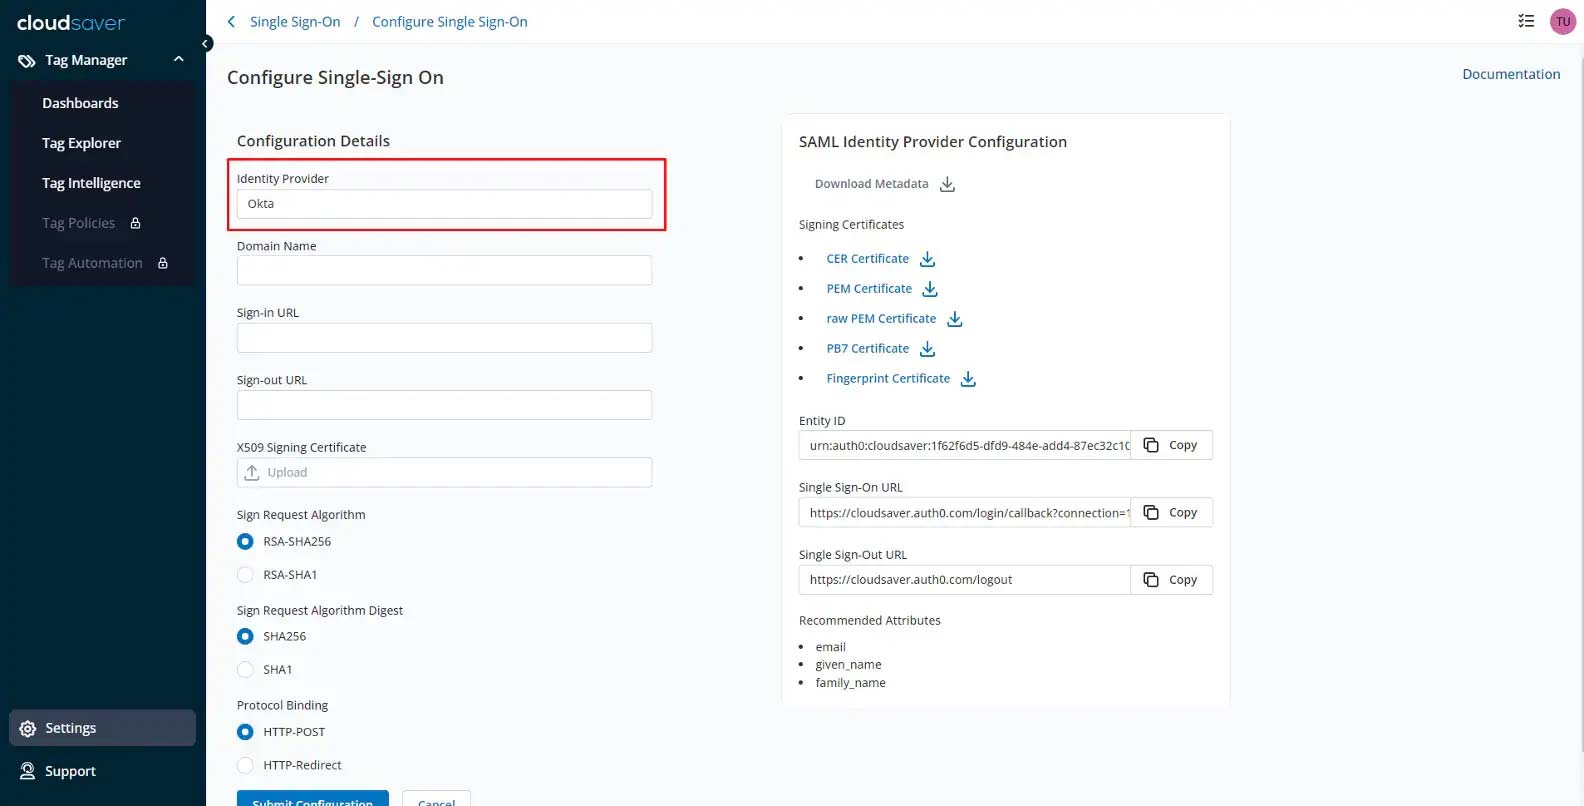
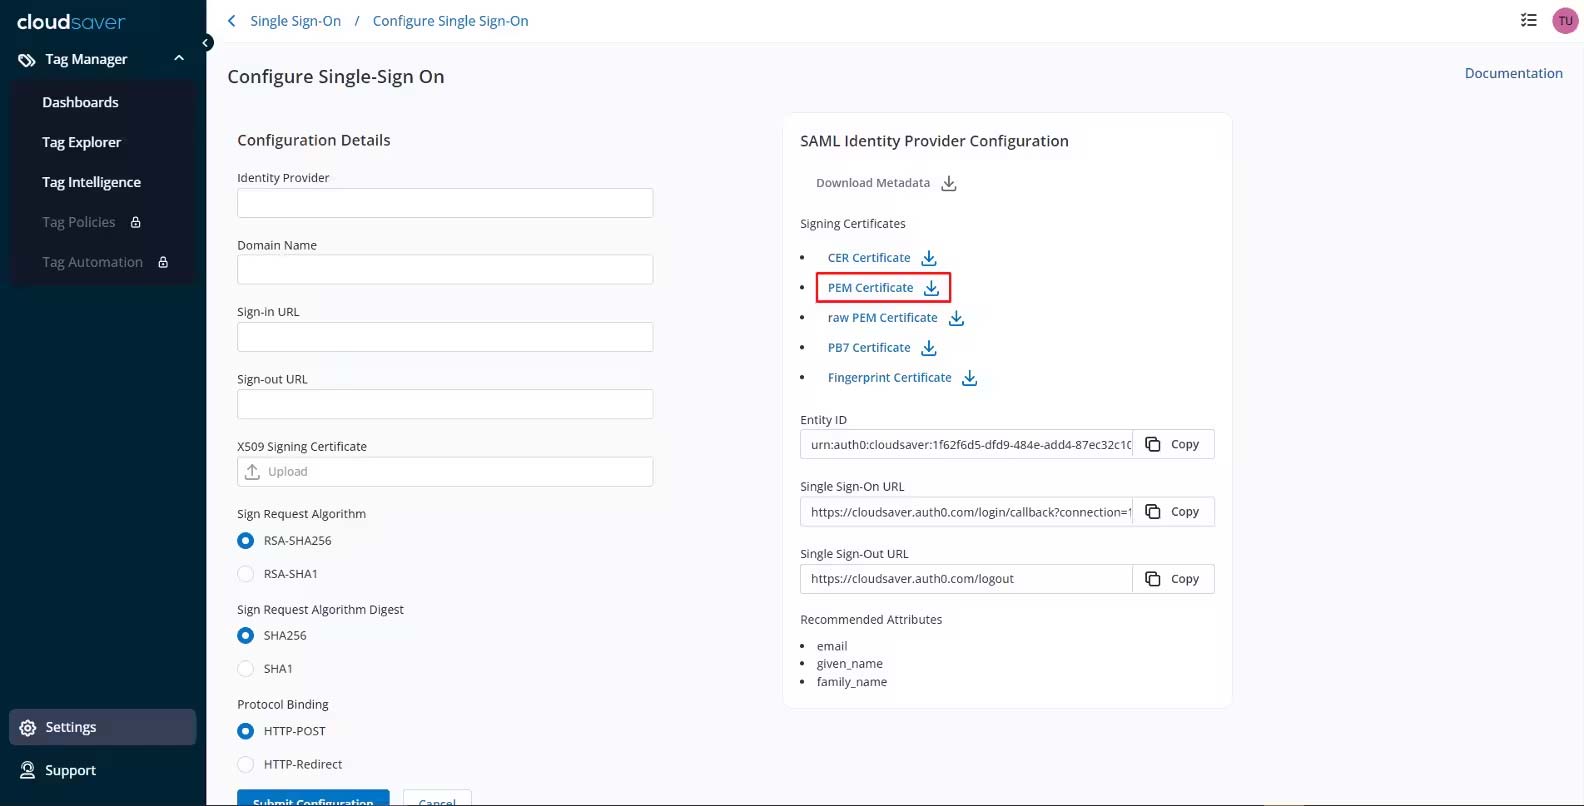
8. Under SAML Identity Provider Configuration, download the PEM Certificate.
9. Back on the Okta Application details page, make sure the Sign On tab is selected and click Edit.
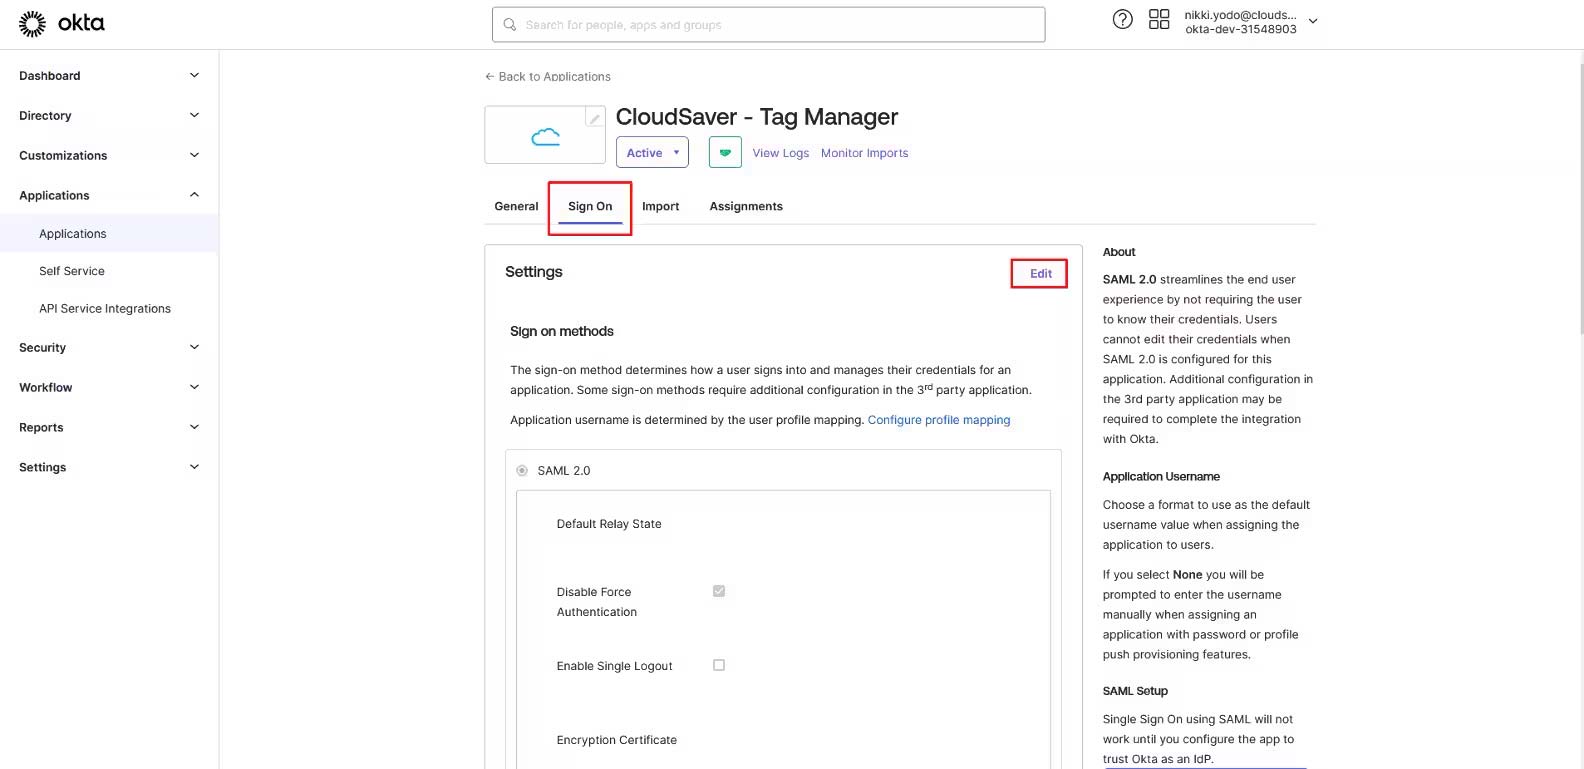
10. Scroll to Encryption Certificate field and upload the CloudSaver certificate.
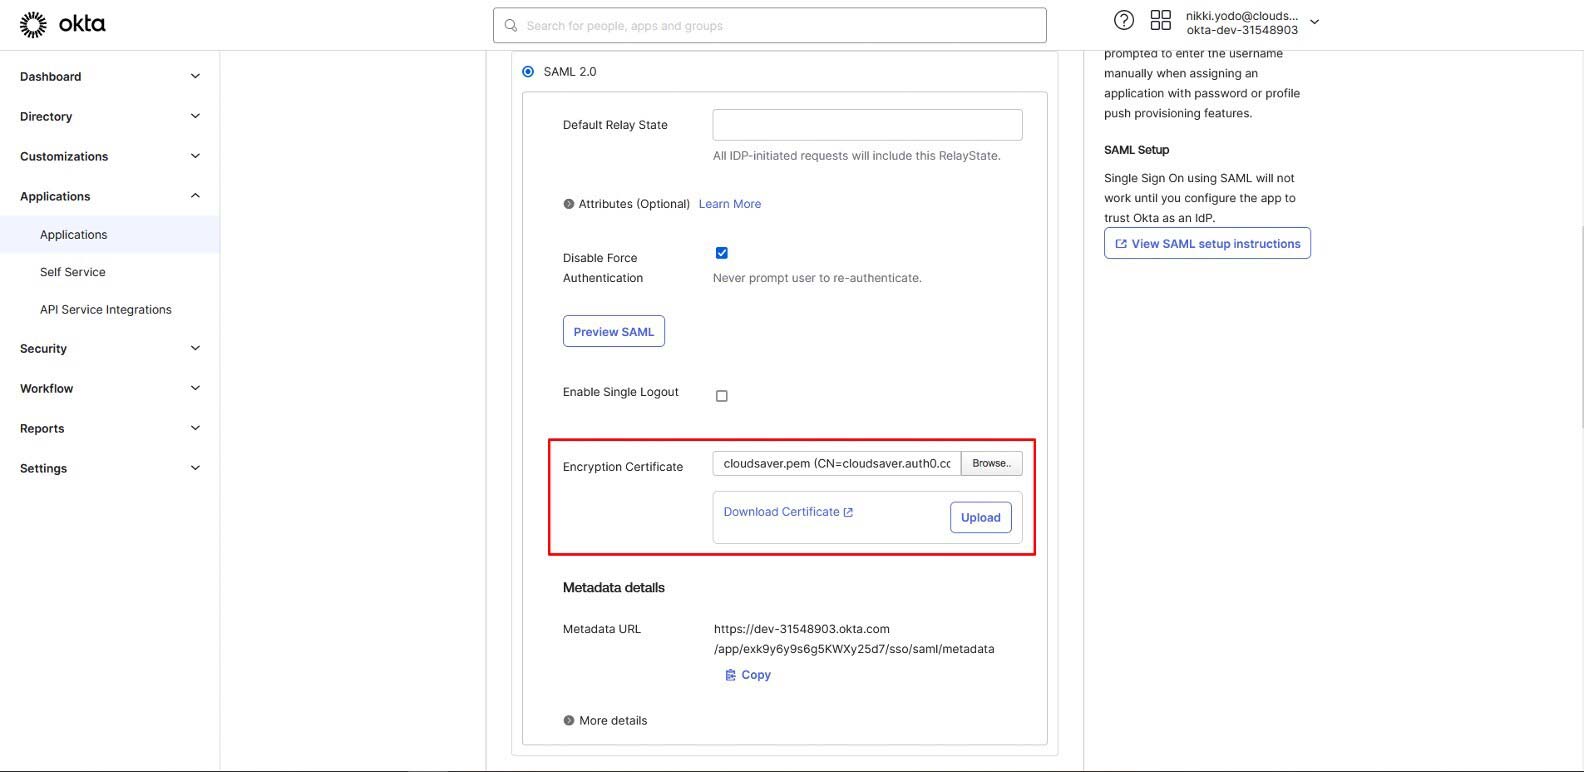
11. Expand the More Details section.
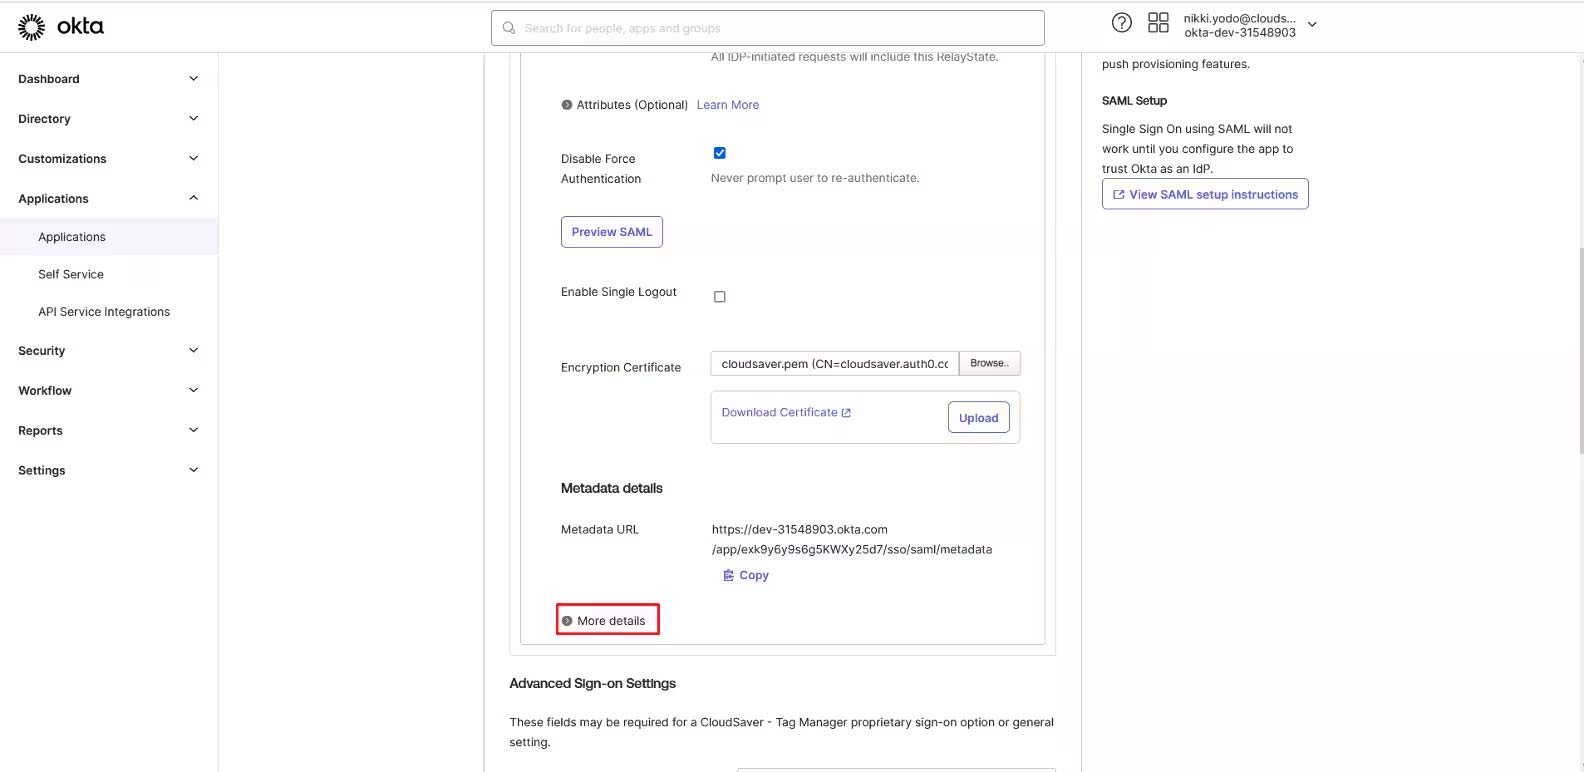
12. Download the Signing Certificate.
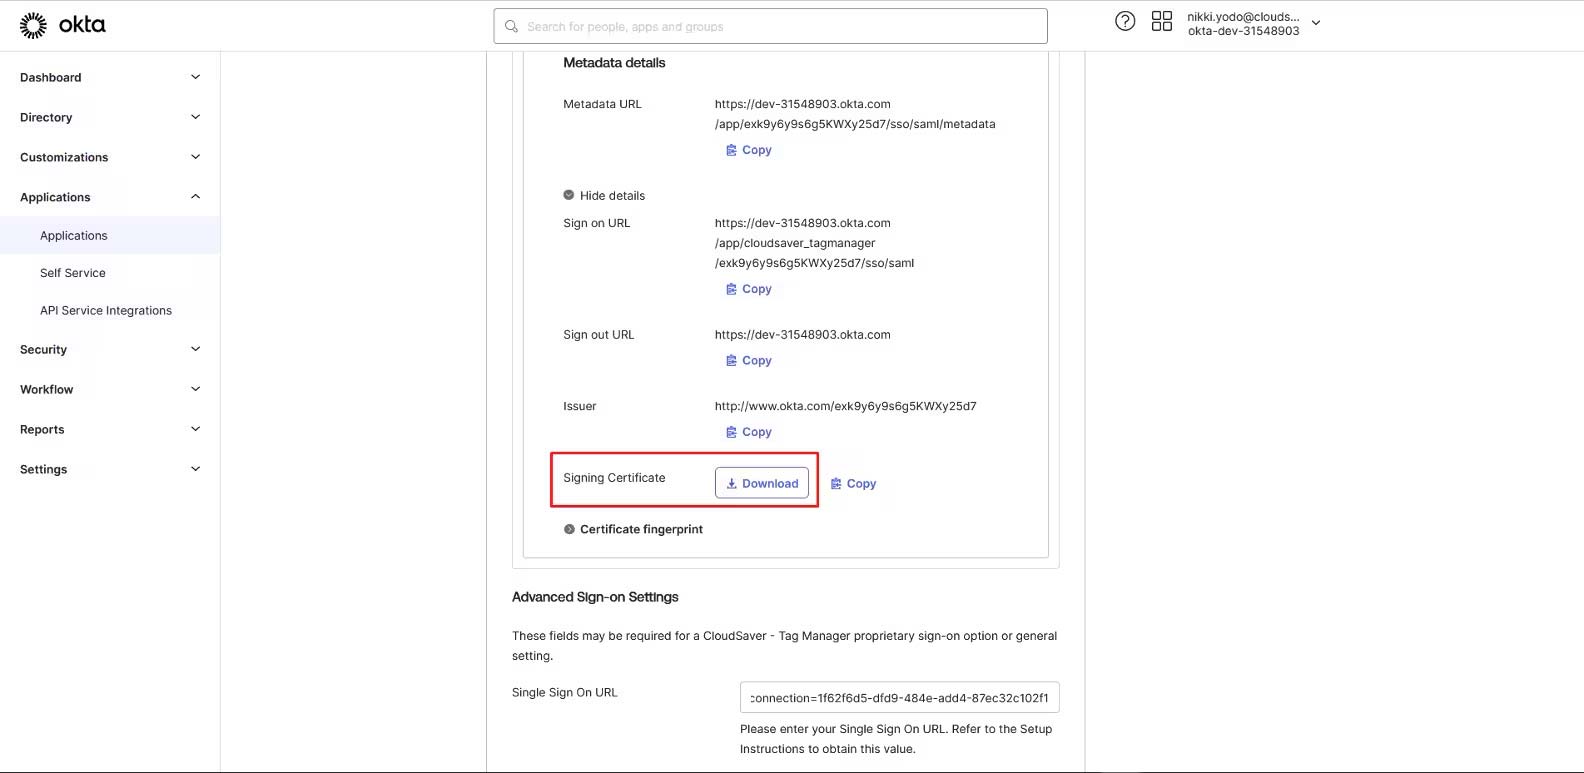
13. Back to CloudSaver Configure Single-Sign On page, under X509 Singing Certificate, select the downloaded certificate.
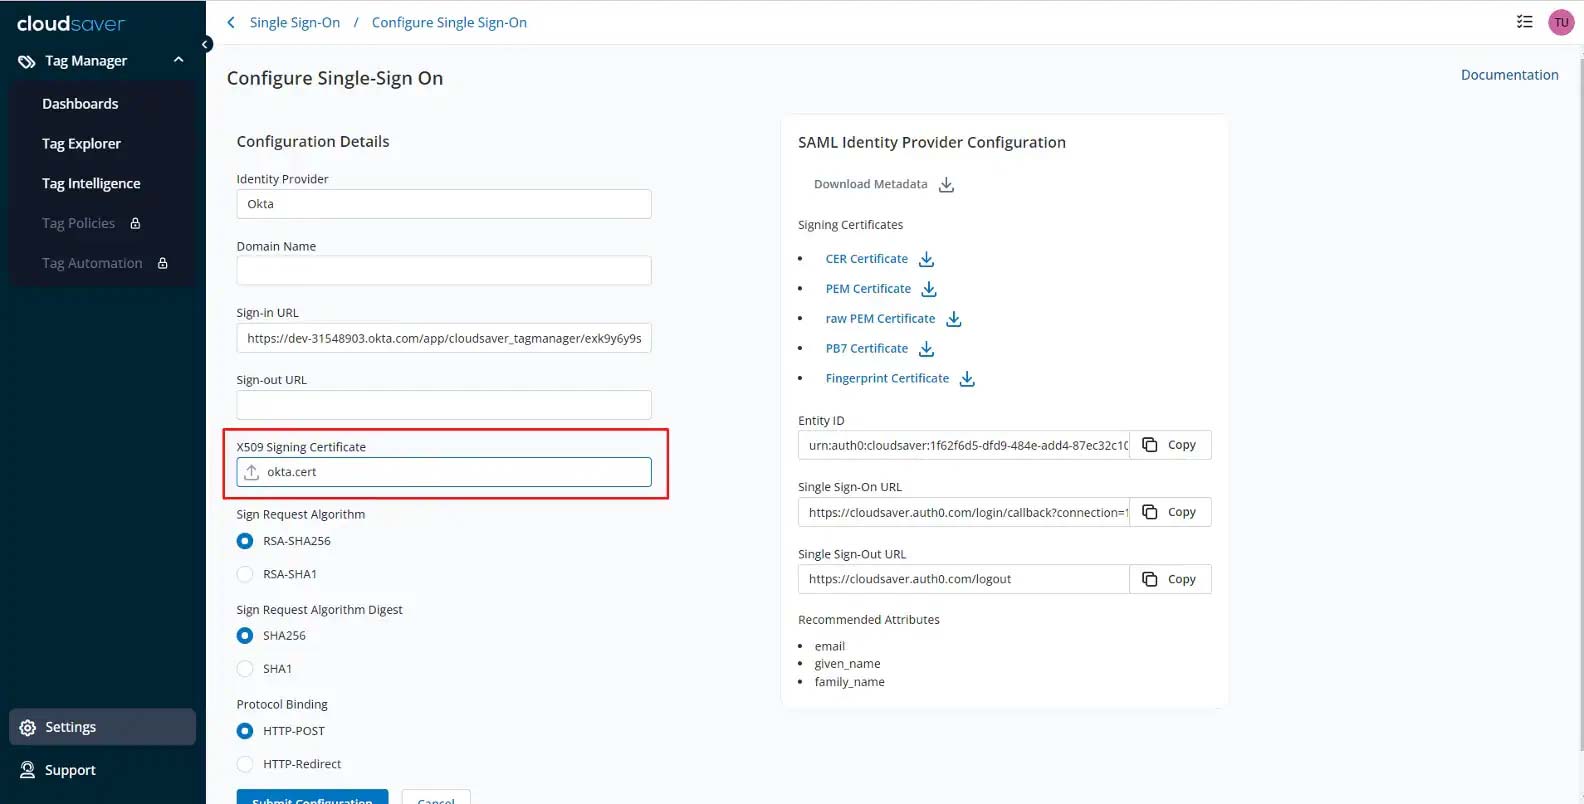
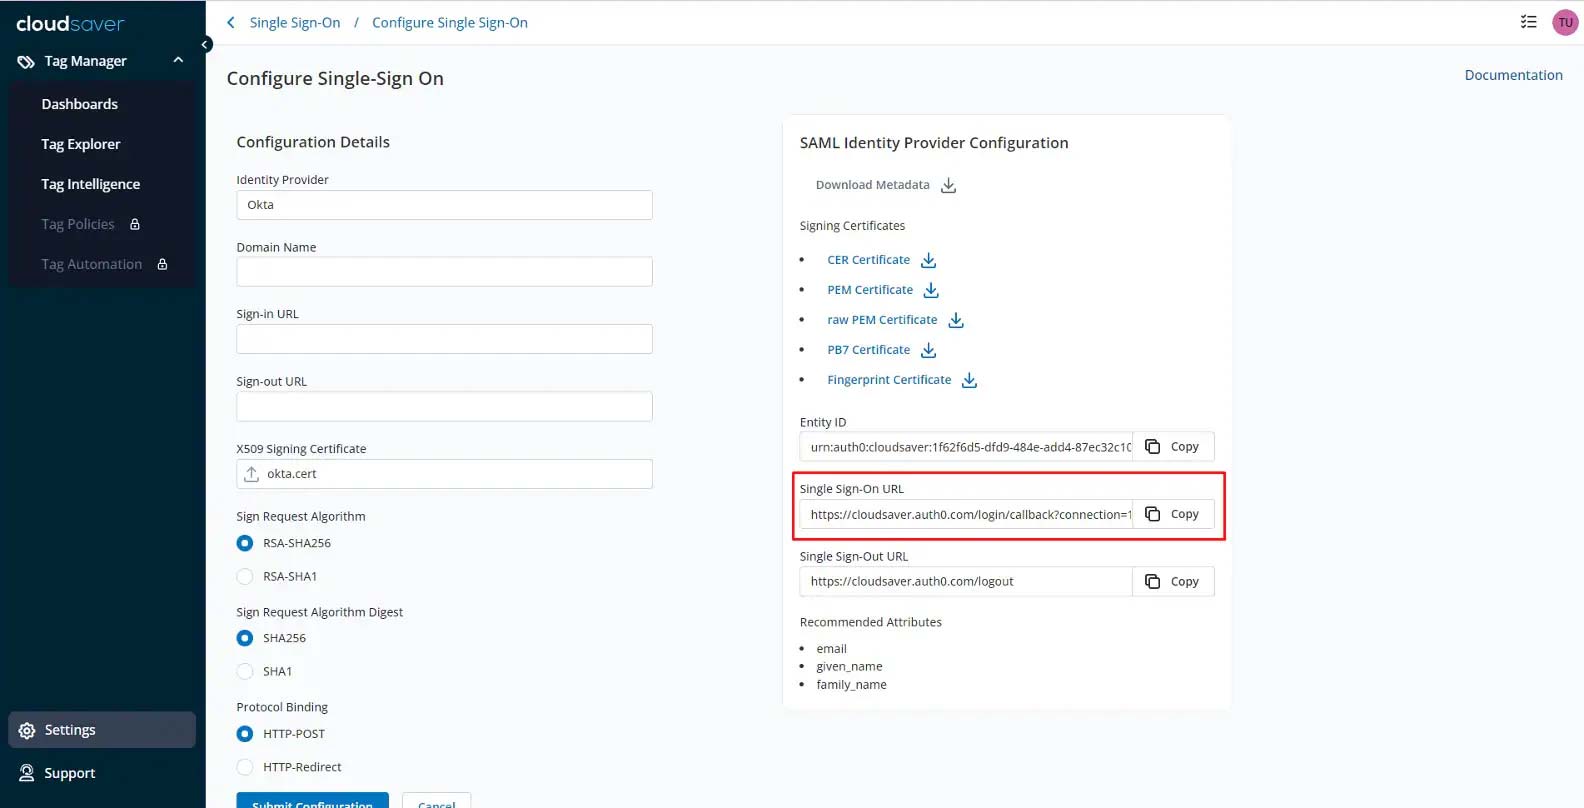
14. Under SAML Identity Provider Configuration, copy the Single Sign-On URL.
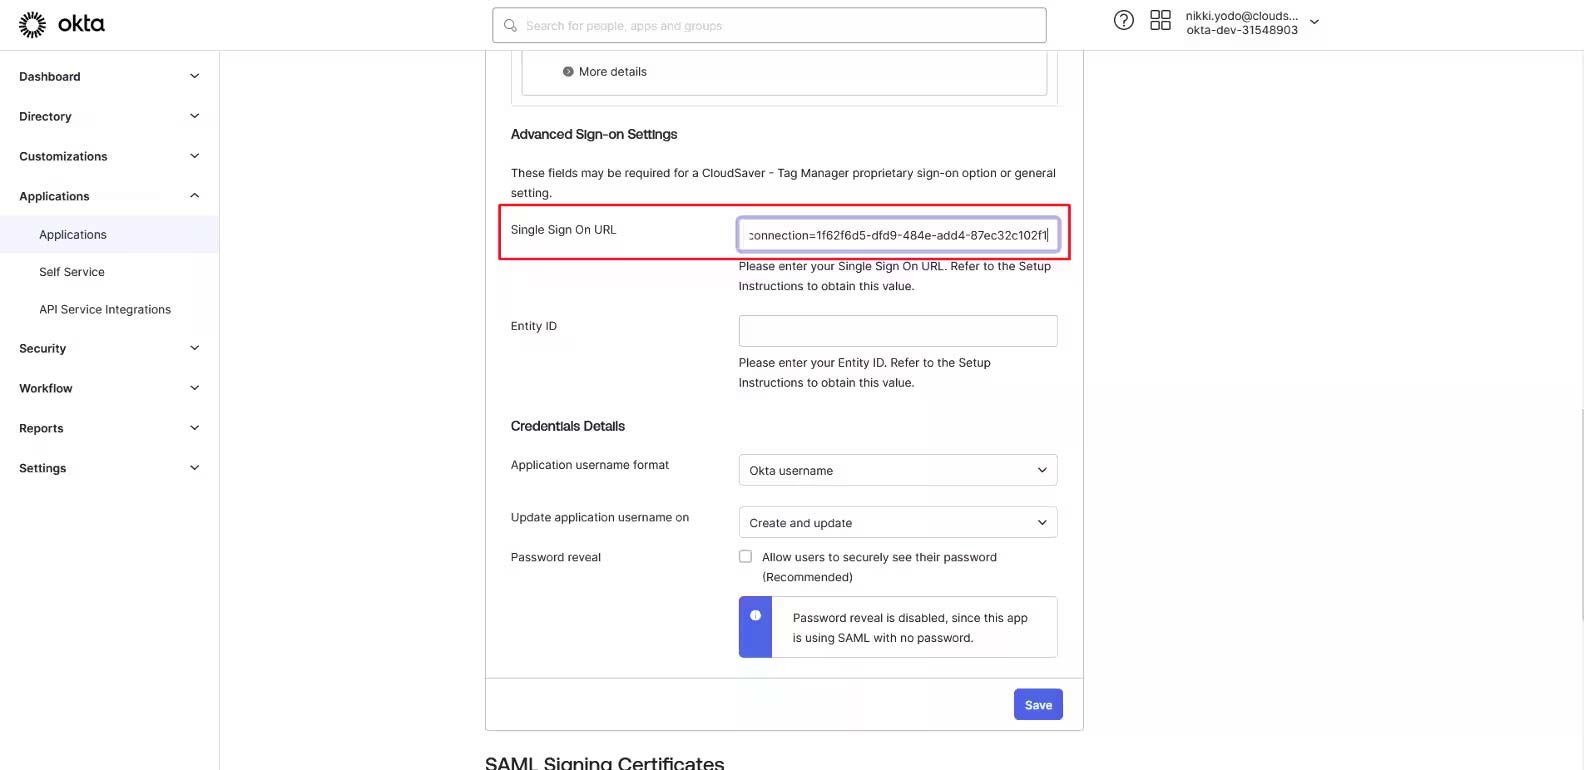
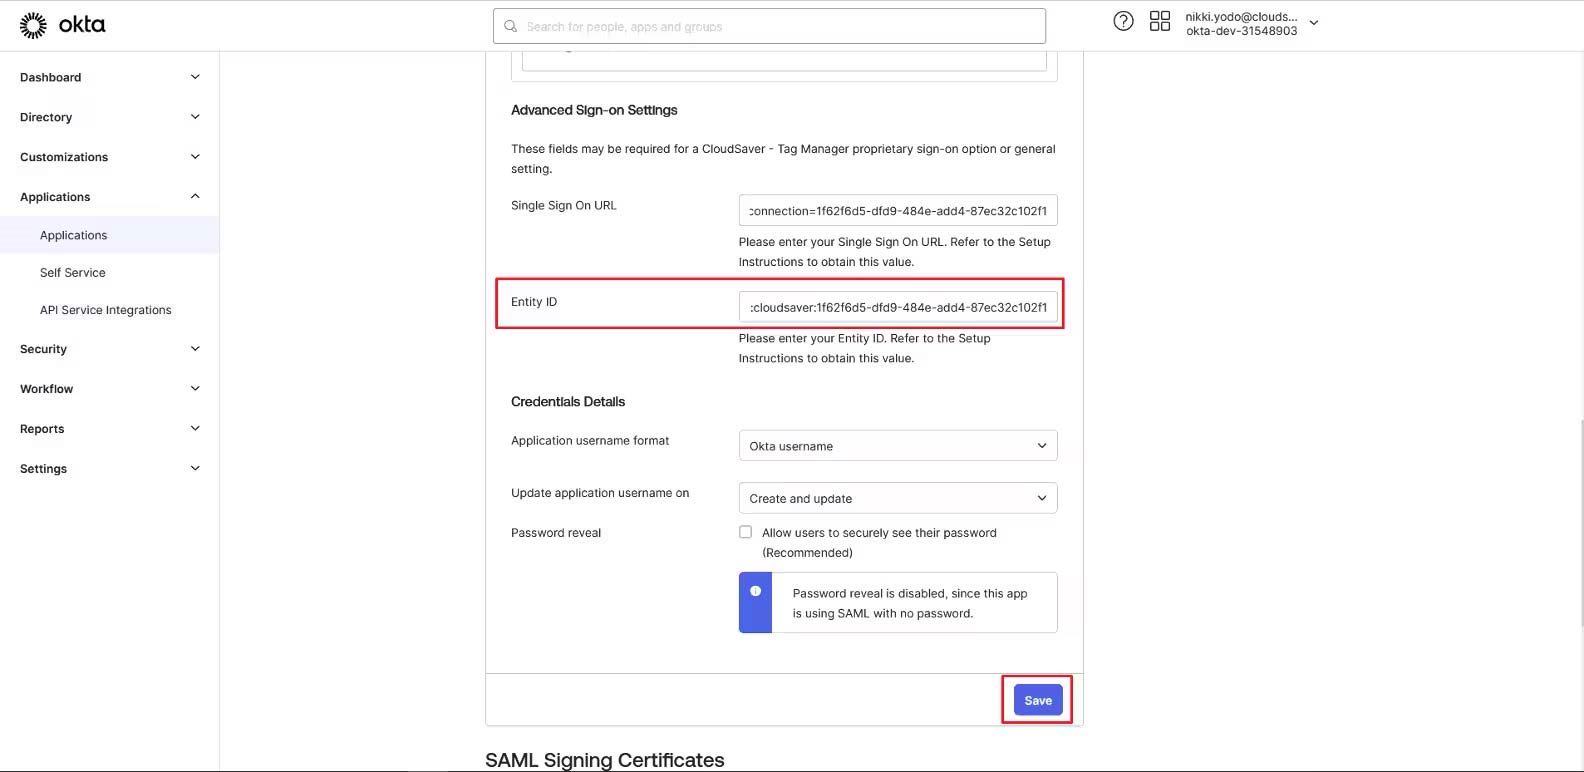
15. Scroll down to Advanced Sign-on Settings in Okta and paste.
16. Scroll up to Okta more details section, copy the Sign on URL value.
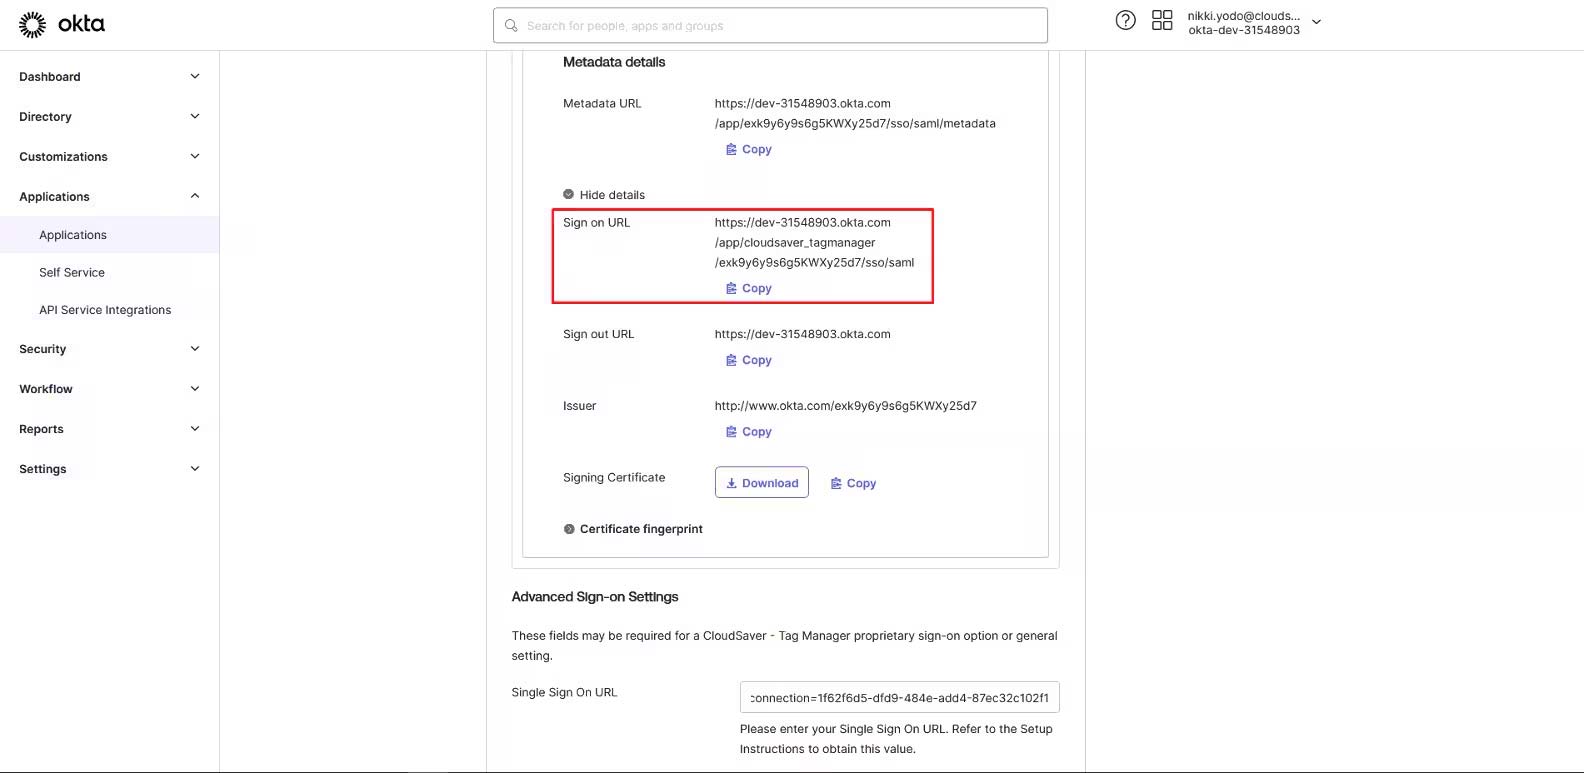
17. Back to Configure Single-Sign On page in CloudSaver, paste the value to Sign-in URL field.
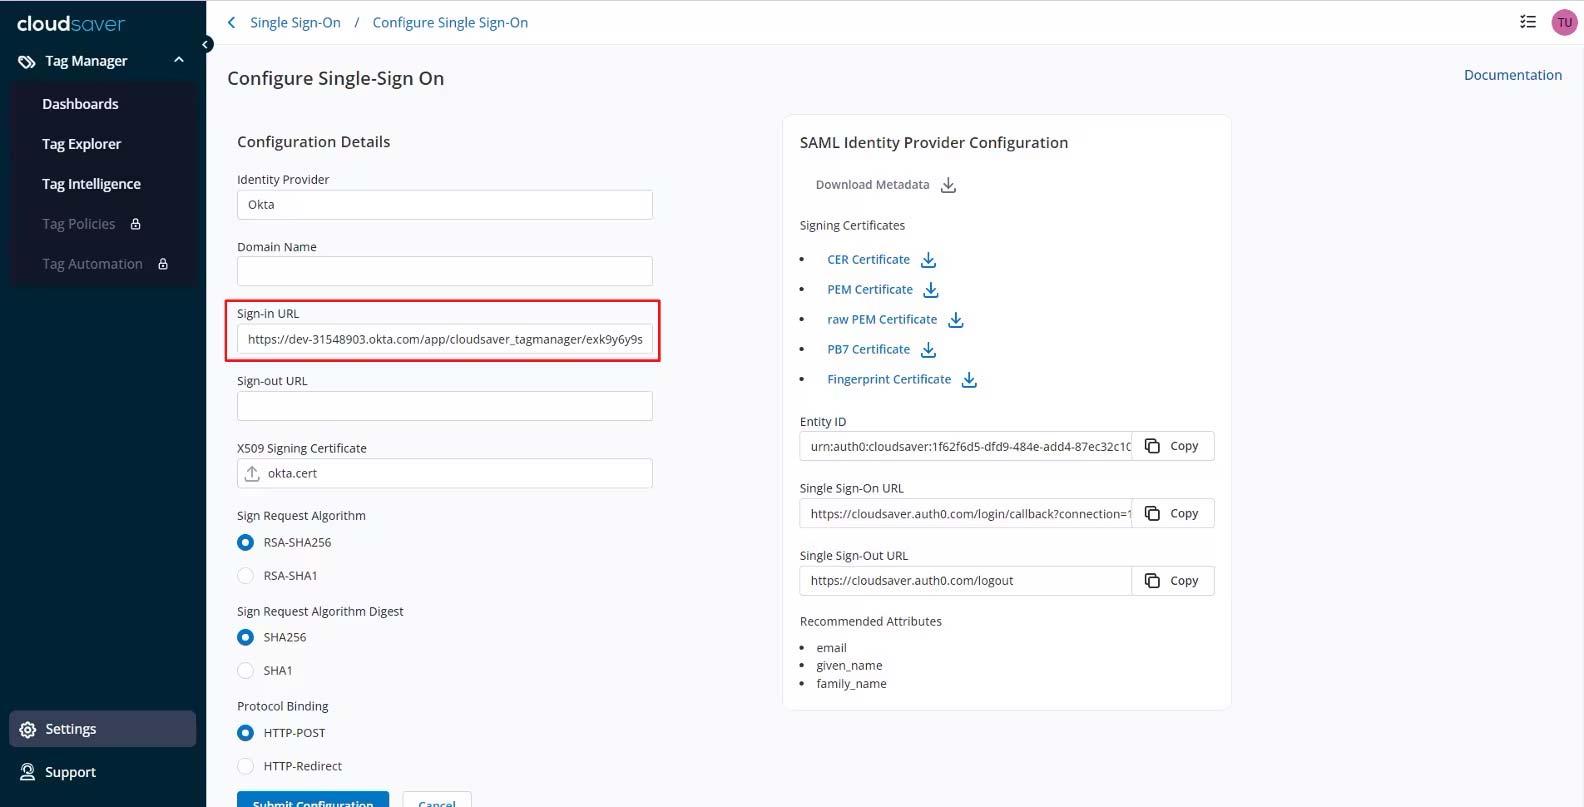
18. Go back to CloudSaver Configure Single-Sign On page and copy the Entity ID value.
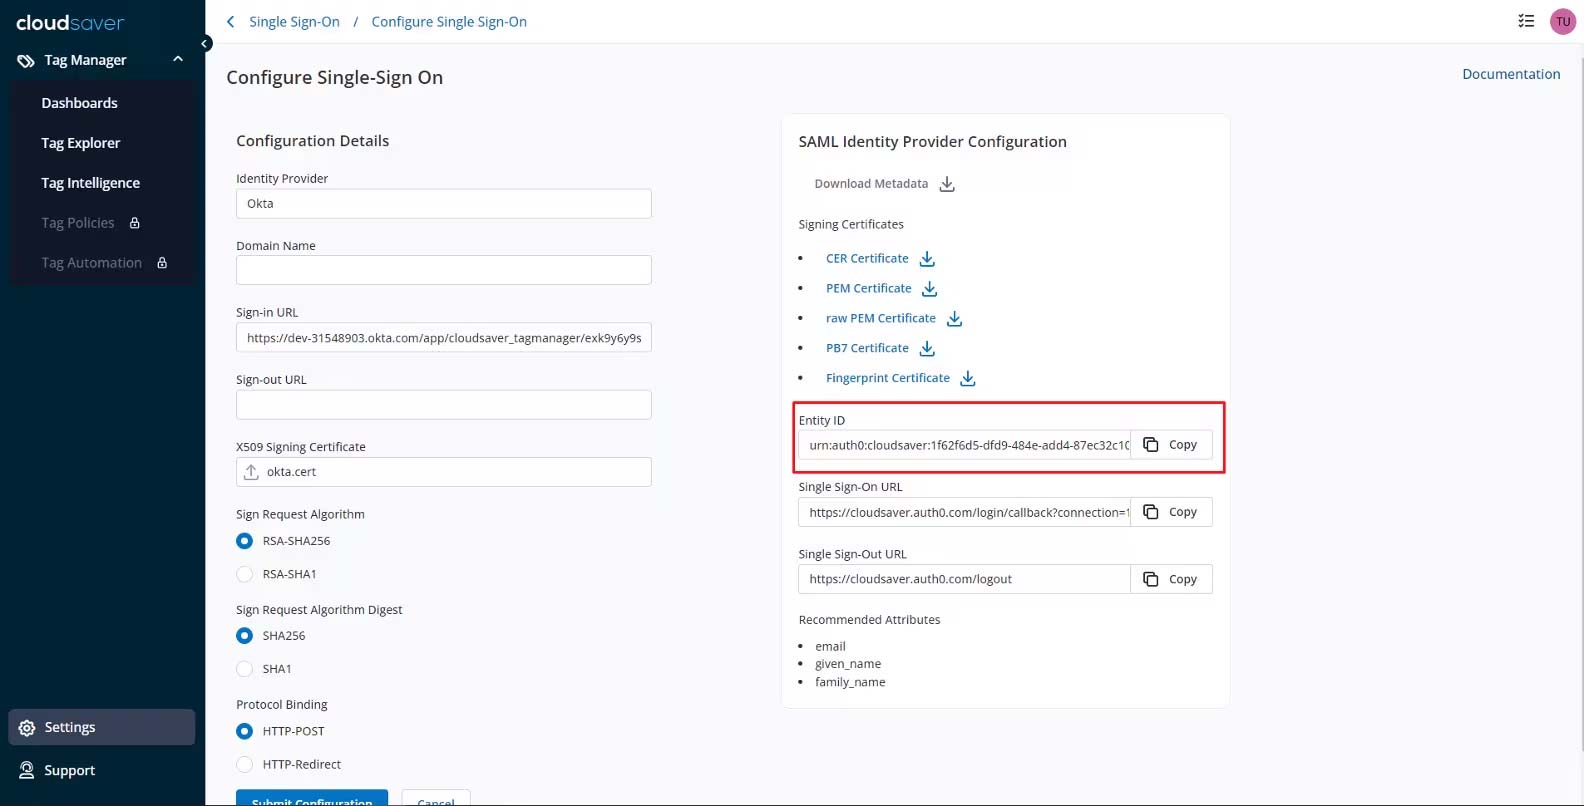
19. Back to Okta, scroll down Advanced Sign-On Settings, paste the value to Entity ID field and click Save.
20. Back to CloudSaver Configure Single Sign-On page, click Submit Configuration.
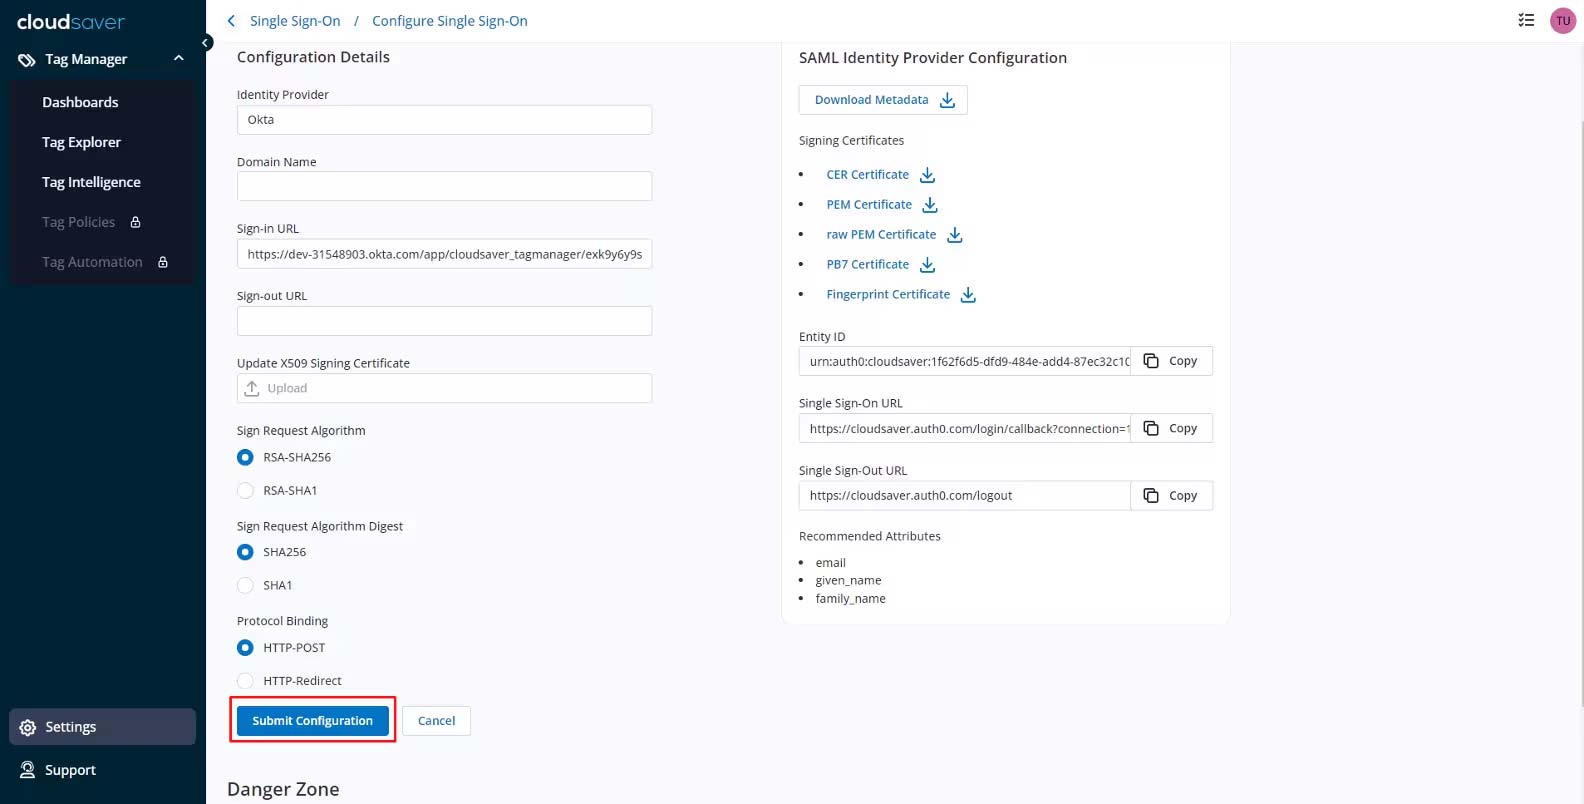
21. Configuration now completes.
SP-Initiated SSO
1. Starts by following instructions to setup SSO (IDP-initiated)
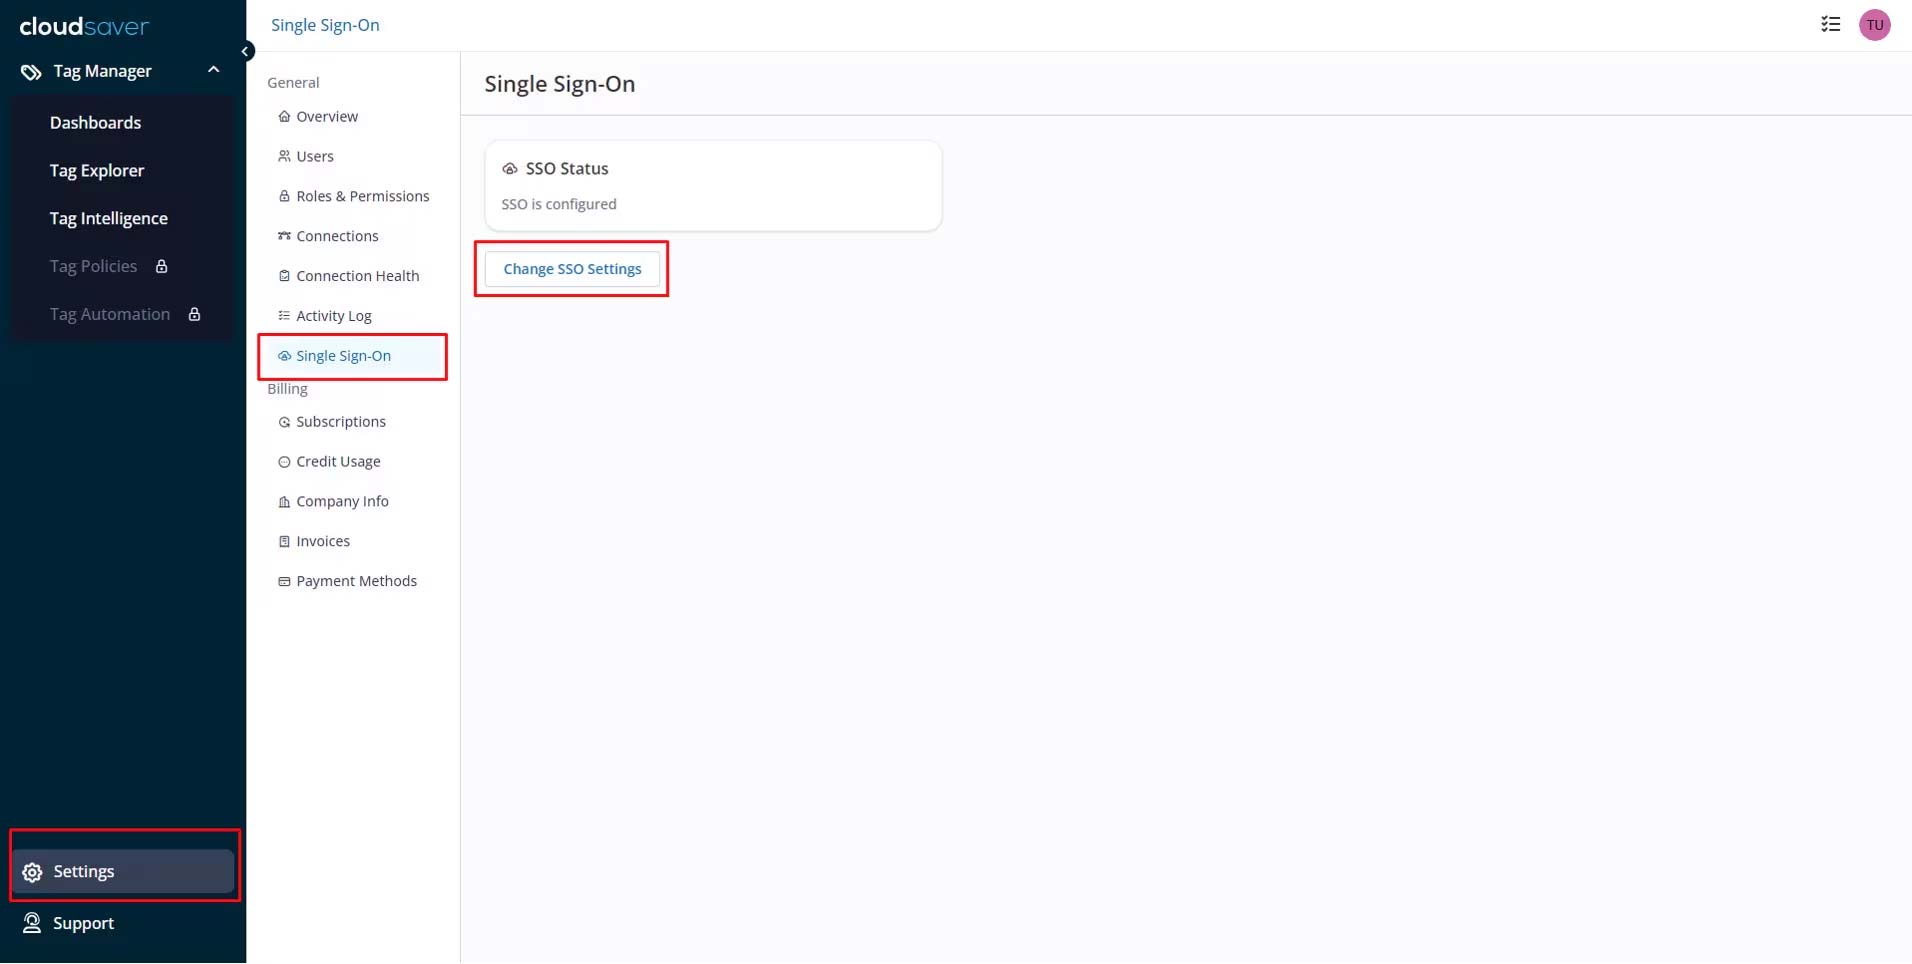
2. In CloudSaver, navigate to Settings > Single-Sign On and select Change SSO Settings.
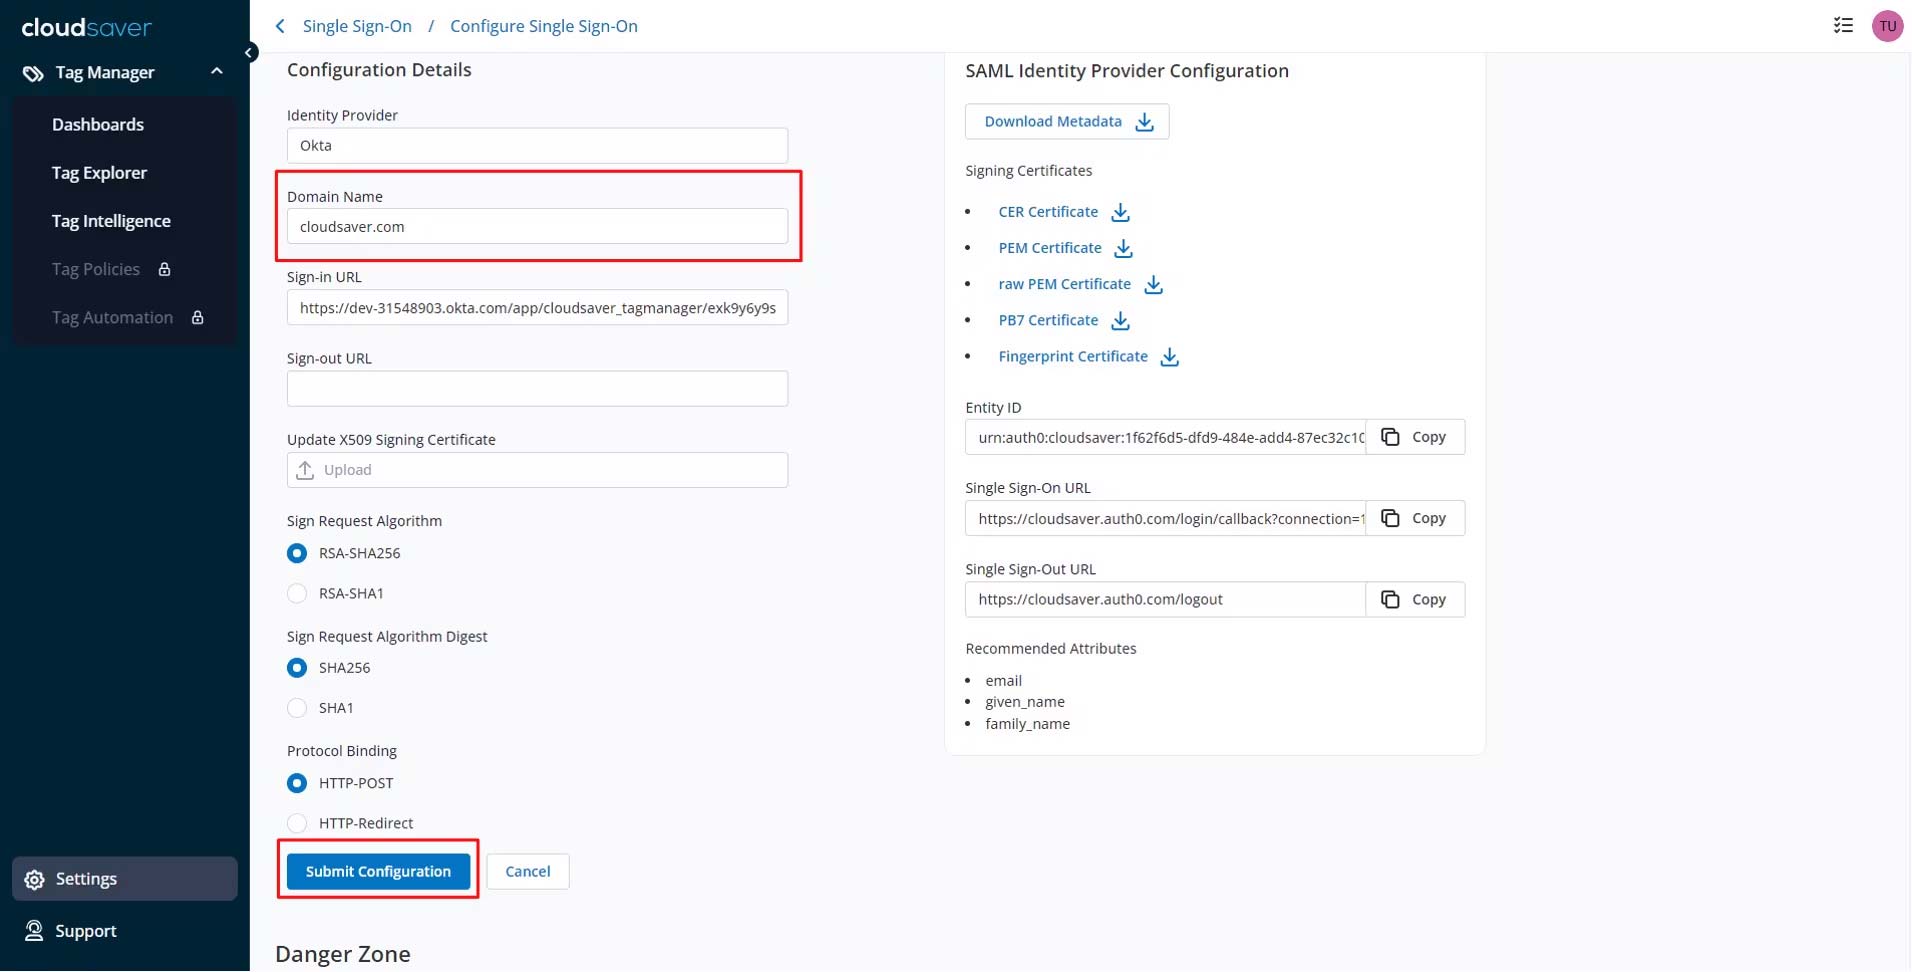
3. To enable SP-initiated flow, enter email domain name in CloudSaver Configure Single-Sign On page and click Submit Configuration. For example: if email is test@cloudsaver.com, then domain name is cloudsaver.com.
4. Configuration now completes.
5. To ensure SP-initiated SSO is configured correctly, go to https://app.cloudsaver.com/.
6. Enter your email and you will be redirected to Login with Okta.
SLO
1. Starts by following instructions to setup SSO (IDP-initiated).
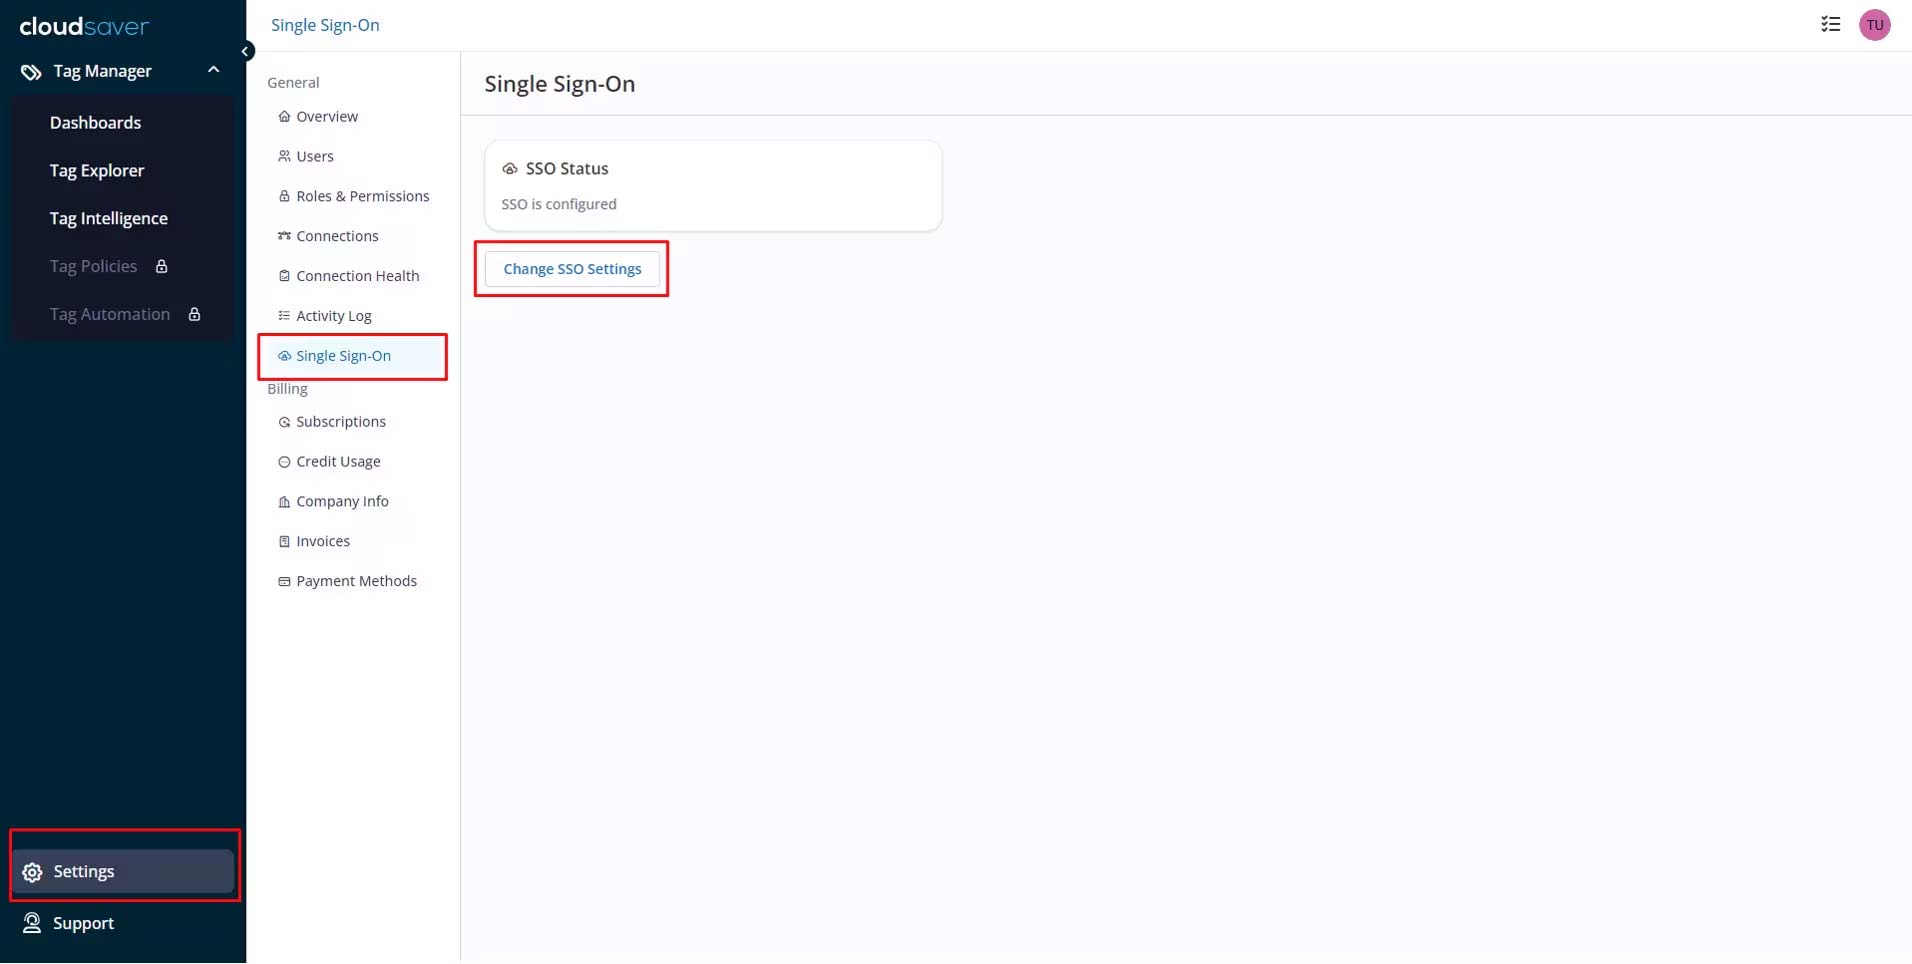
2. In CloudSaver, navigate to Settings > Single-Sign On and select Change SSO Settings.
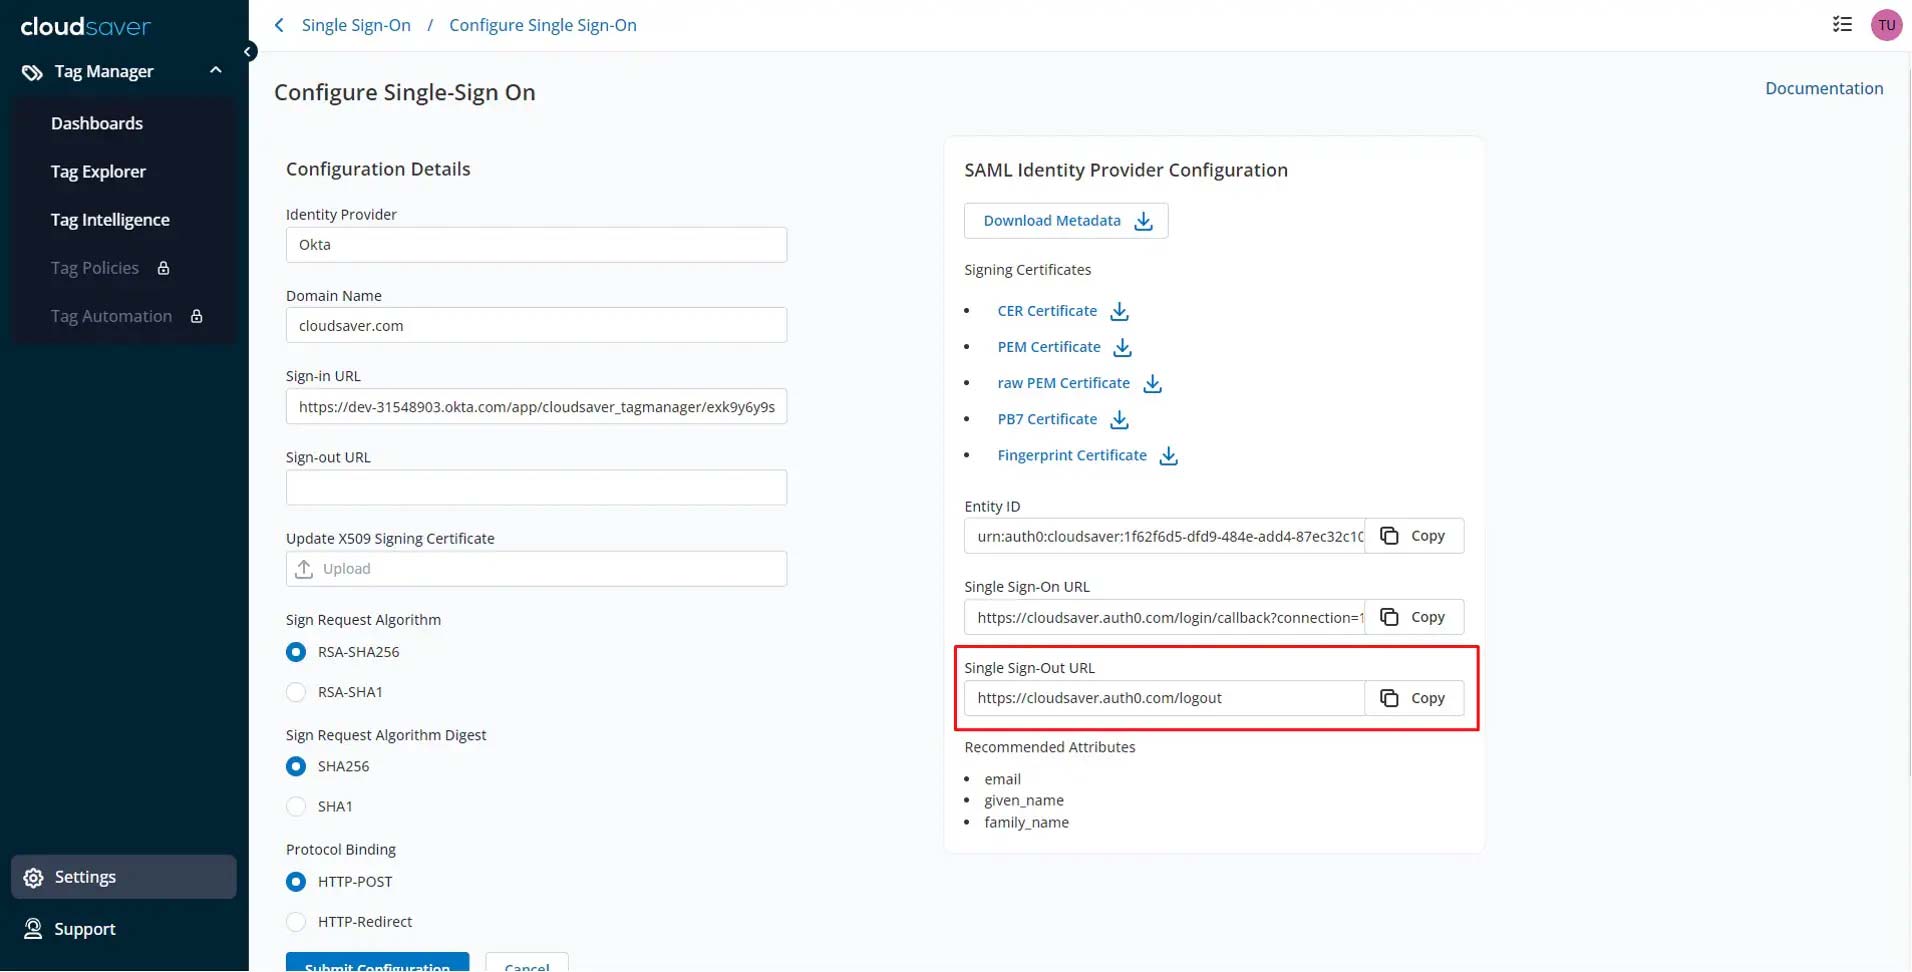
3. Under SAML Identity Provider Configuration, copy the Single Sign-Out URL.
4. In Okta application page, select CloudSaver app, view Sign On tab and click Edit.
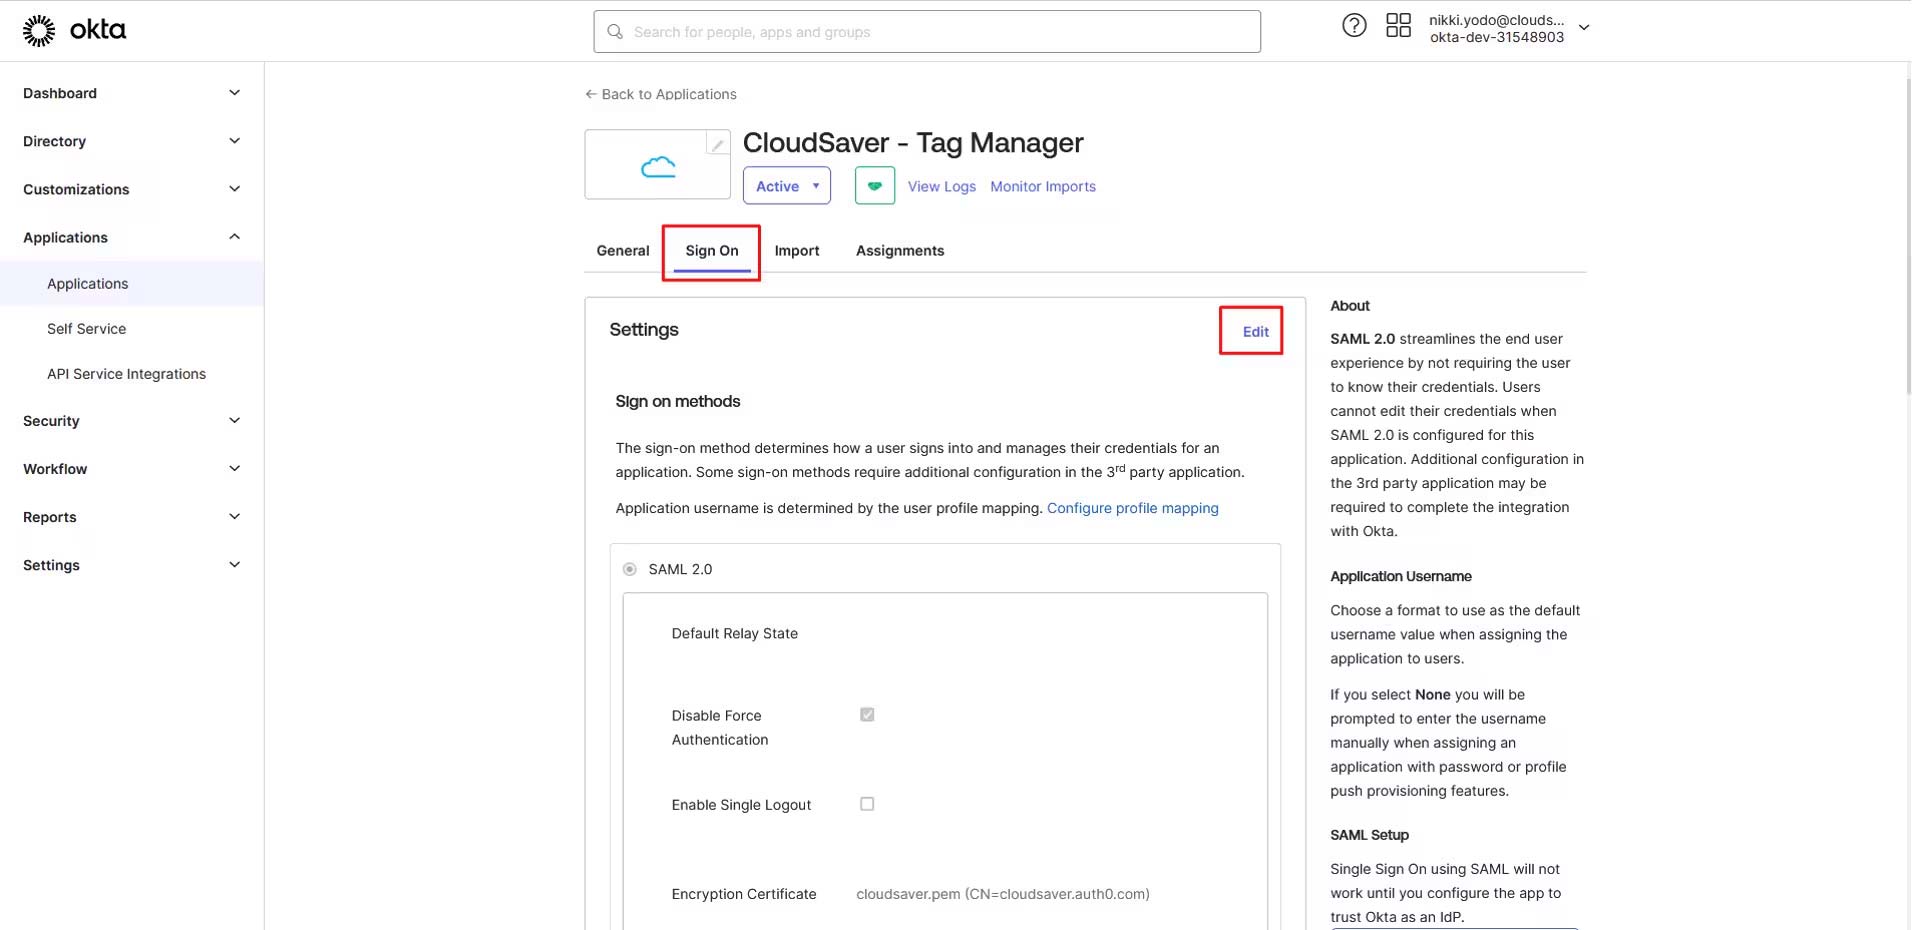
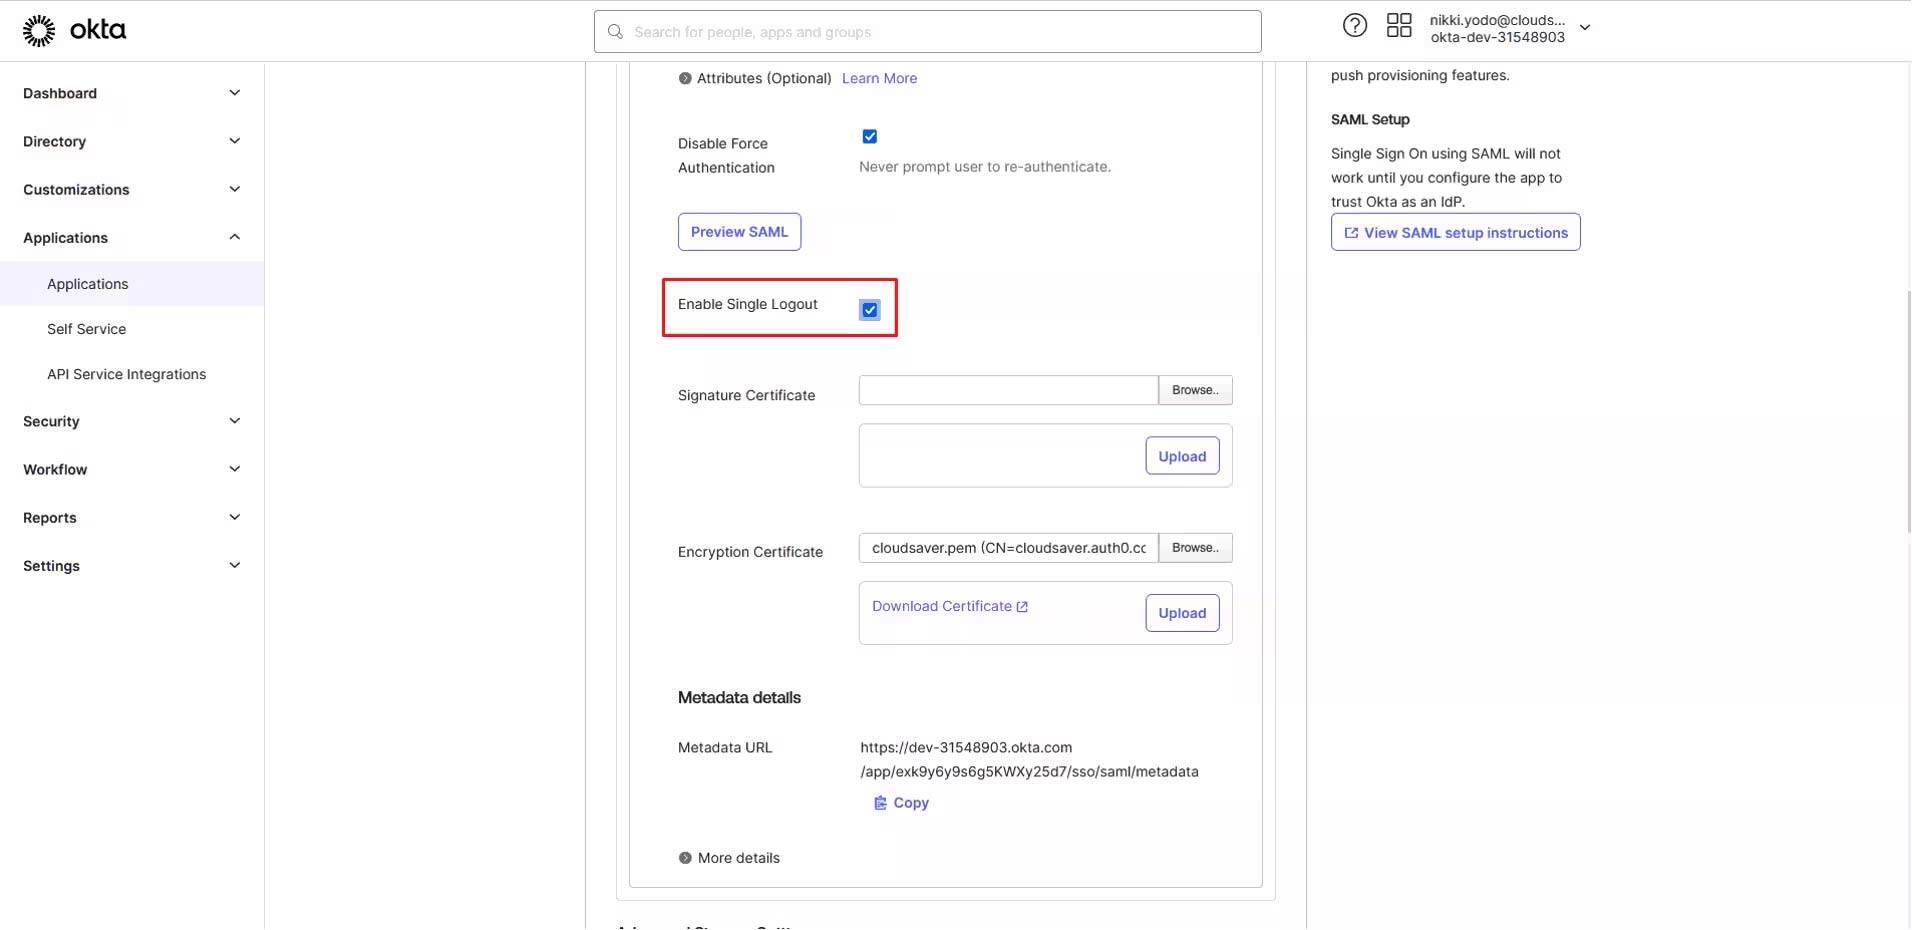
5. Scroll down and check Enable Single Logout field.
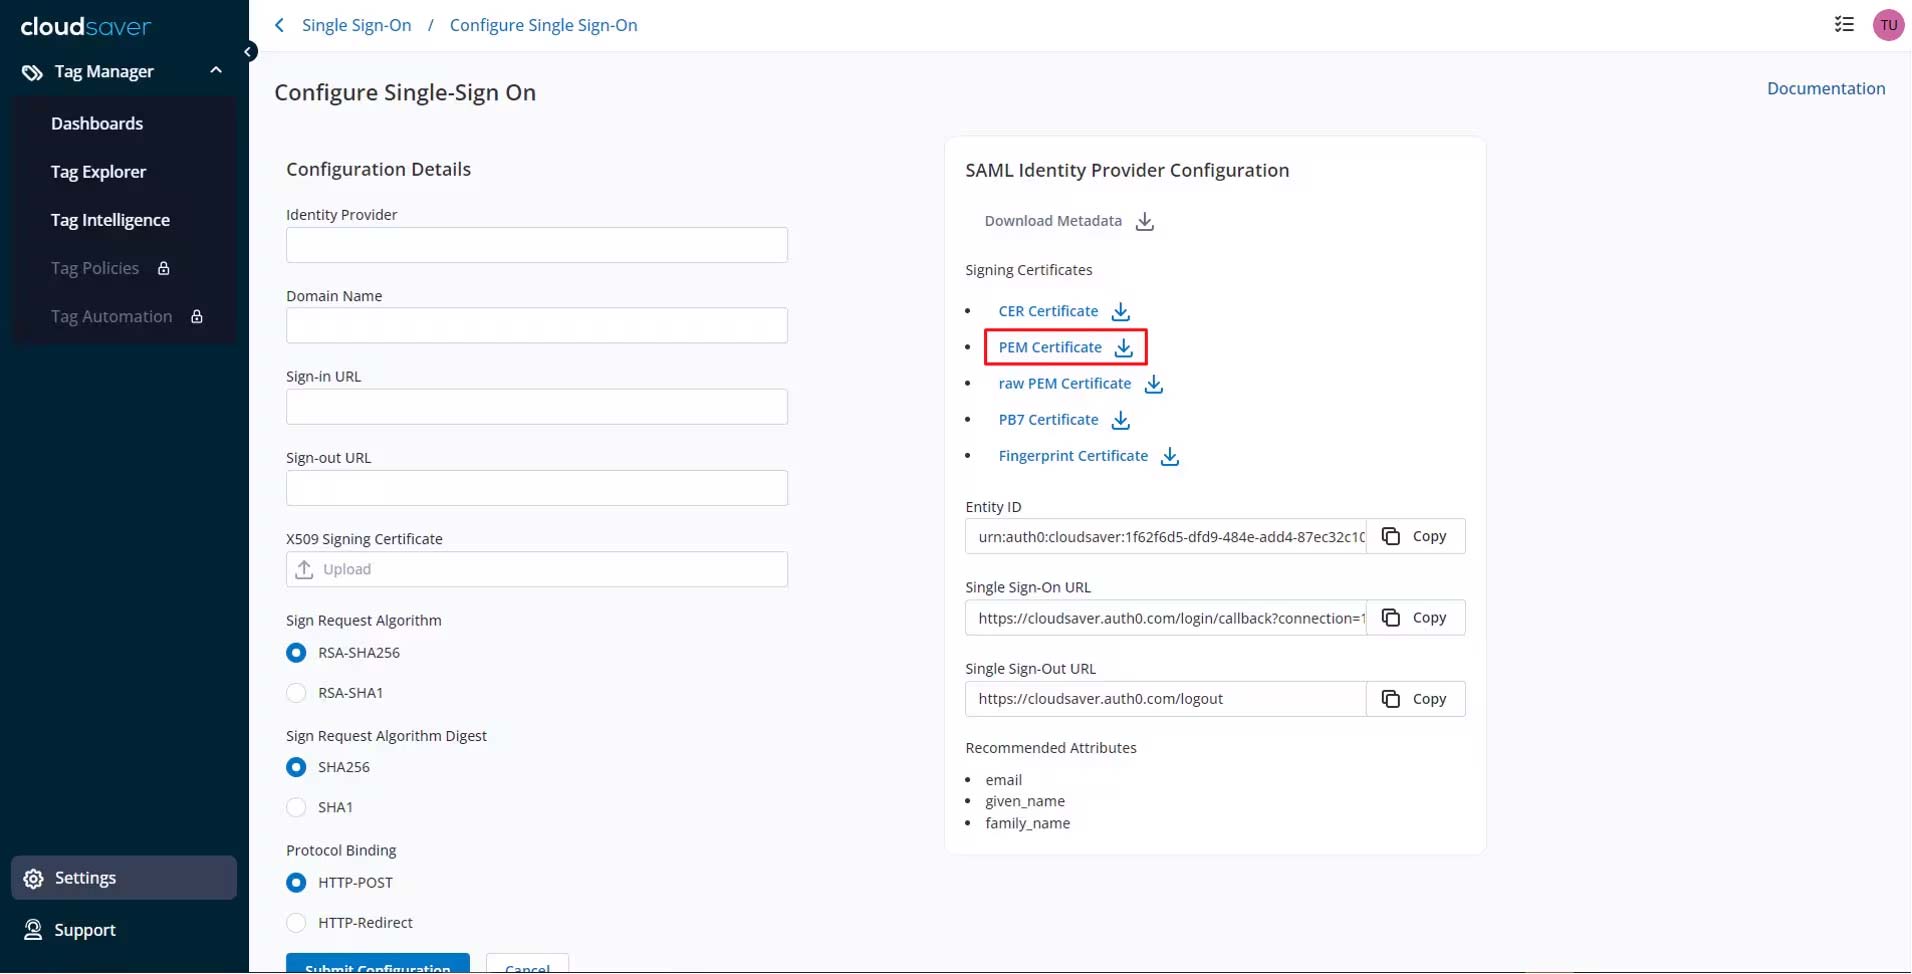
6. Back to CloudSaver Configure Single Sign-On page, under SAML Identity Provider Configuration, download the PEM Certificate.
7. Back to Okta application page, upload the CloudSaver certificate to Signature Certificate field.
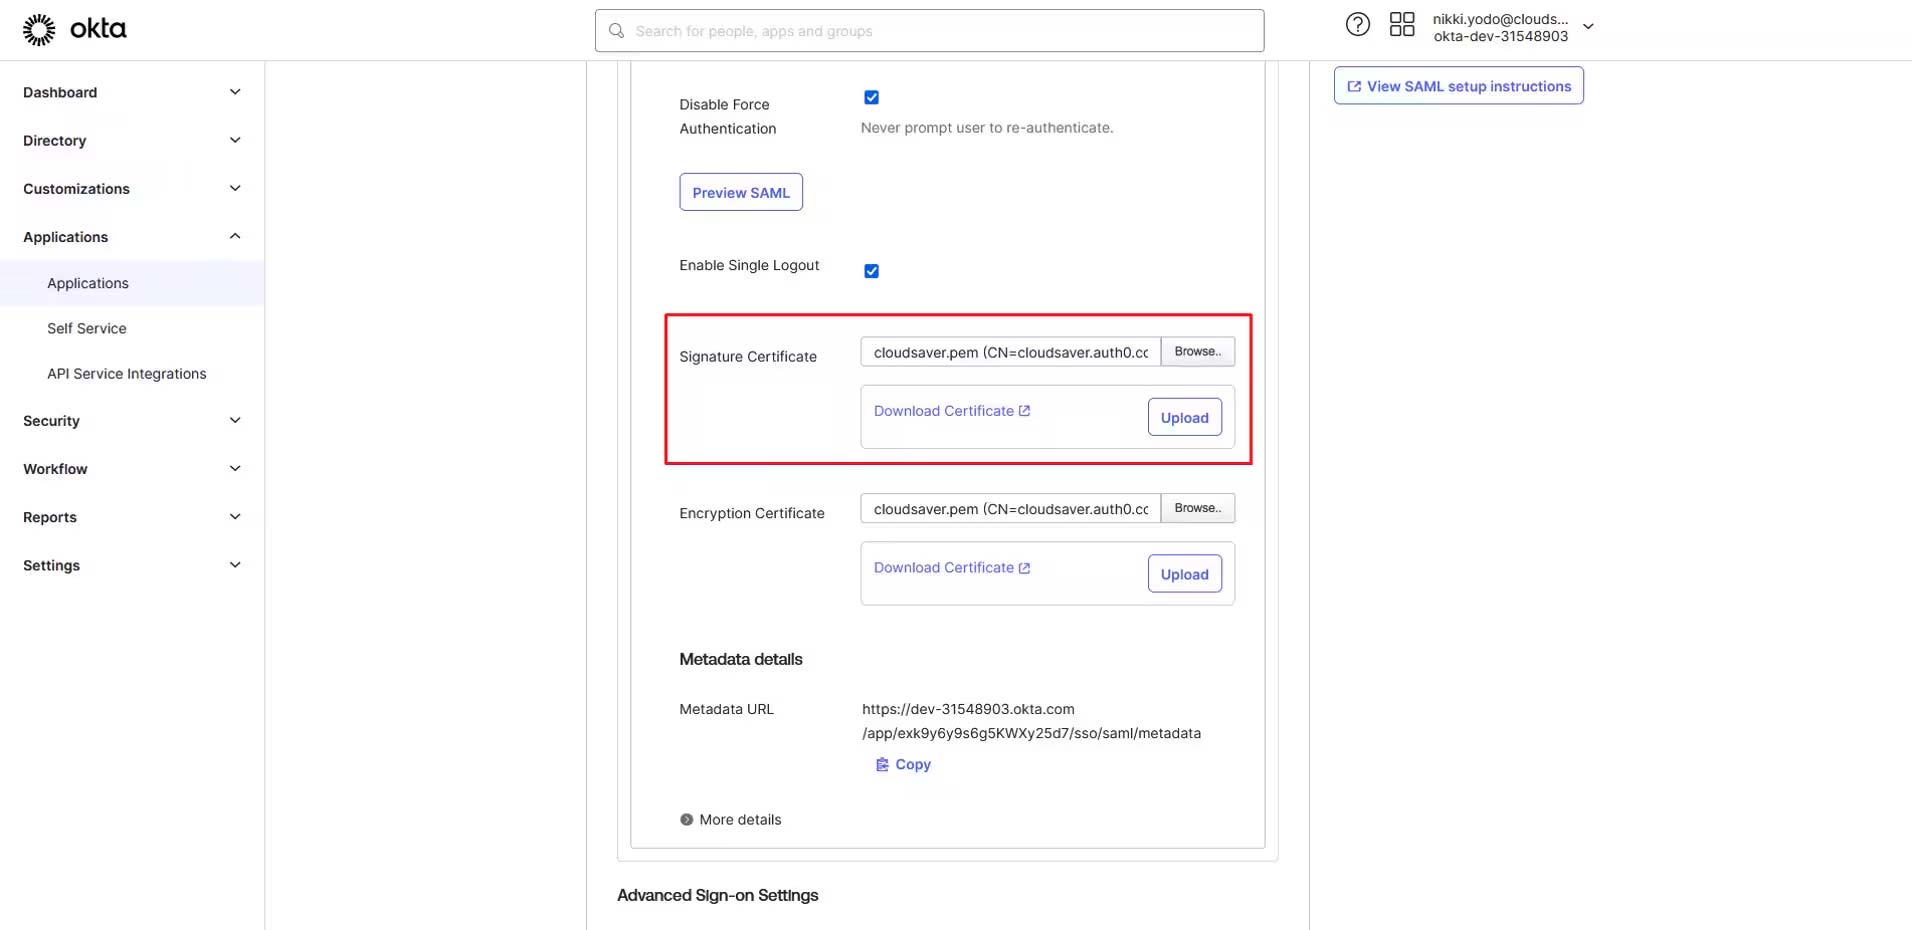
8. Click to expand More details section.
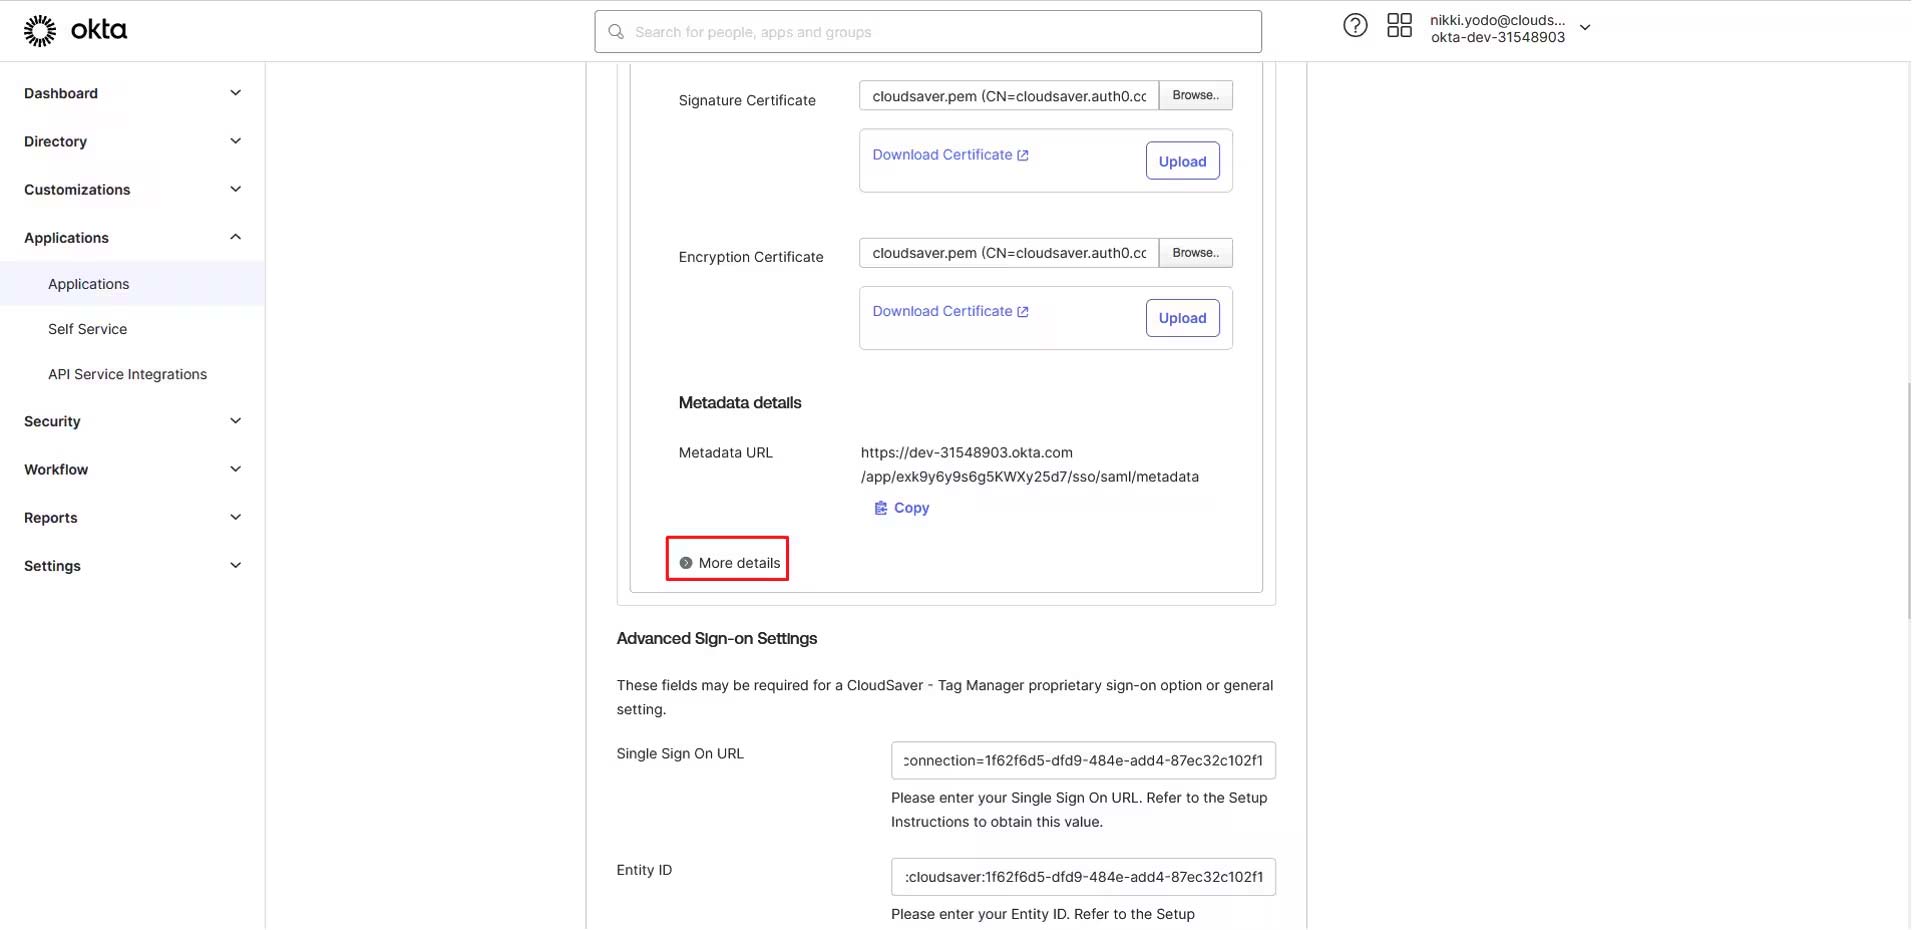
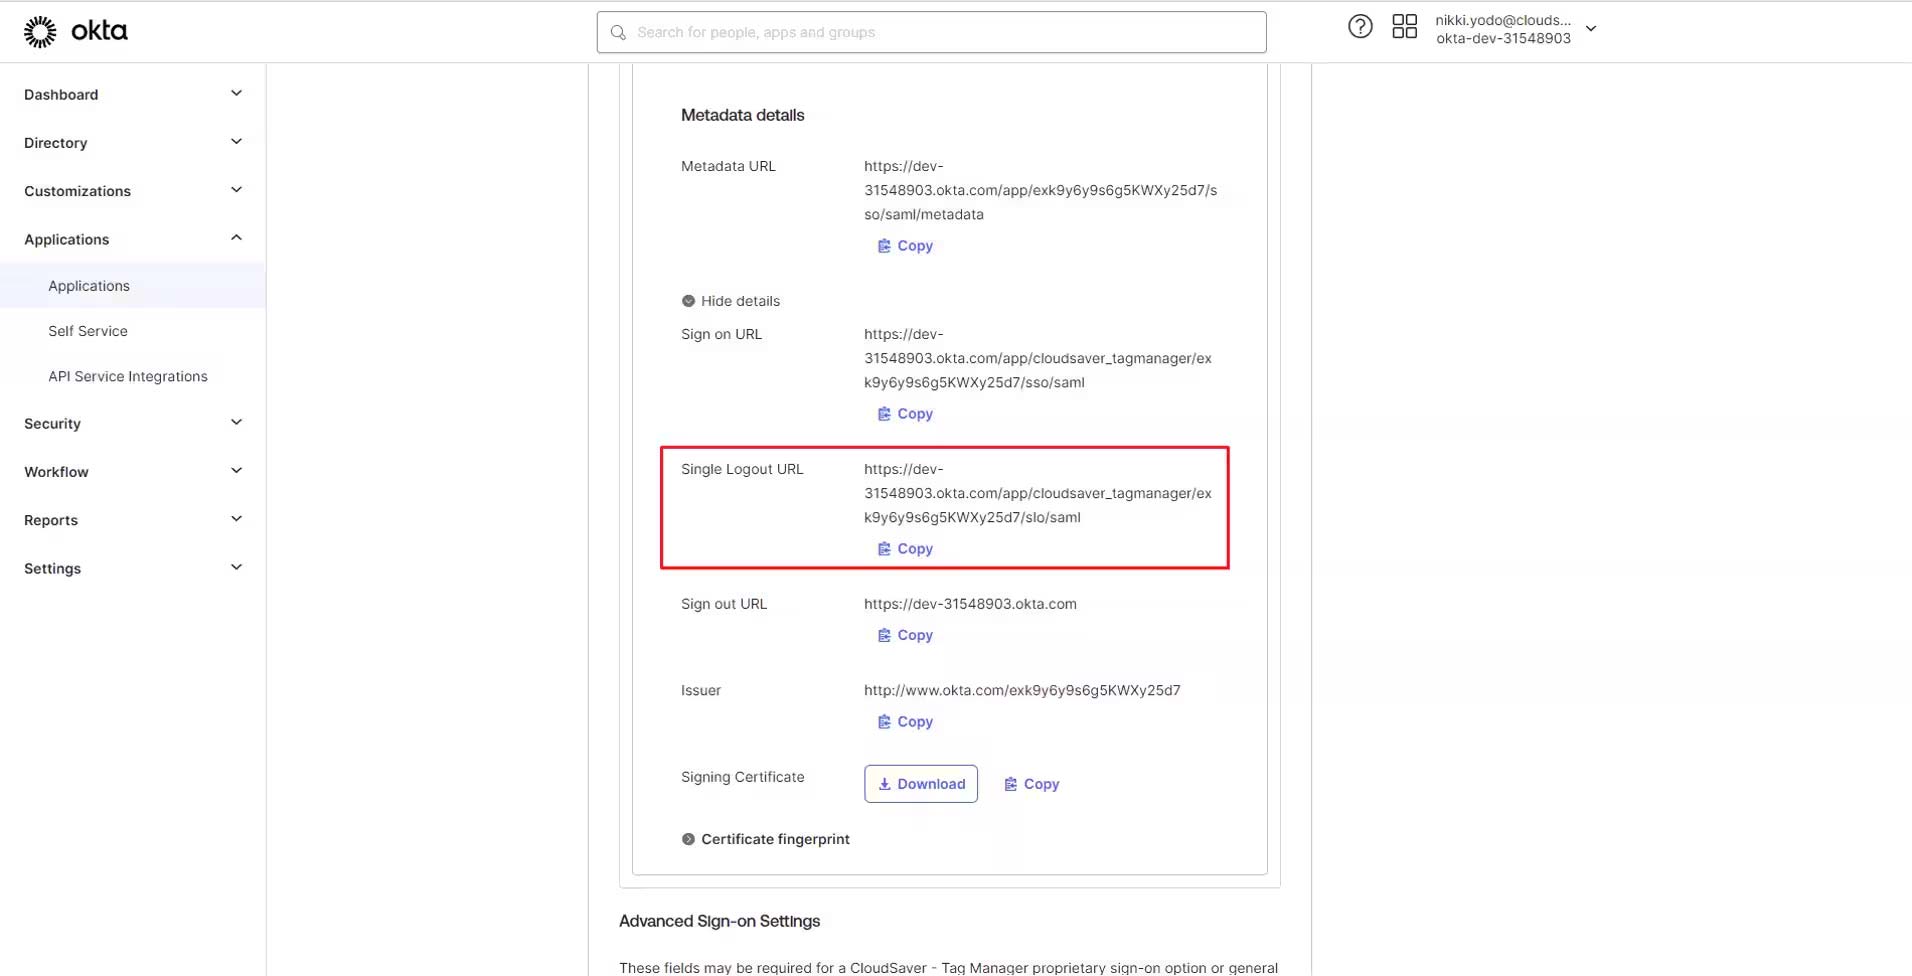
9. Copy the Single Logout URL value.
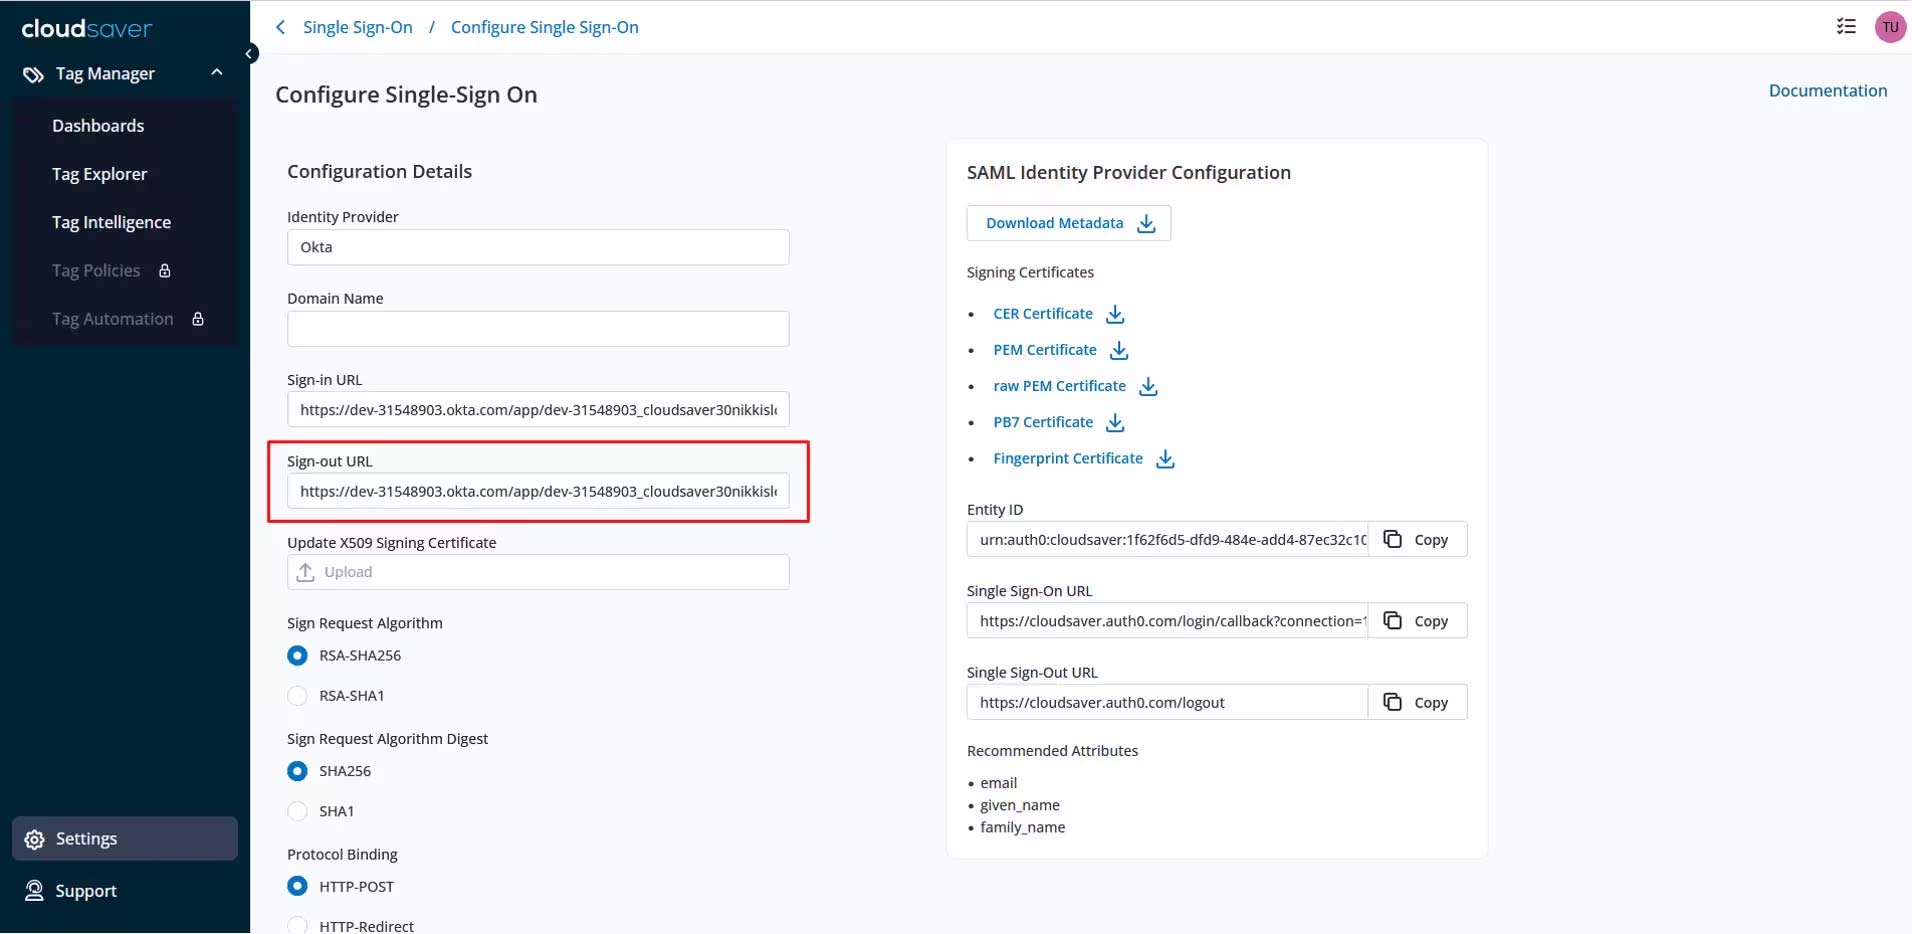
10. Back to CloudSaver, paste the value to Sign-out URL field and click Submit Configuration.
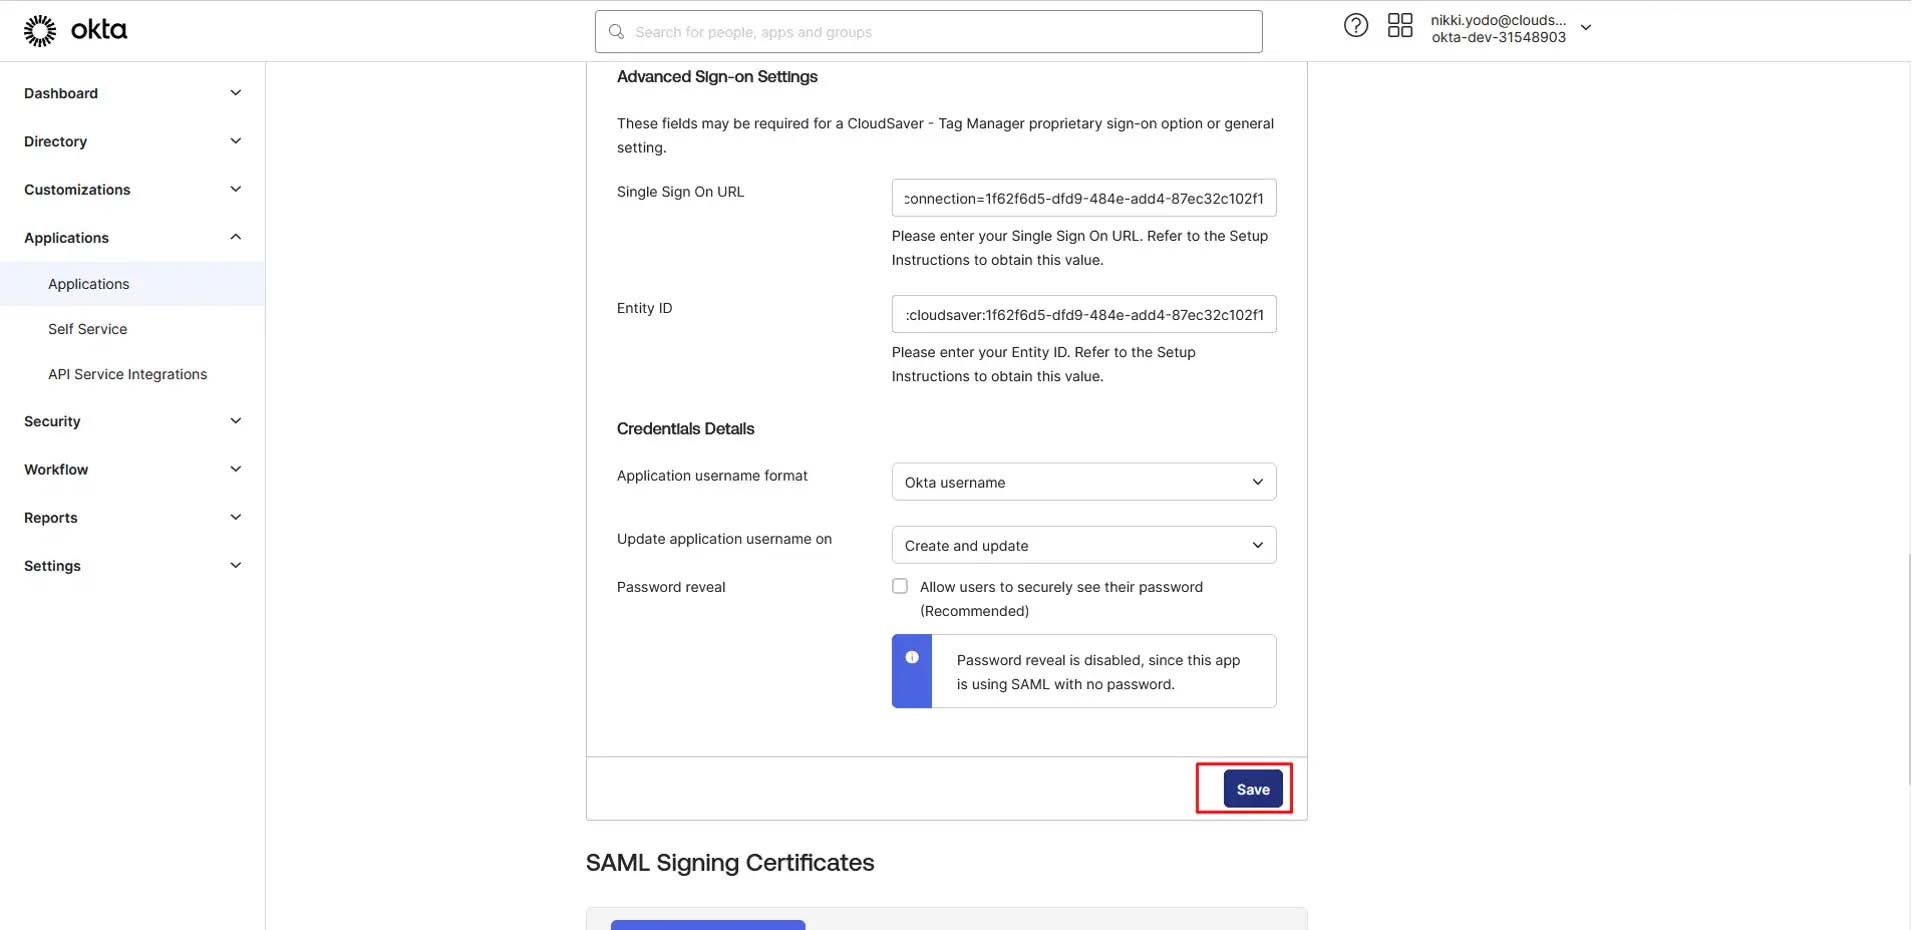
11. In Okta application page, scroll down and click Save.
12. Single Logout is now configured.
Notes
Make sure that you entered the correct value in the Subdomain field under the General tab. Using the wrong value will prevent you from authenticating via SAMLE to CloudSaver Tag Manager.
The following SAML attributes are supported:
| Name | Value |
|---|---|
| User.firstName | user.firstName |
| User.lastName | user.firstName |
| User.email | user.email |
In this article