Step-by-Step Guide
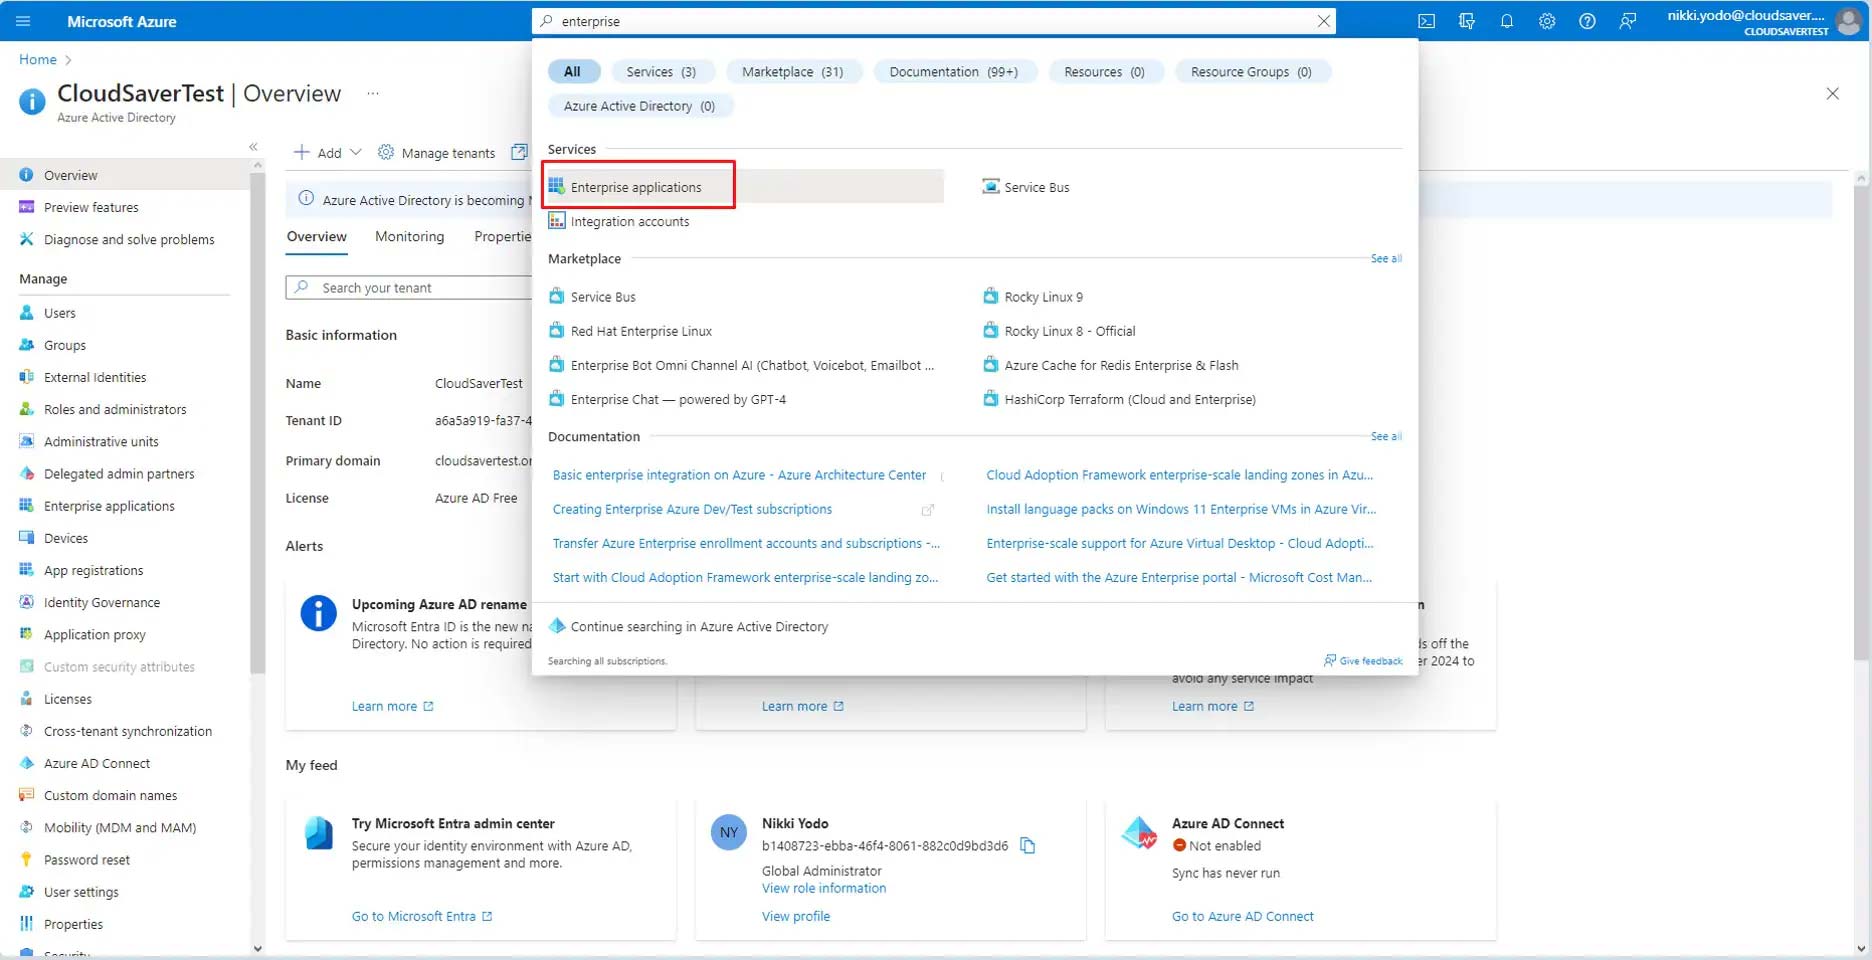
1. On Azure Portal, search for “Enterprise applications”. Select “Enterprise applications” under “Services”.
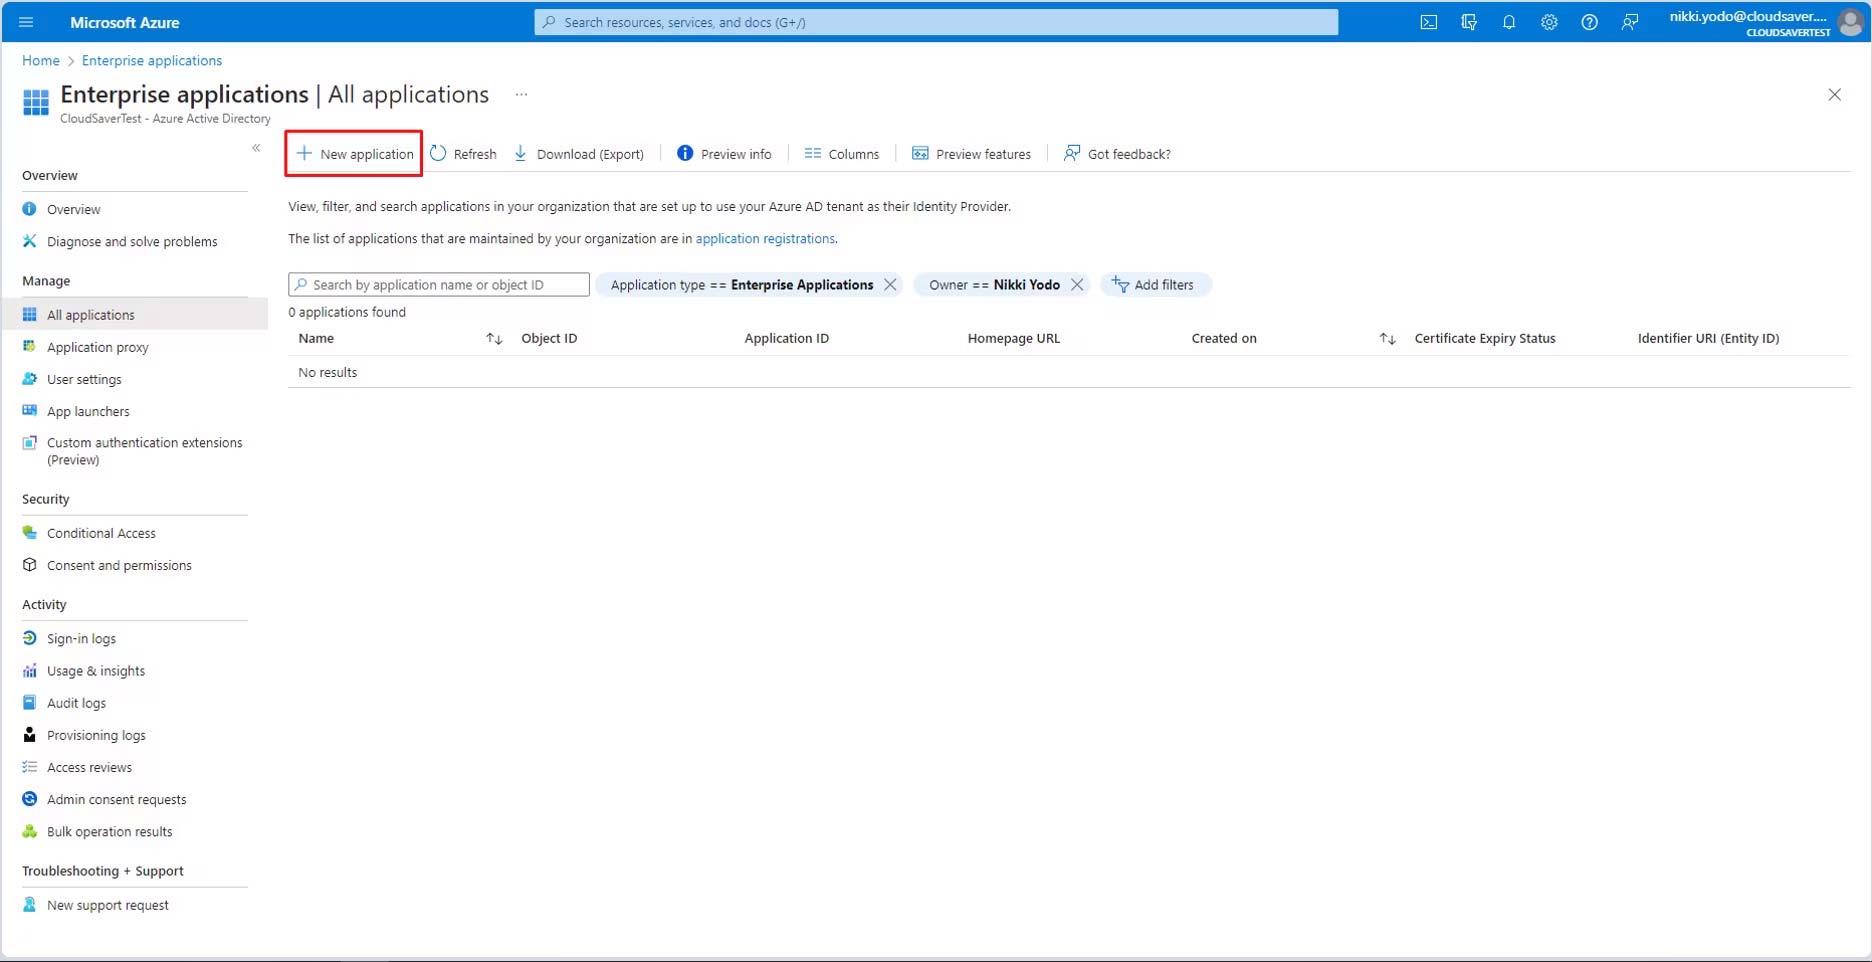
2. In the Enterprise applications page, click New application.
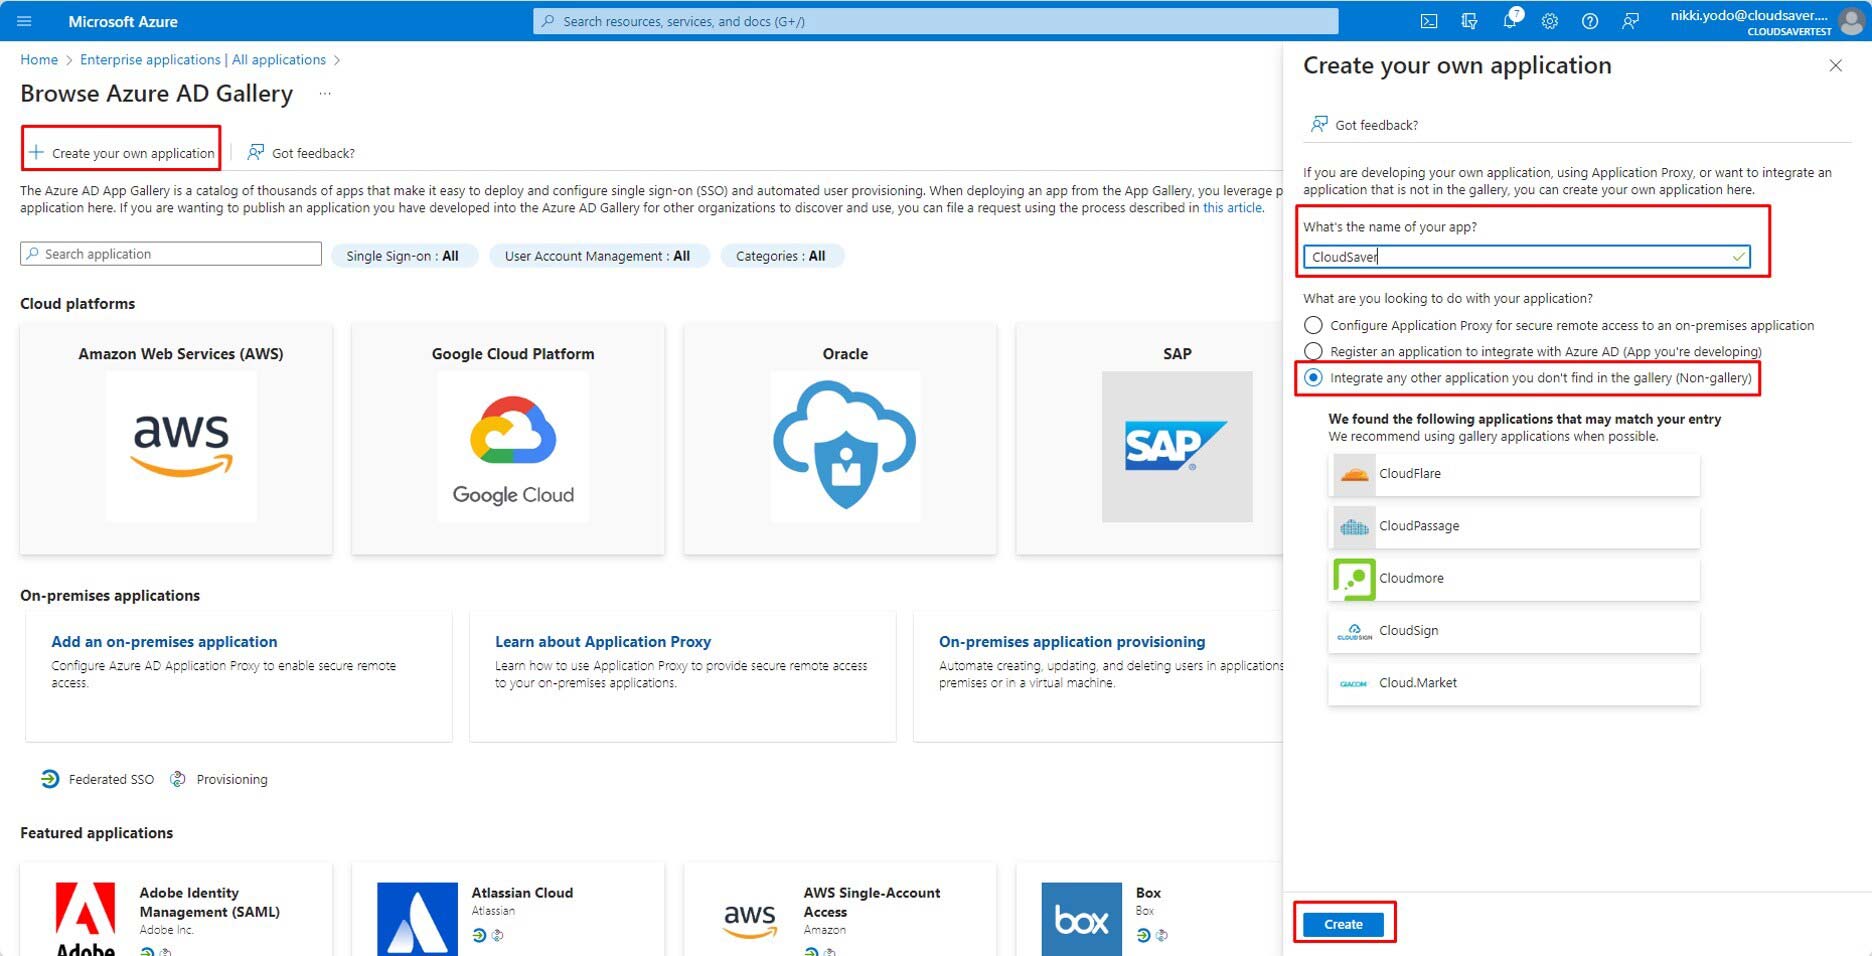
3. On the next page, click Create your own application. Under the question “What’s the name of your app? Type “CloudSaver”. Select the button that says “Integrate any other application you don’t find in the gallery (Non-gallery)” and click Create.
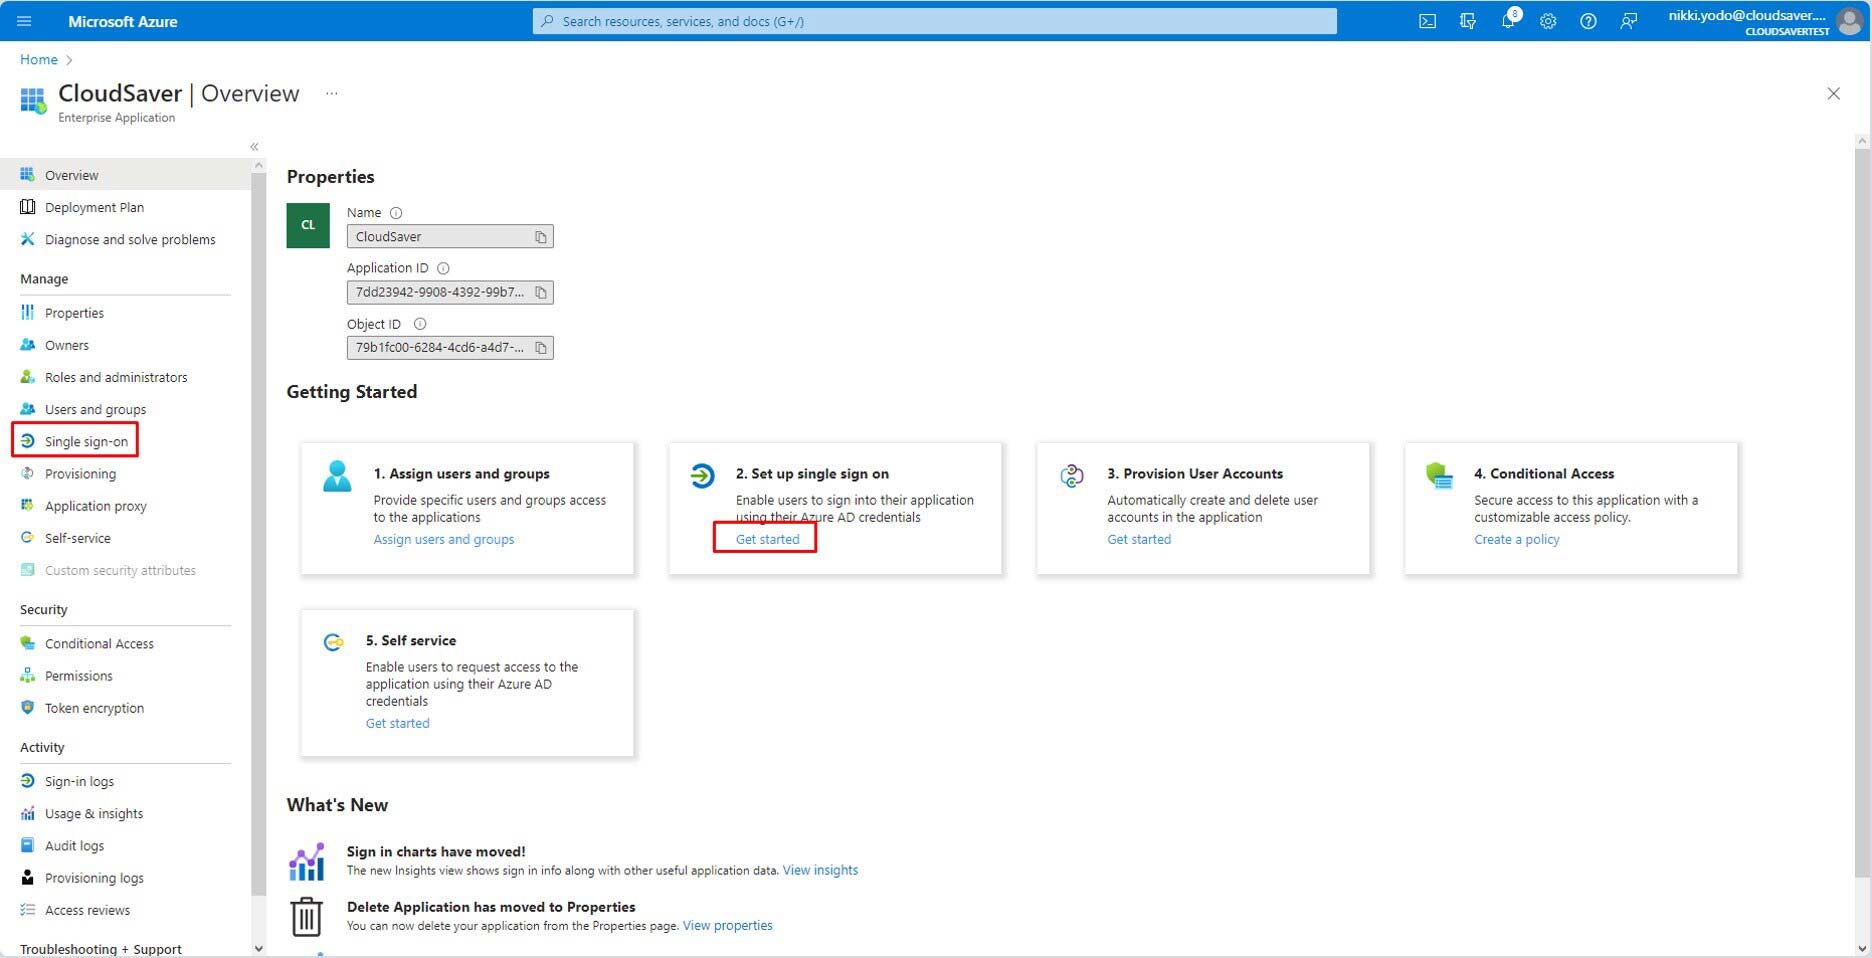
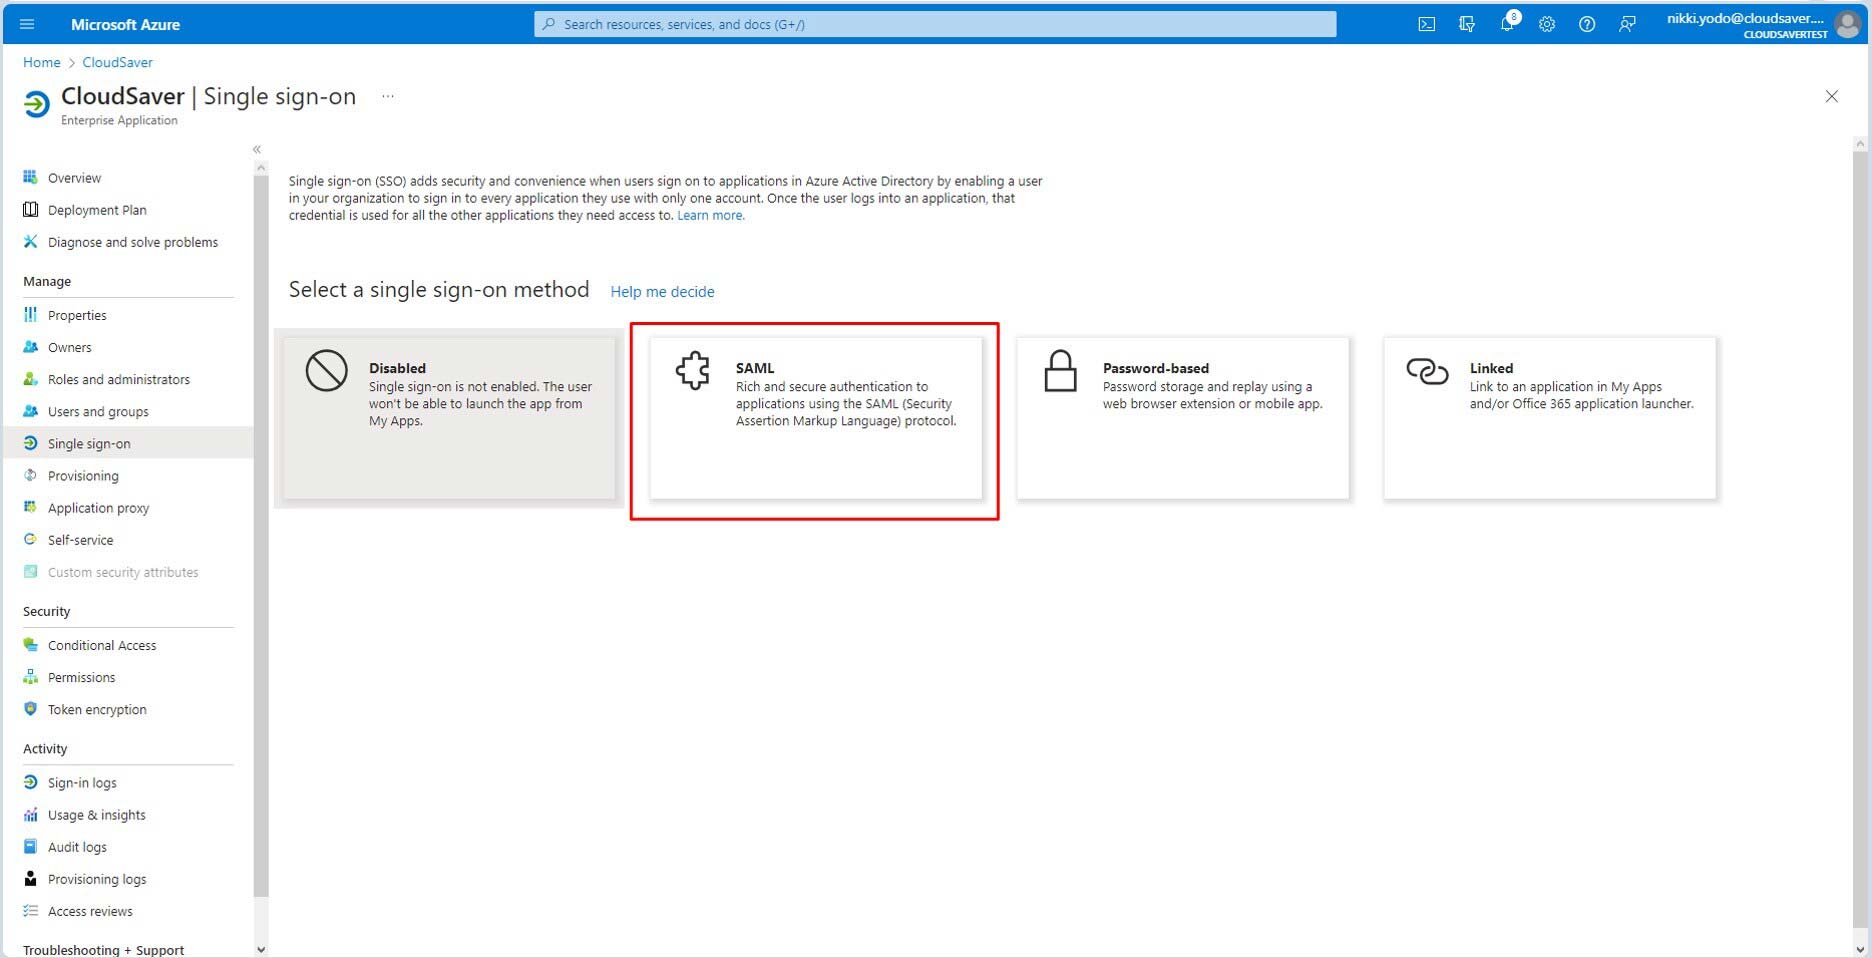
4. Select Single Sign-on on the left menu or click Get started link on Single-sign on tile.
5. Select the SAML tile.
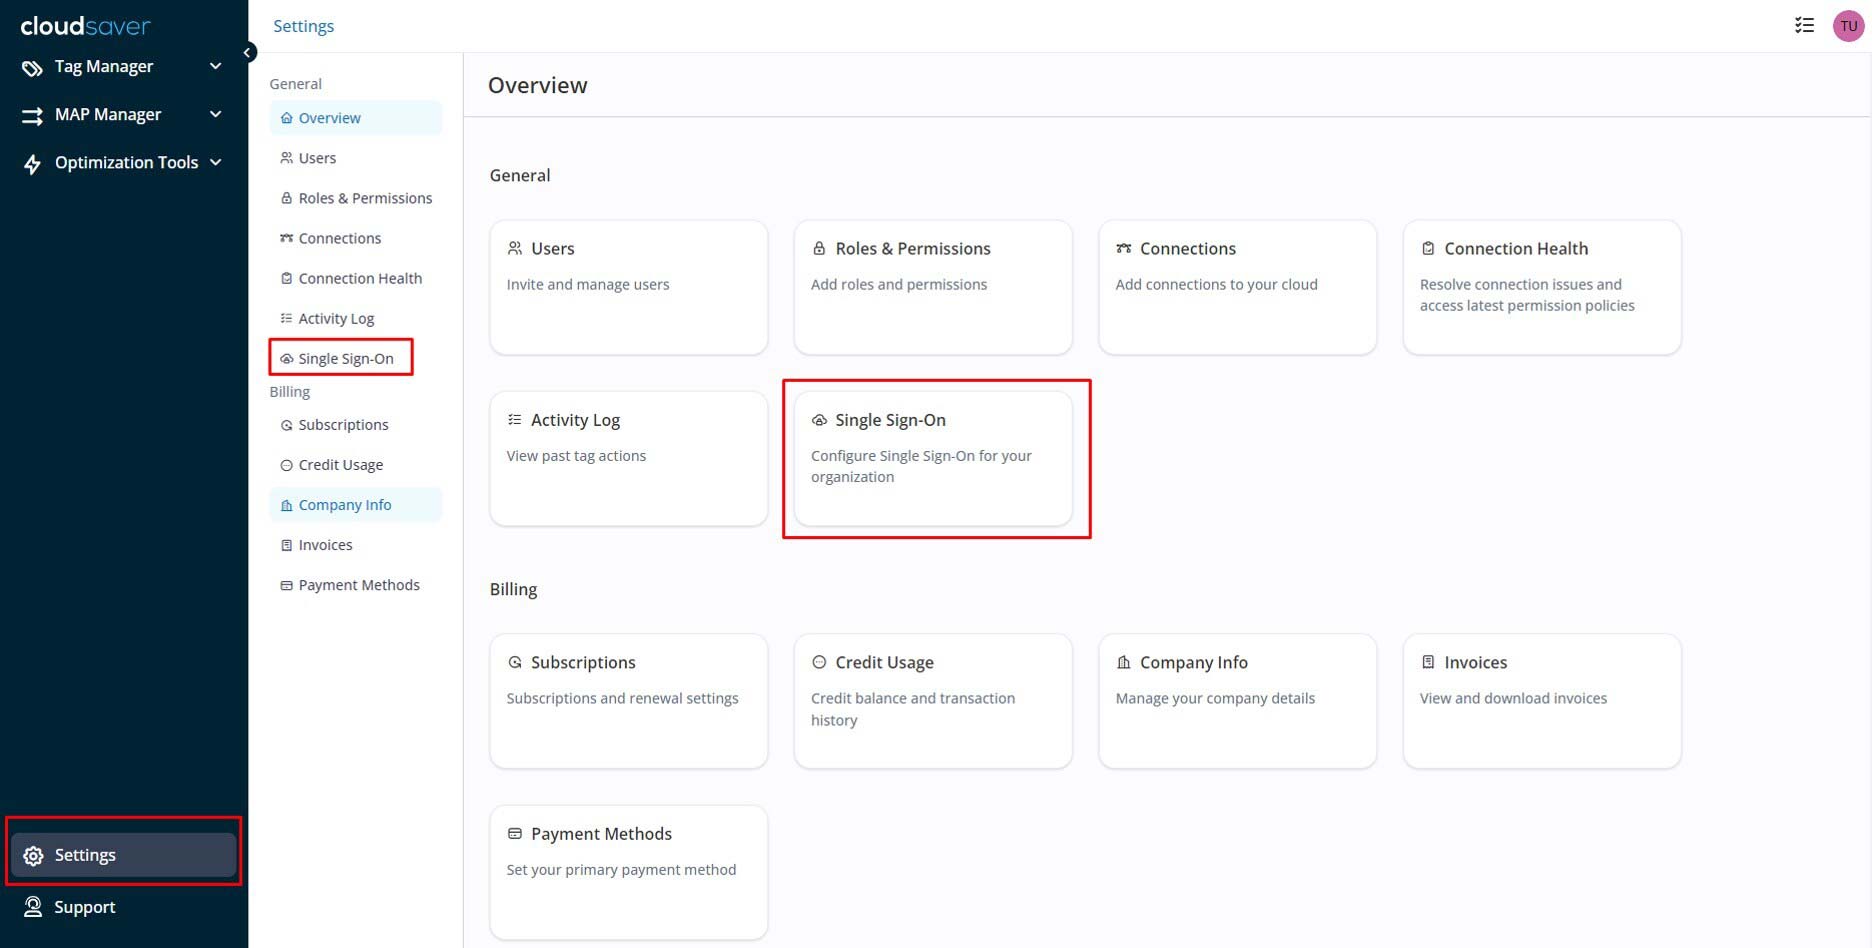
6. On CloudSaver app, click Settings on the bottom of the left menu and click Single Sign-On link or tile.
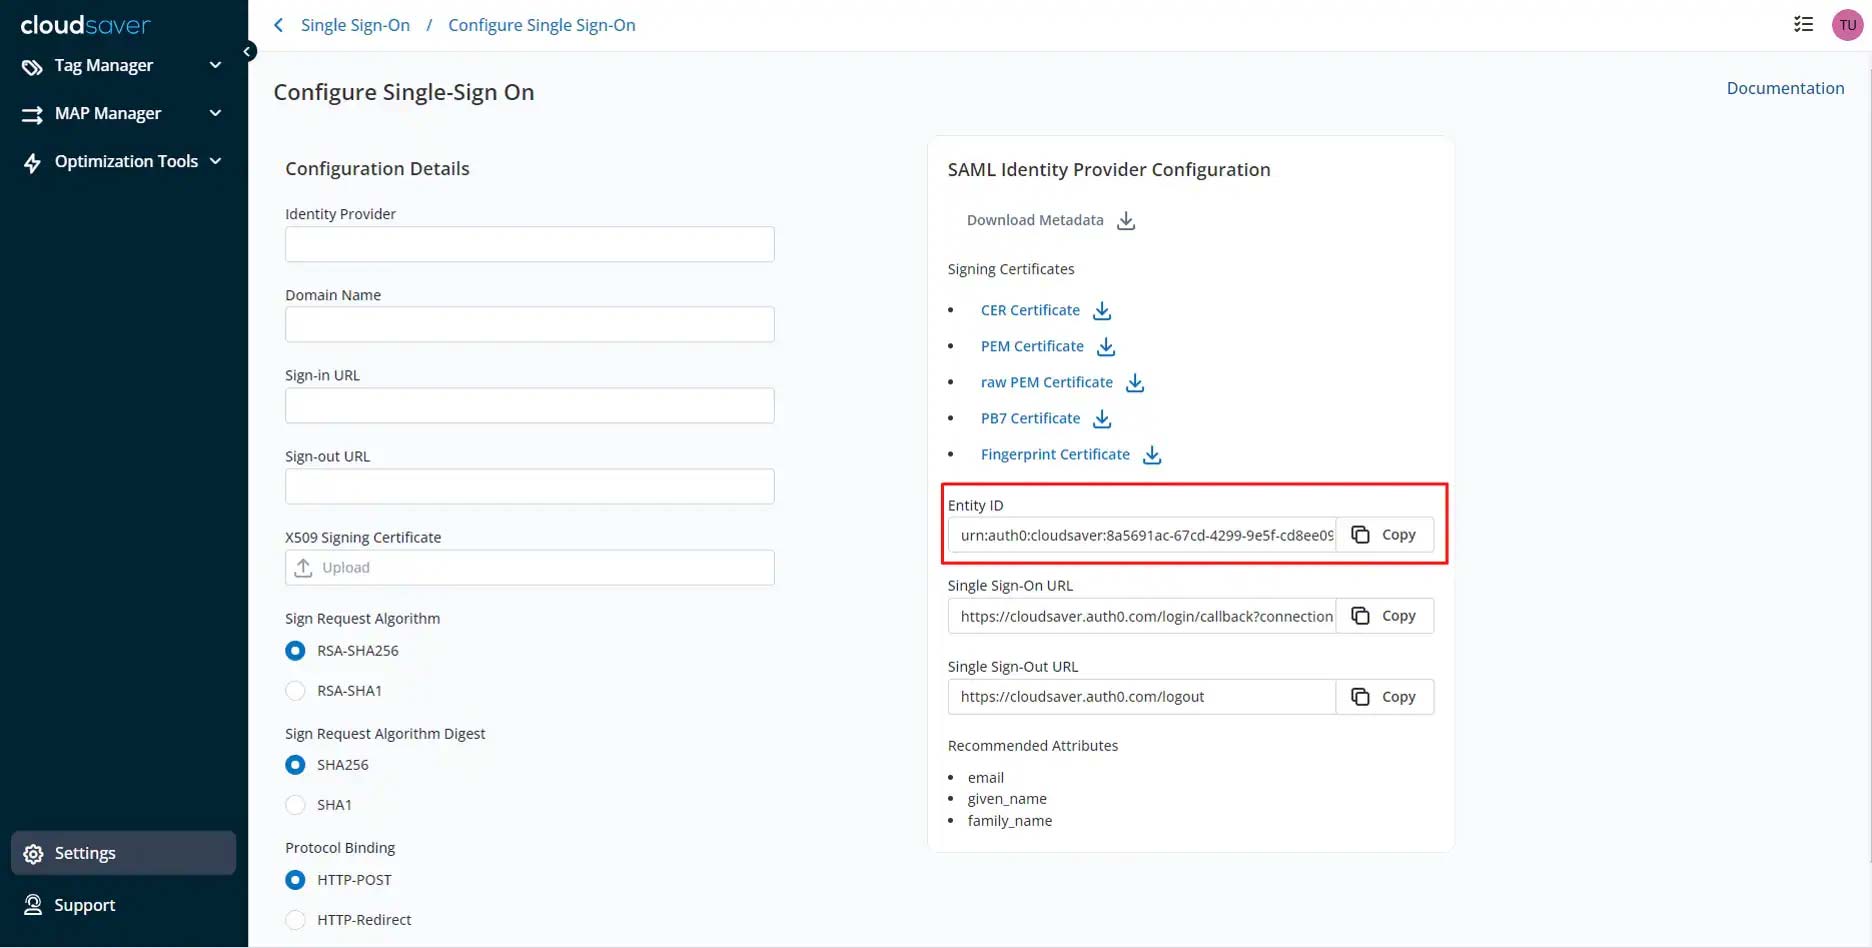
7. Click Set Up SSO button.

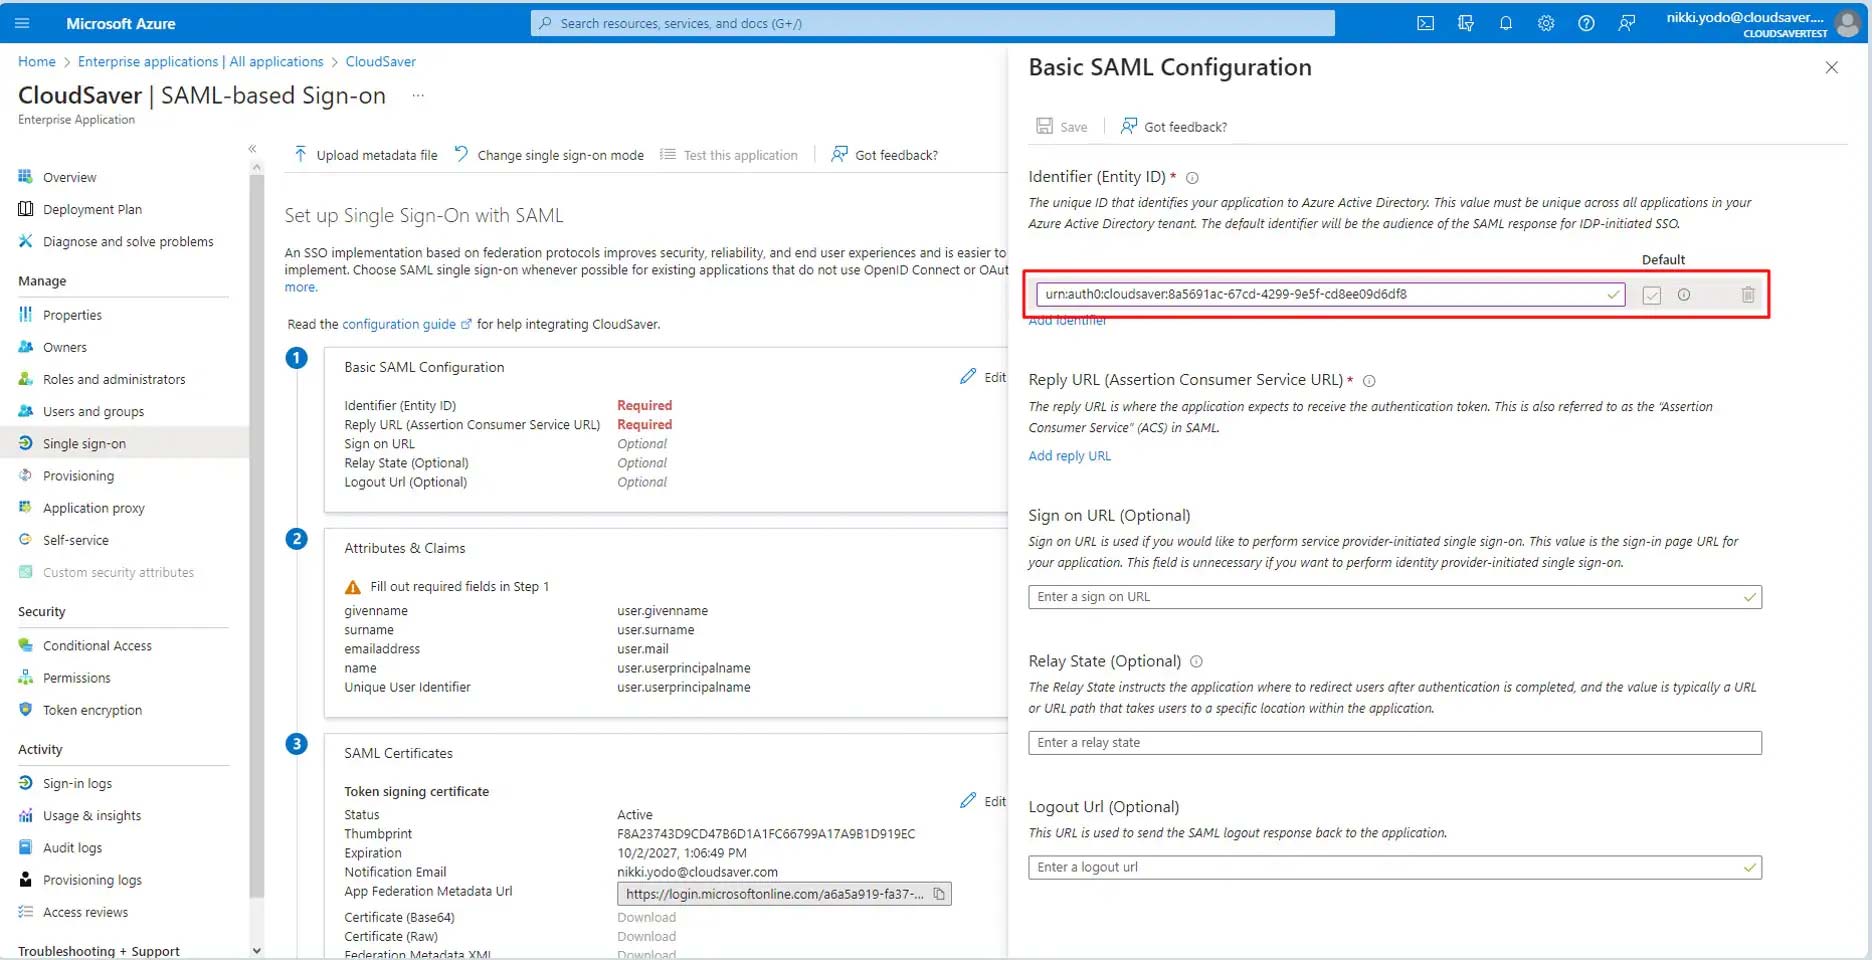
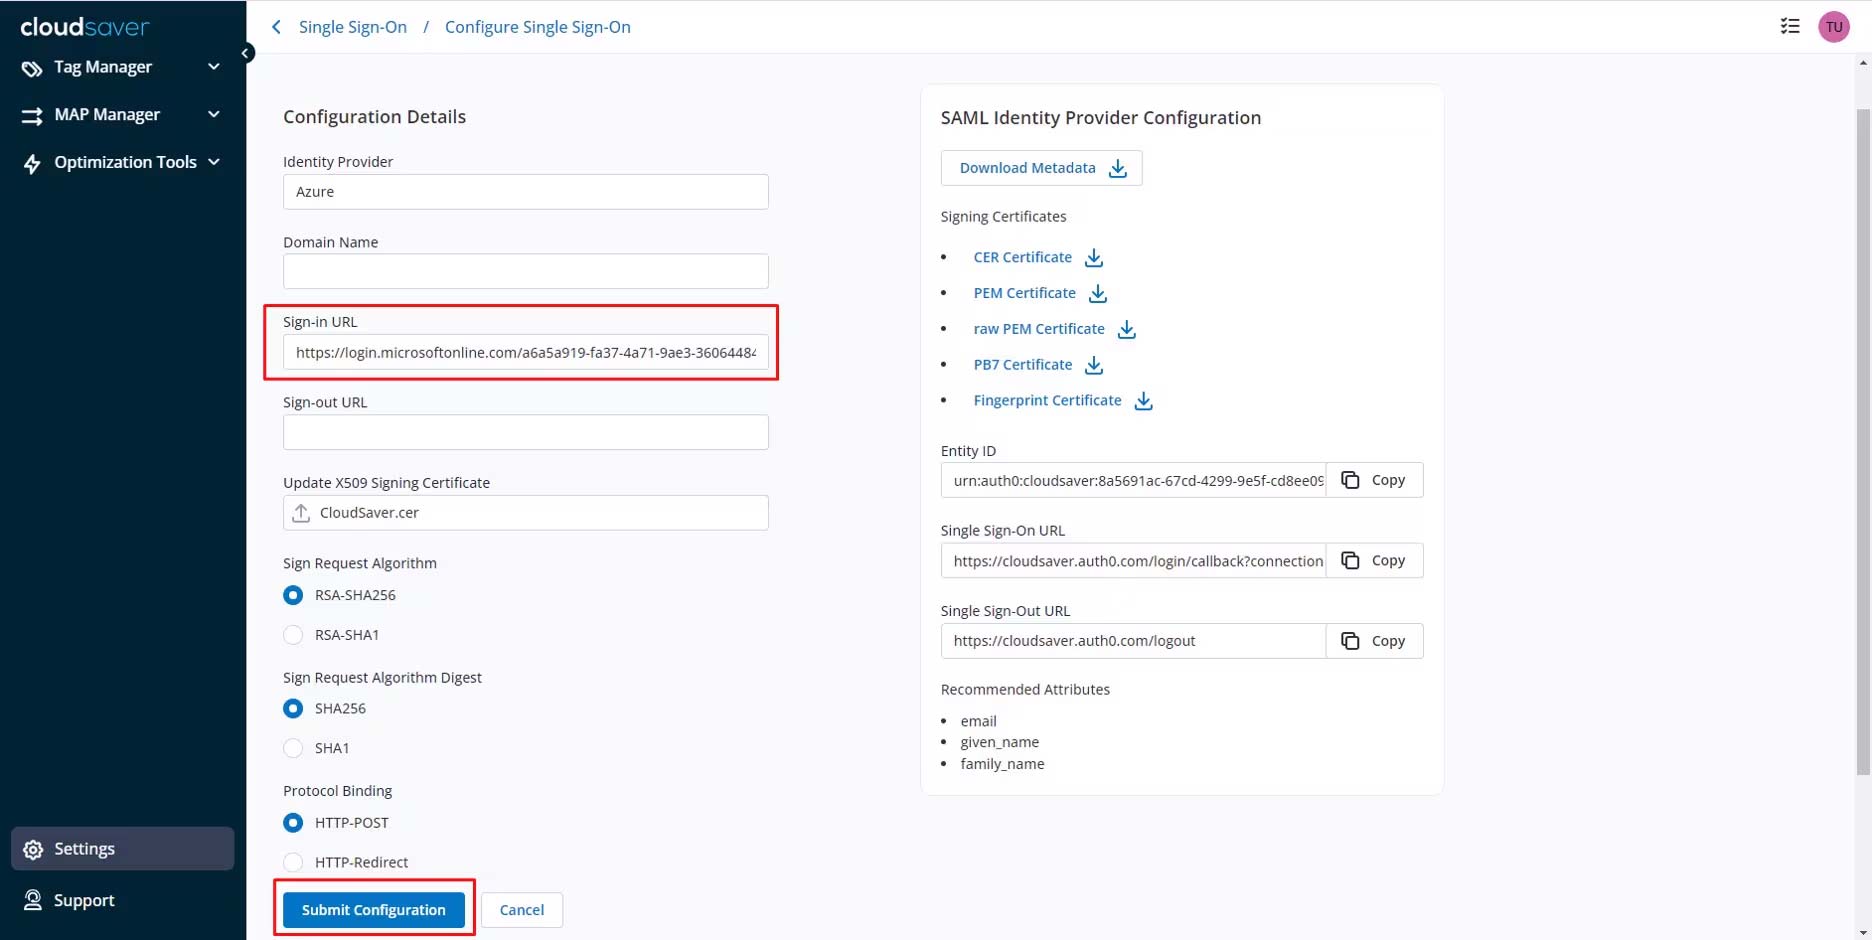
8. Copy the Entity ID.
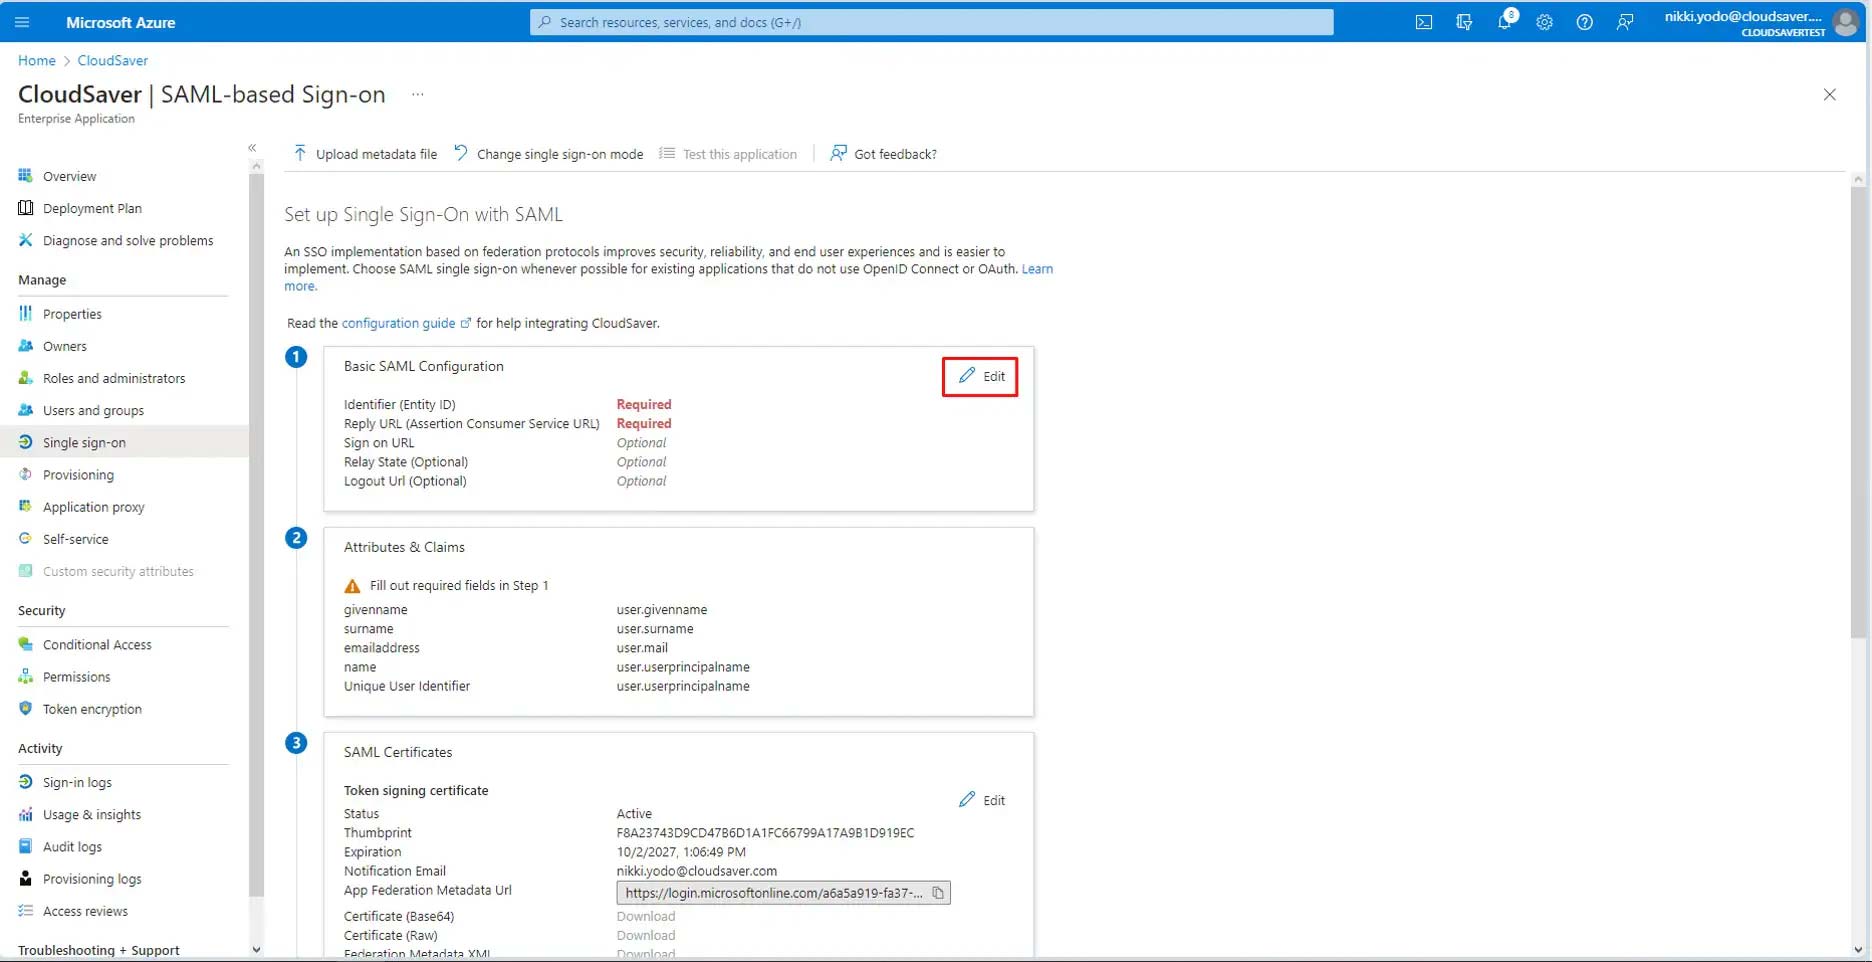
9. Back to Azure, under Basic SAML Configuration section, click Edit.
10. On the slide out panel, paste the Entity ID value copied earlier under Identifier (Entity ID) box.
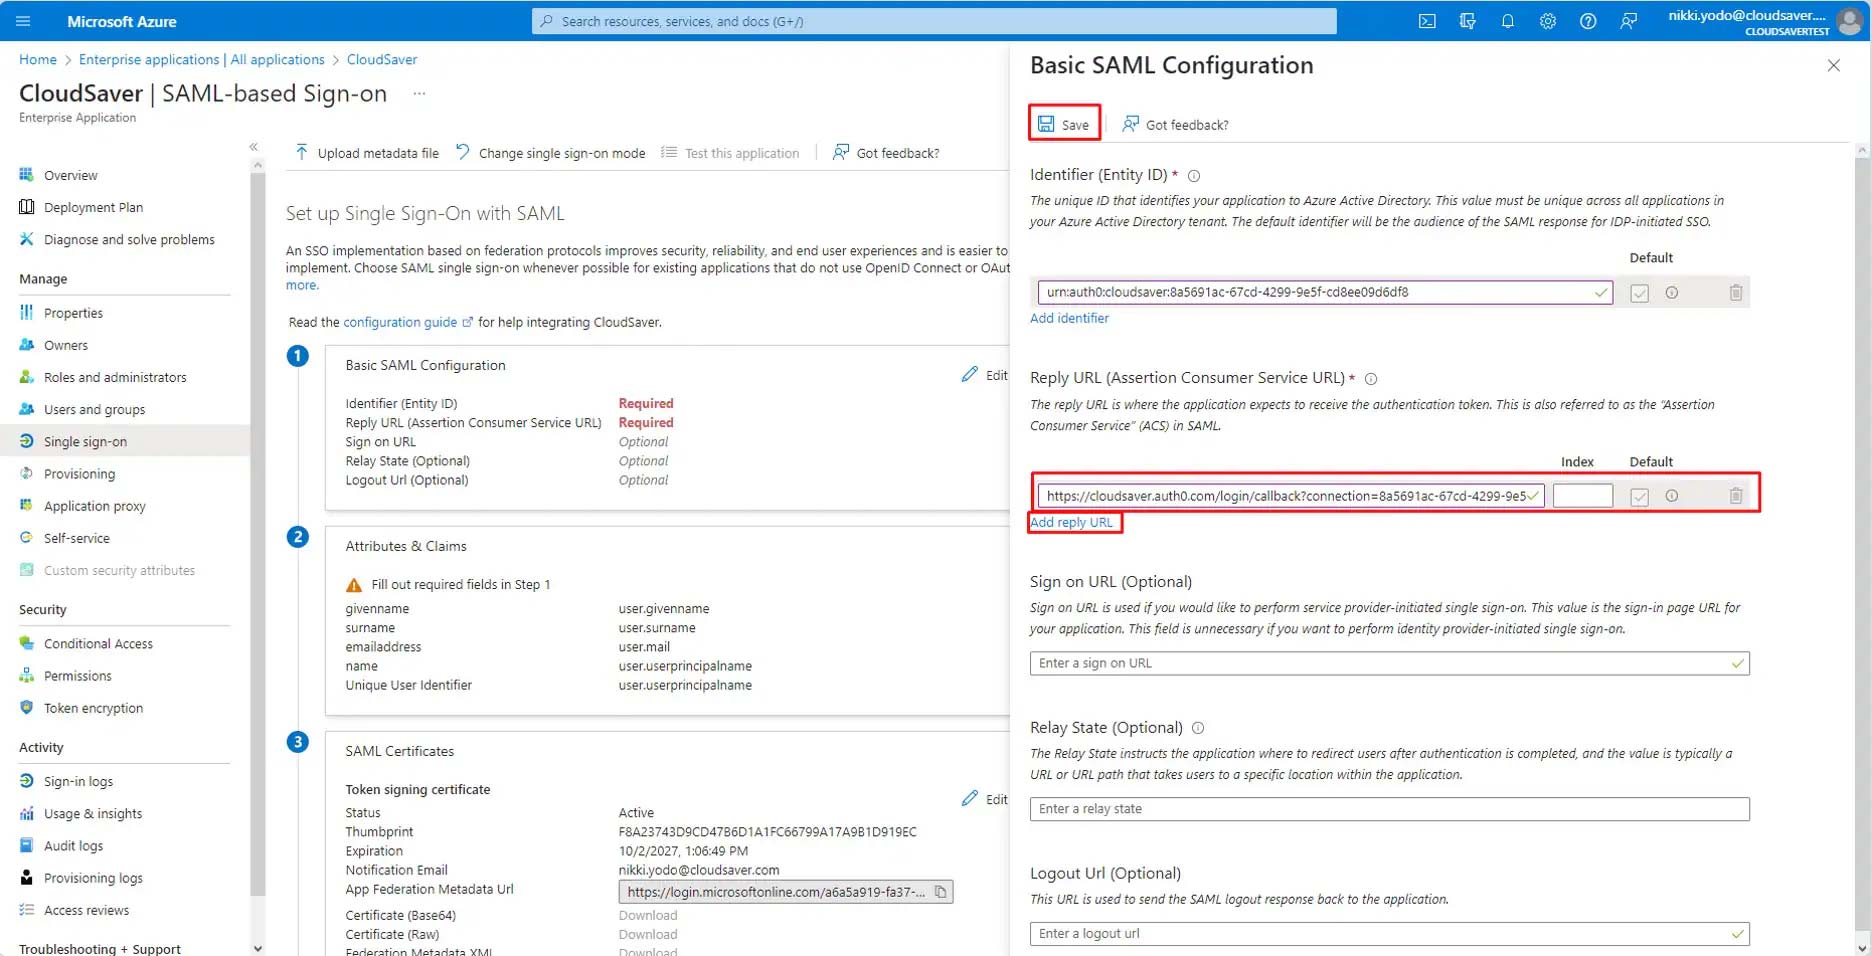
11. Back to CloudSaver Single Sign-On page, copy the Single Sign-On URL.

12. Paste the Single Sign-On URL value to Reply URL (Assertion Consumer Service URL).
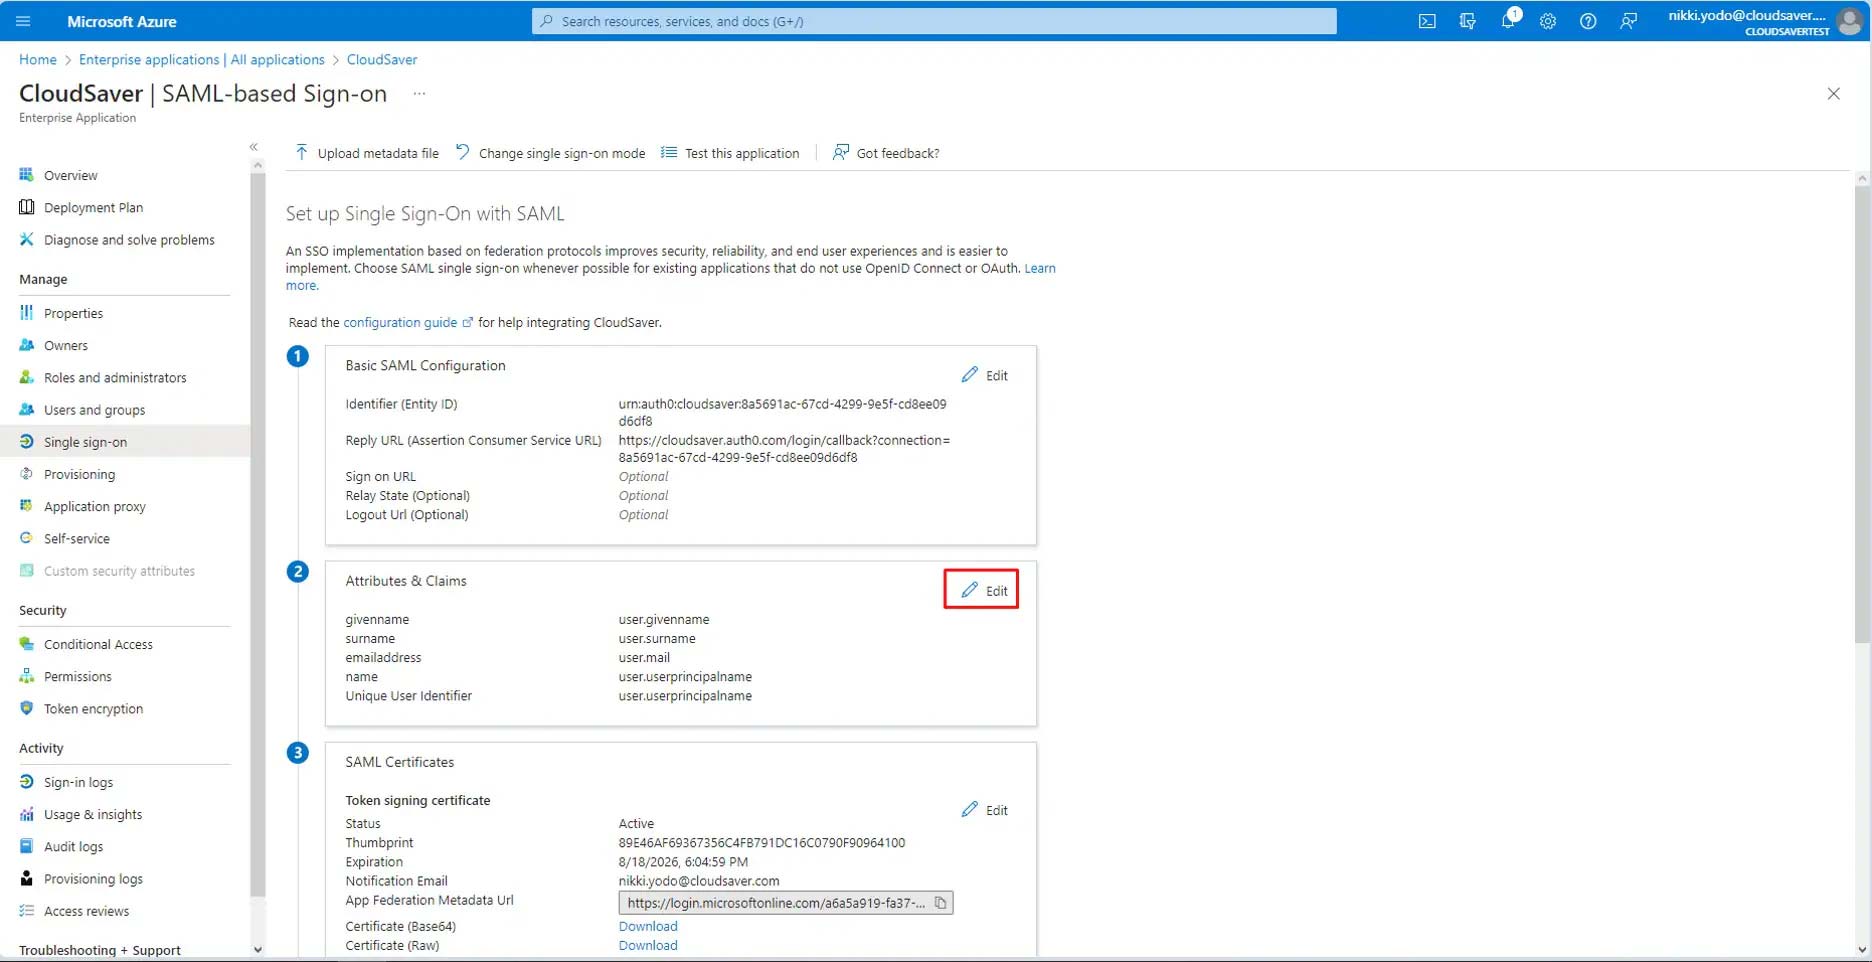
13. Under Attributes & Claims section, click Edit.
14. Then click Add new claim.
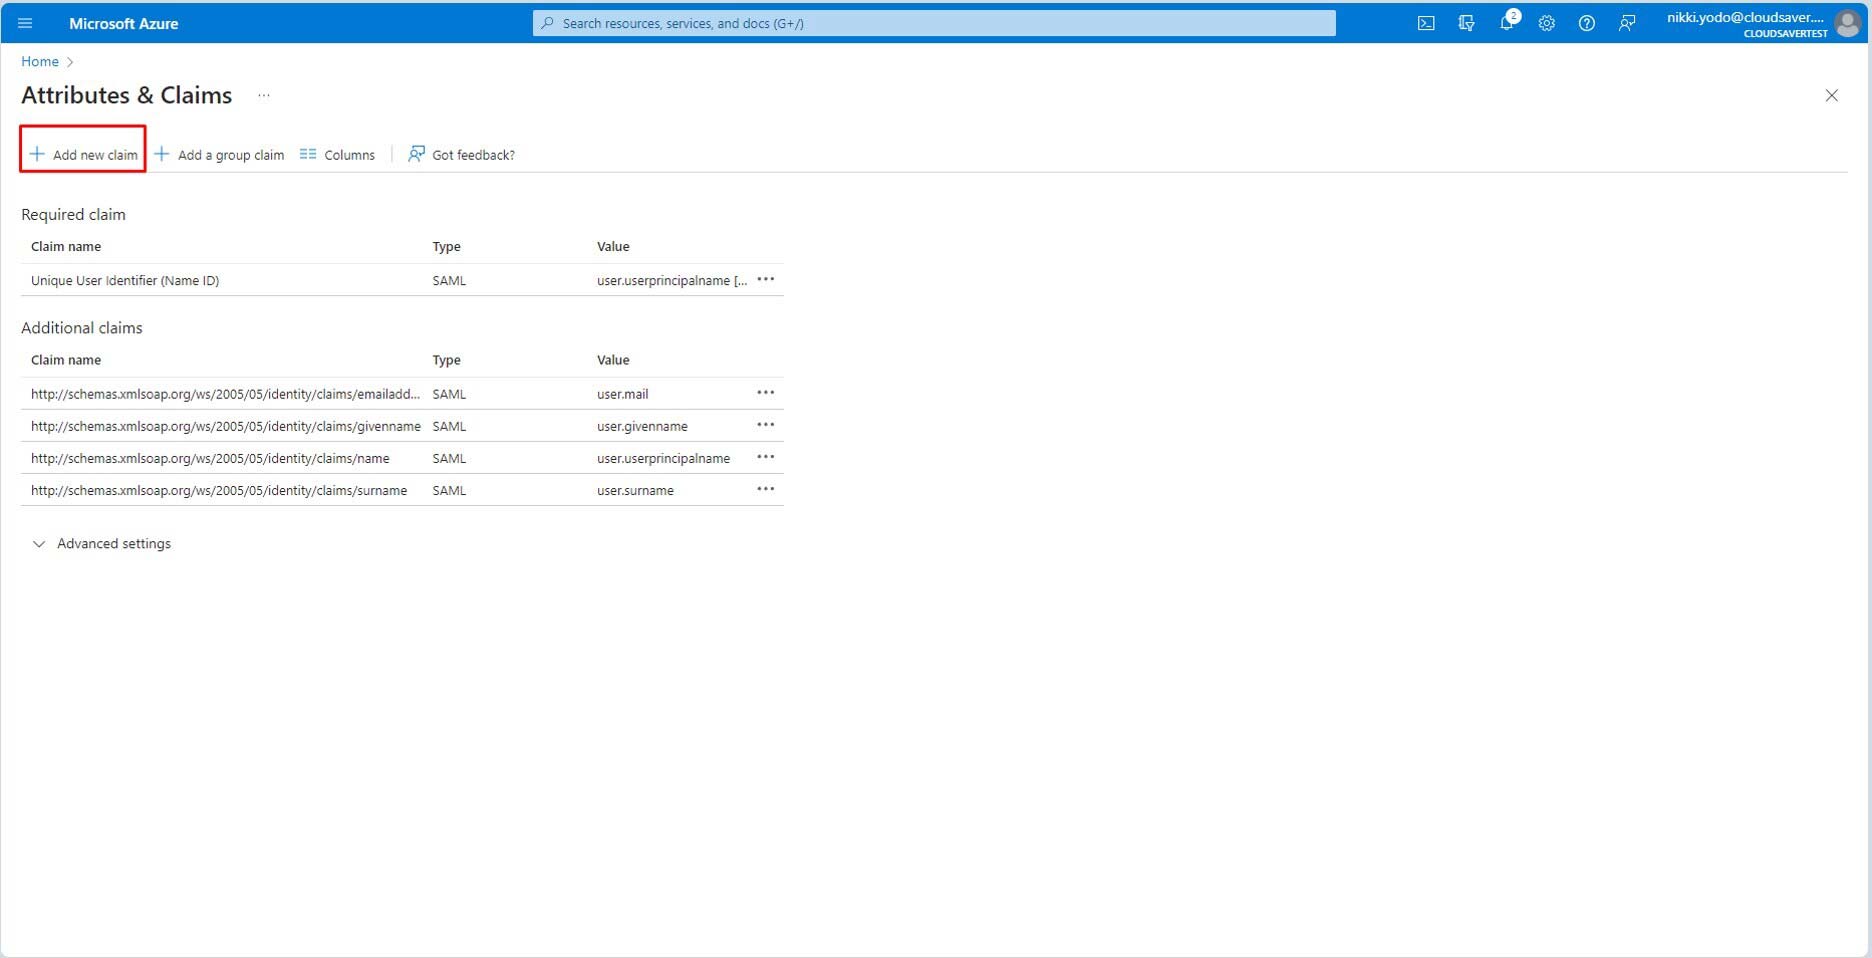
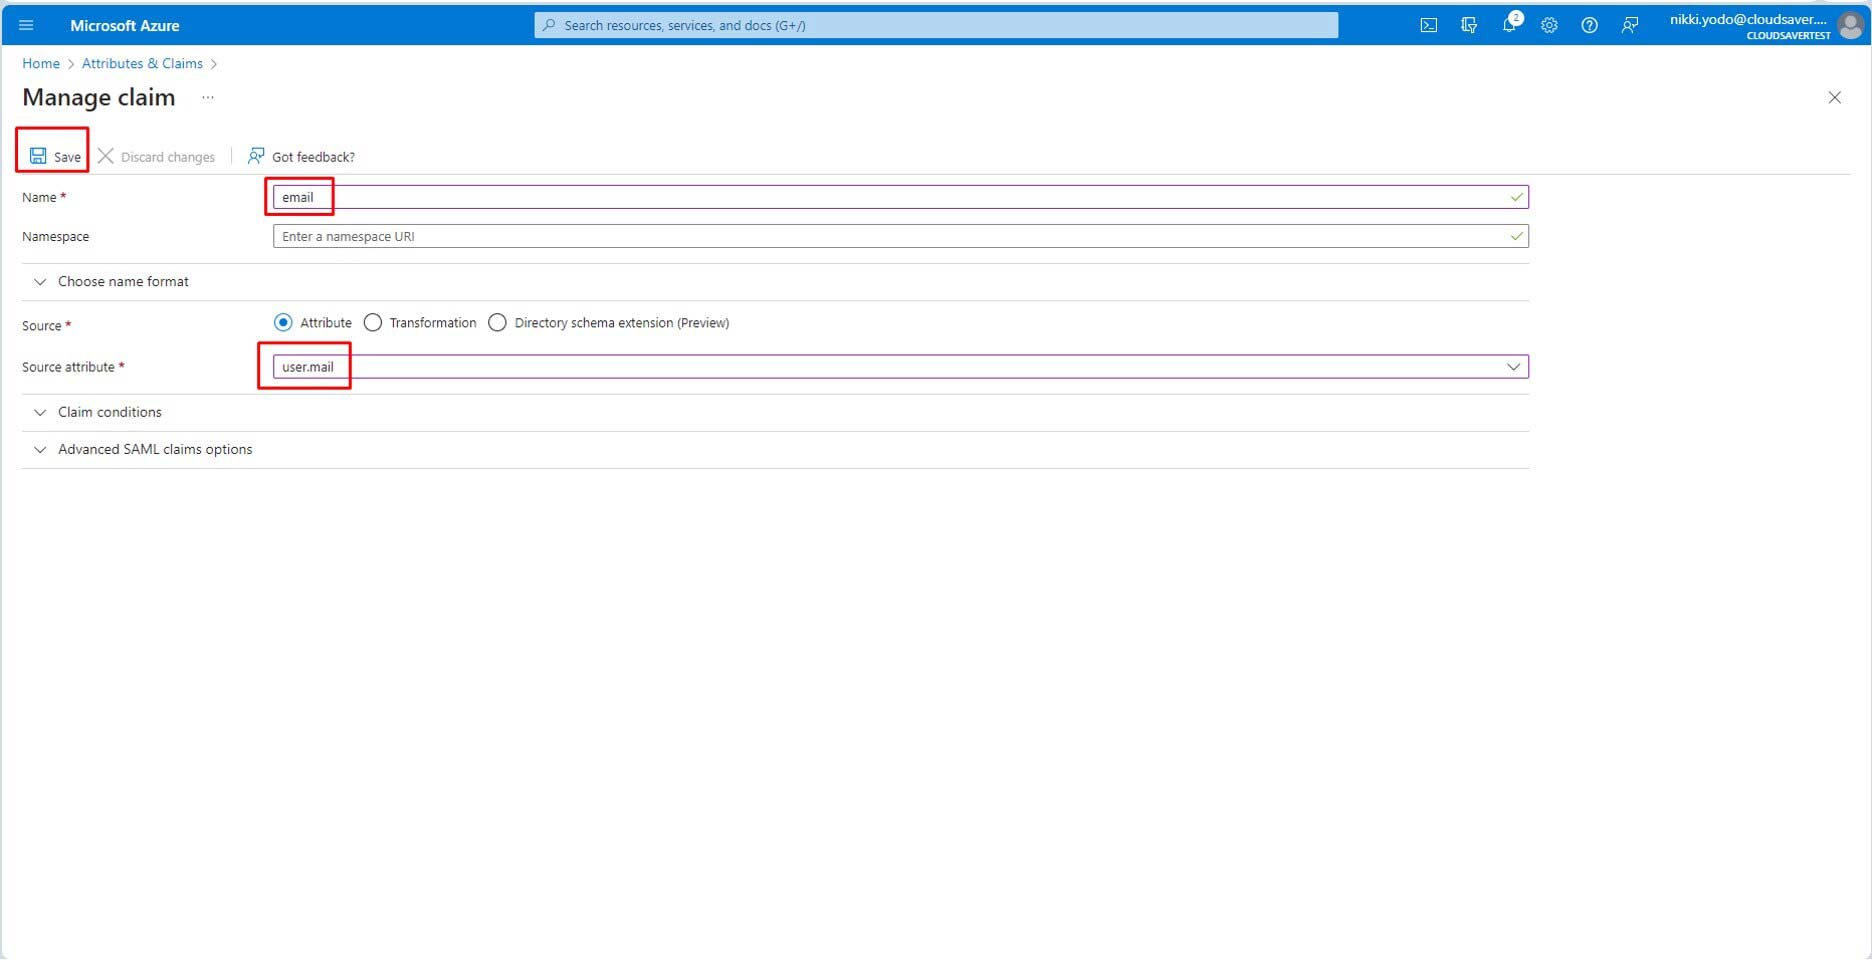
15. Enter email with Source attribute of user.mail and then click Save.
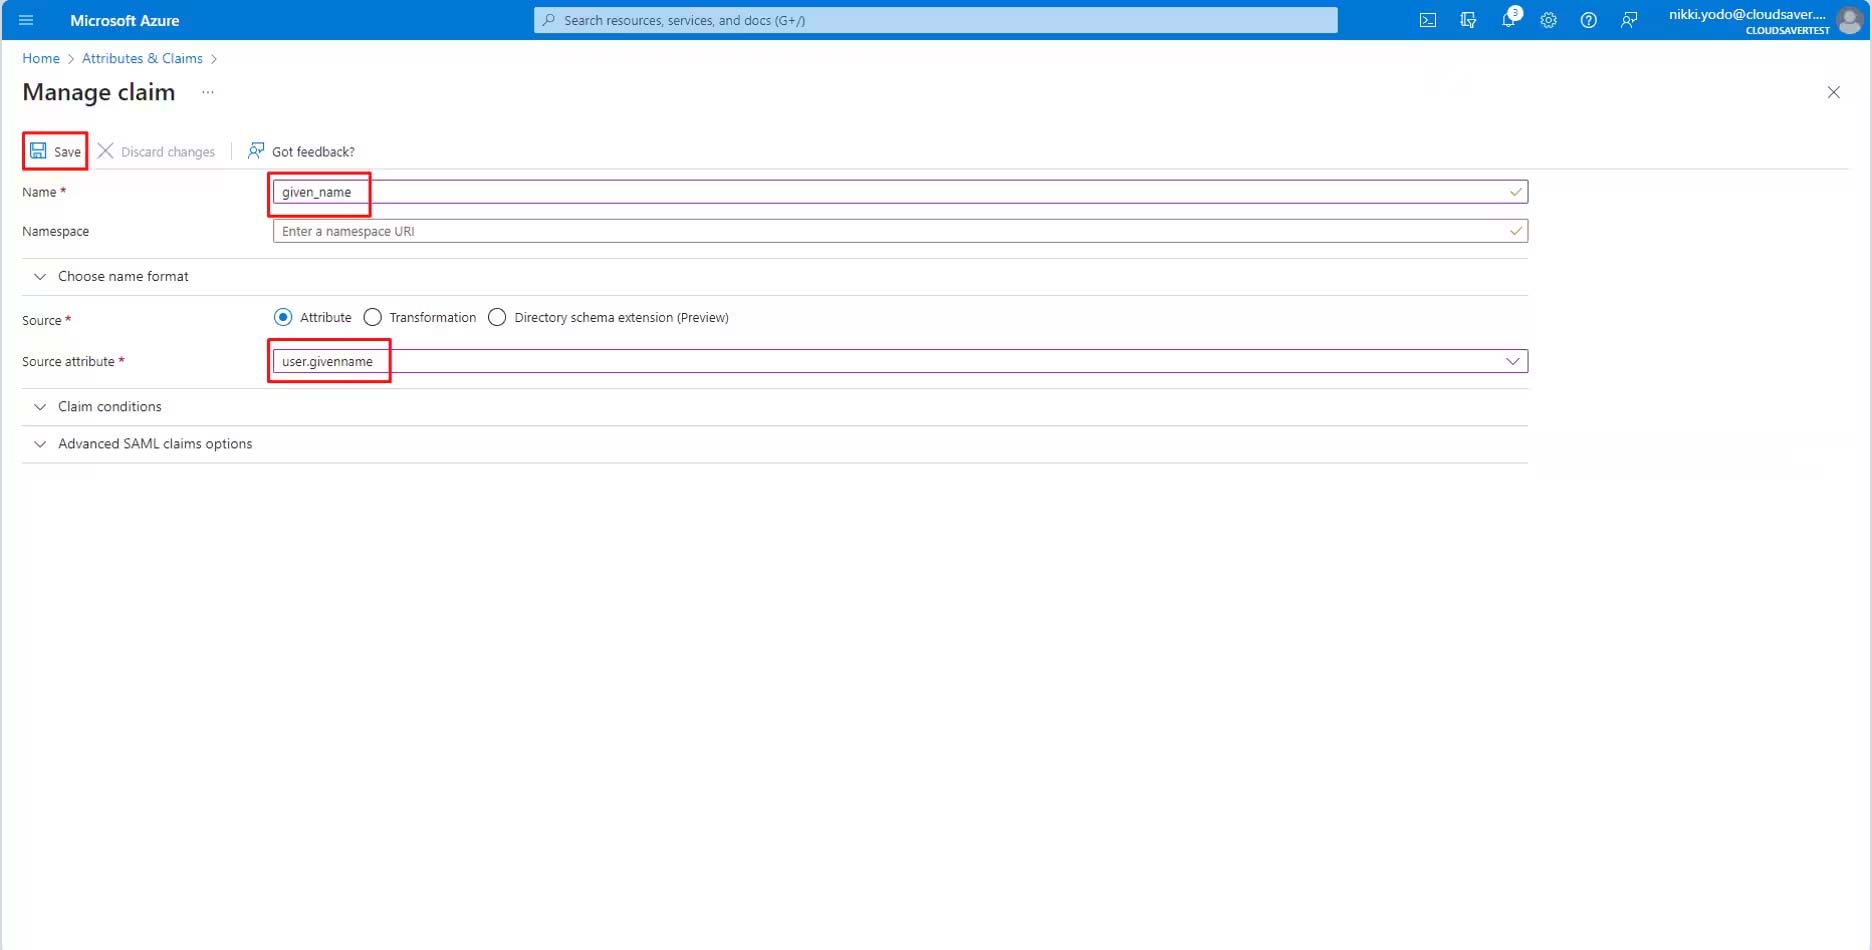
16. Repeat for given_name and family_name with source attribute of user.givenname and user.surname respectively.
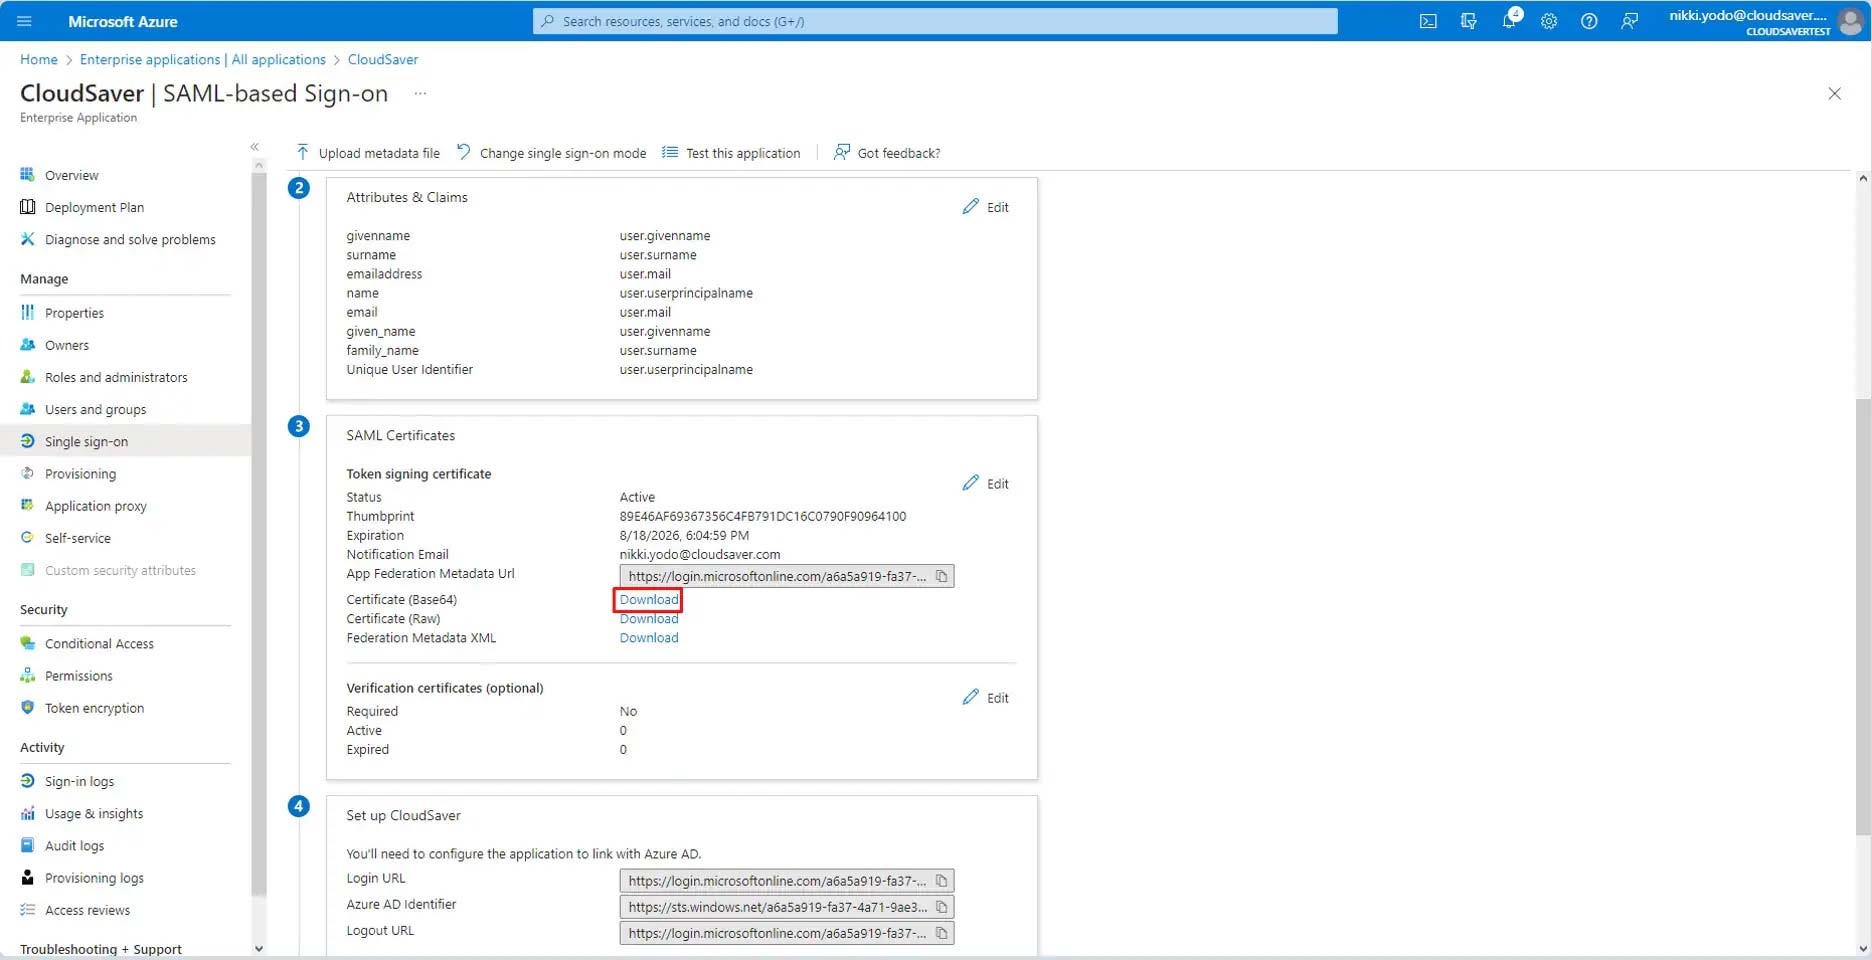
17. After claims have been configured, go back to CloudSaver enterprise application Single sign-on page. Scroll down a little and click Edit download the Certificate (base 64) under SAML Certificates section.
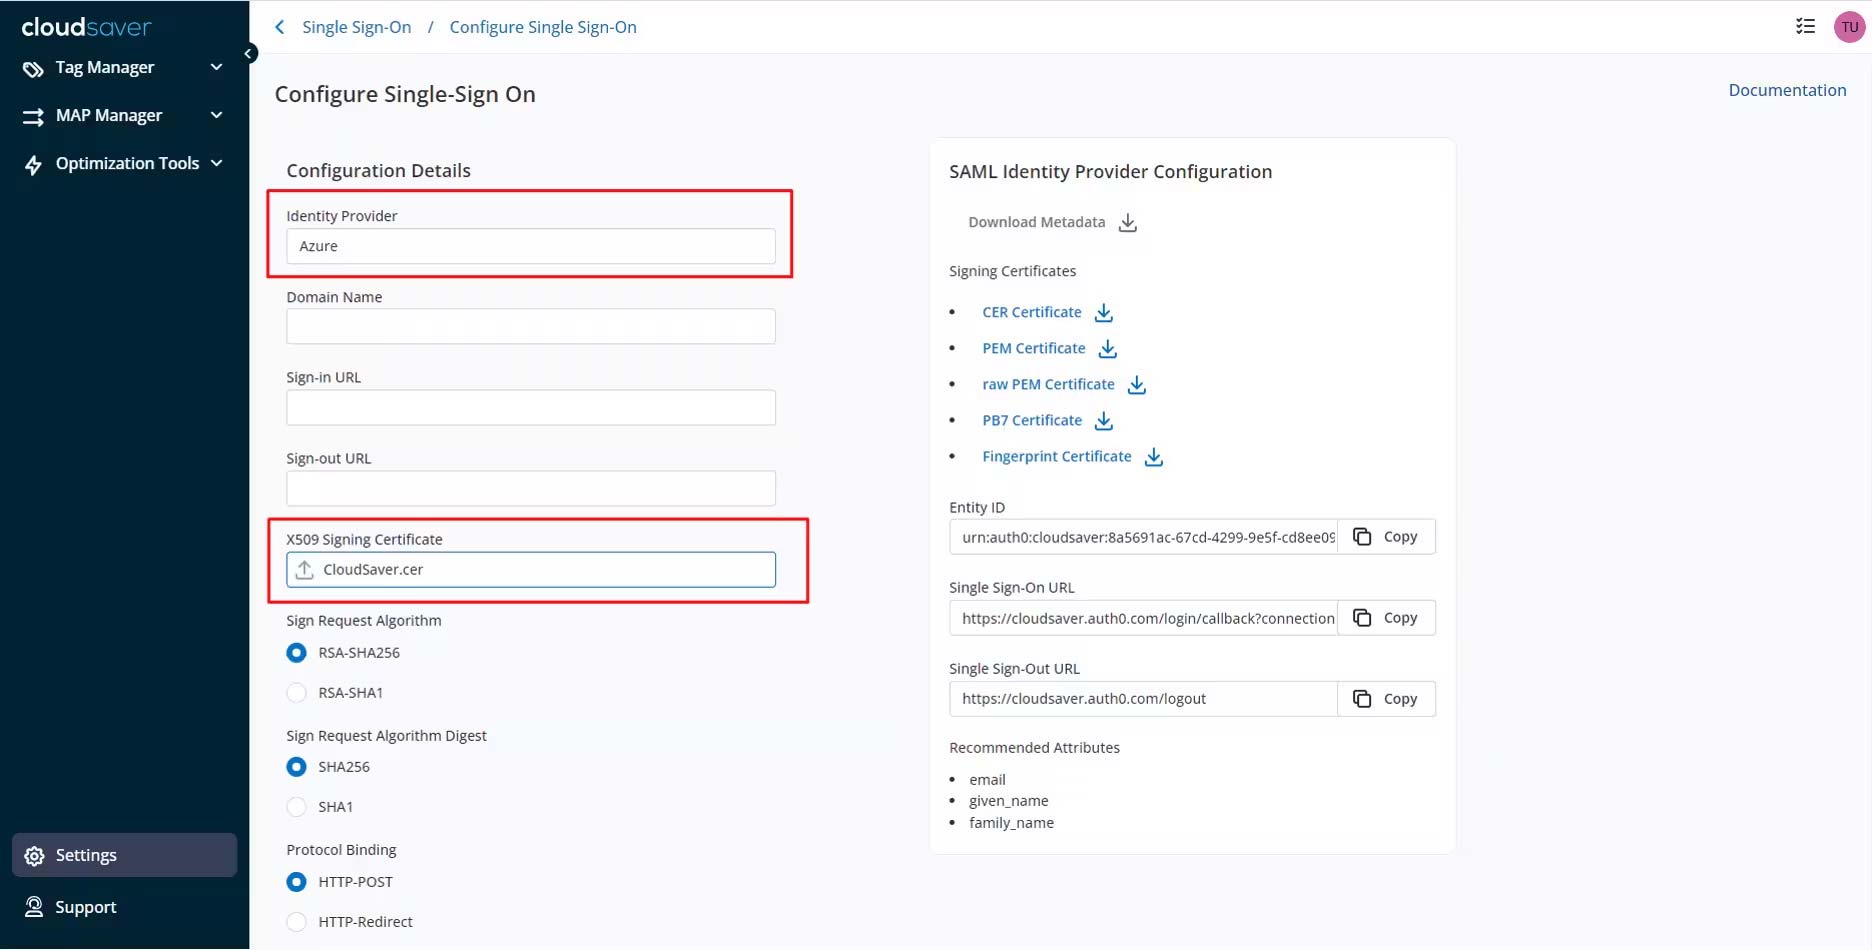
18. Back to CloudSaver Single Sign-On page, enter “Azure” as Identity Provider and upload the earlier downloaded certificate to X509 Signing Certificate field.
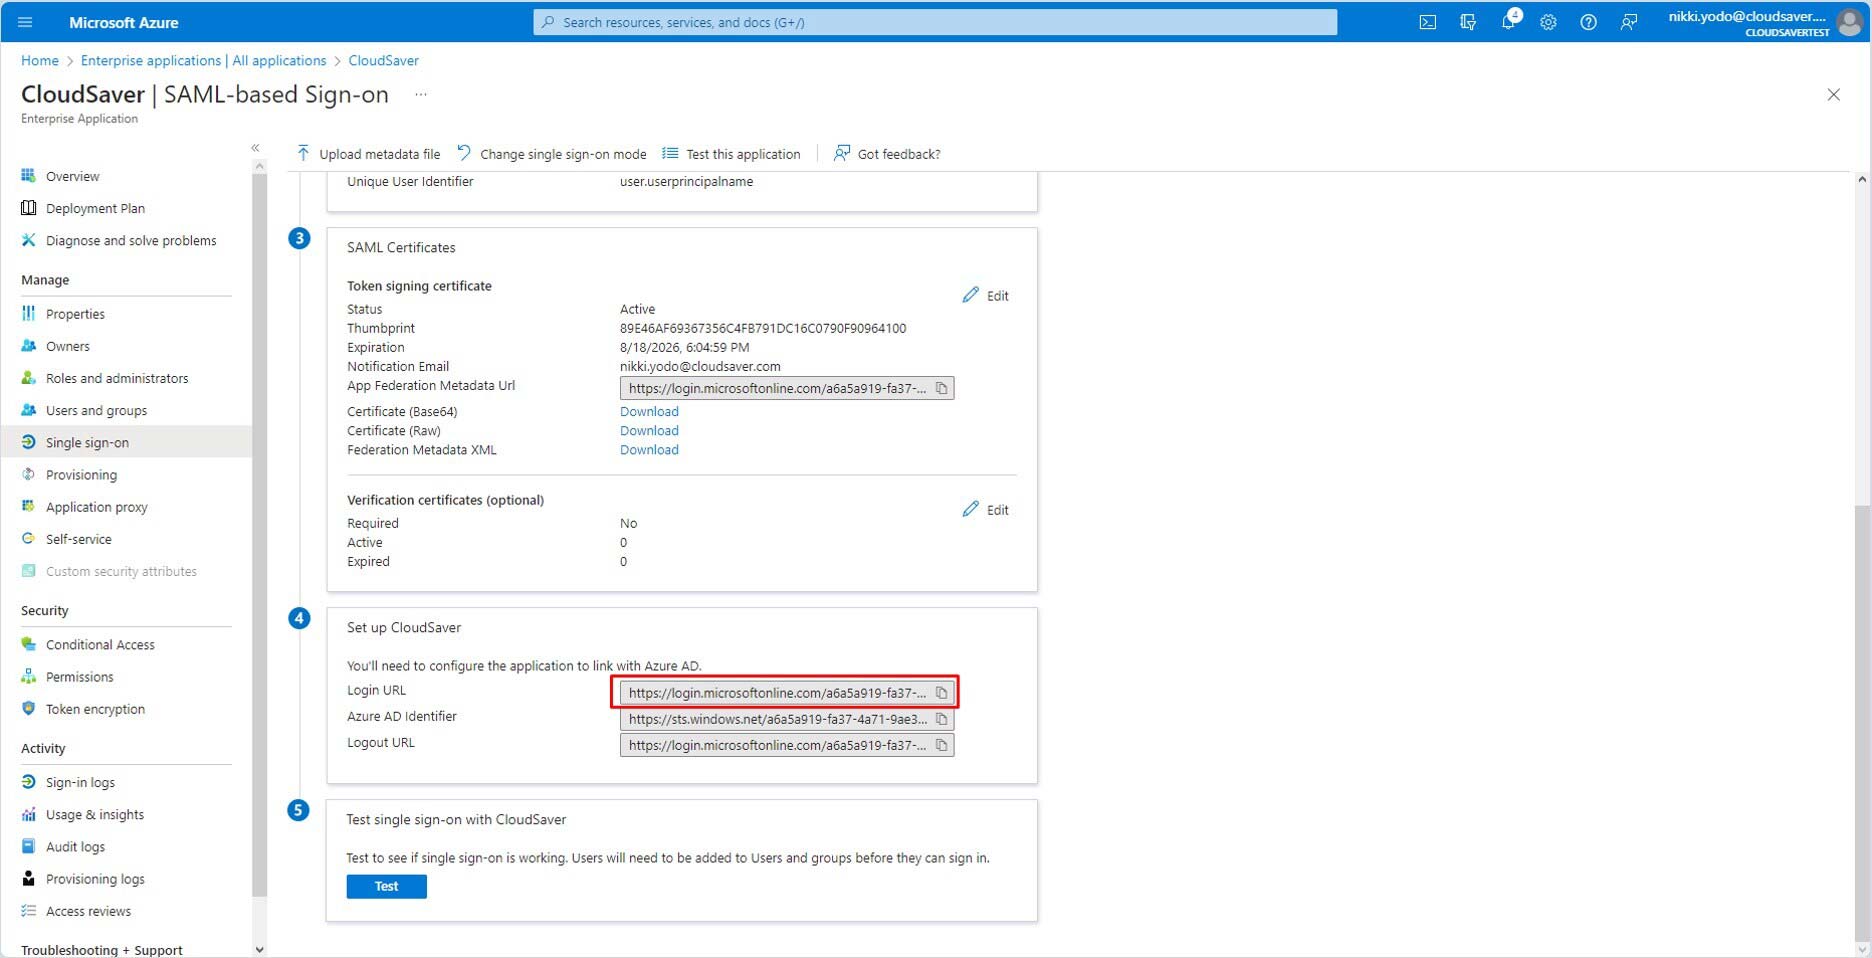
19. Scroll down a little to Set up CloudSaver section in Azure Single Sign-On configuration page and copy the Login URL.
20. Paste the value to Sign-in URL field in CloudSaver and click Submit Configuration button (scroll down might be required).
21. After the navigation, on the next screen, ensure that SSO Status in CloudSaver says “SSO is configured”.
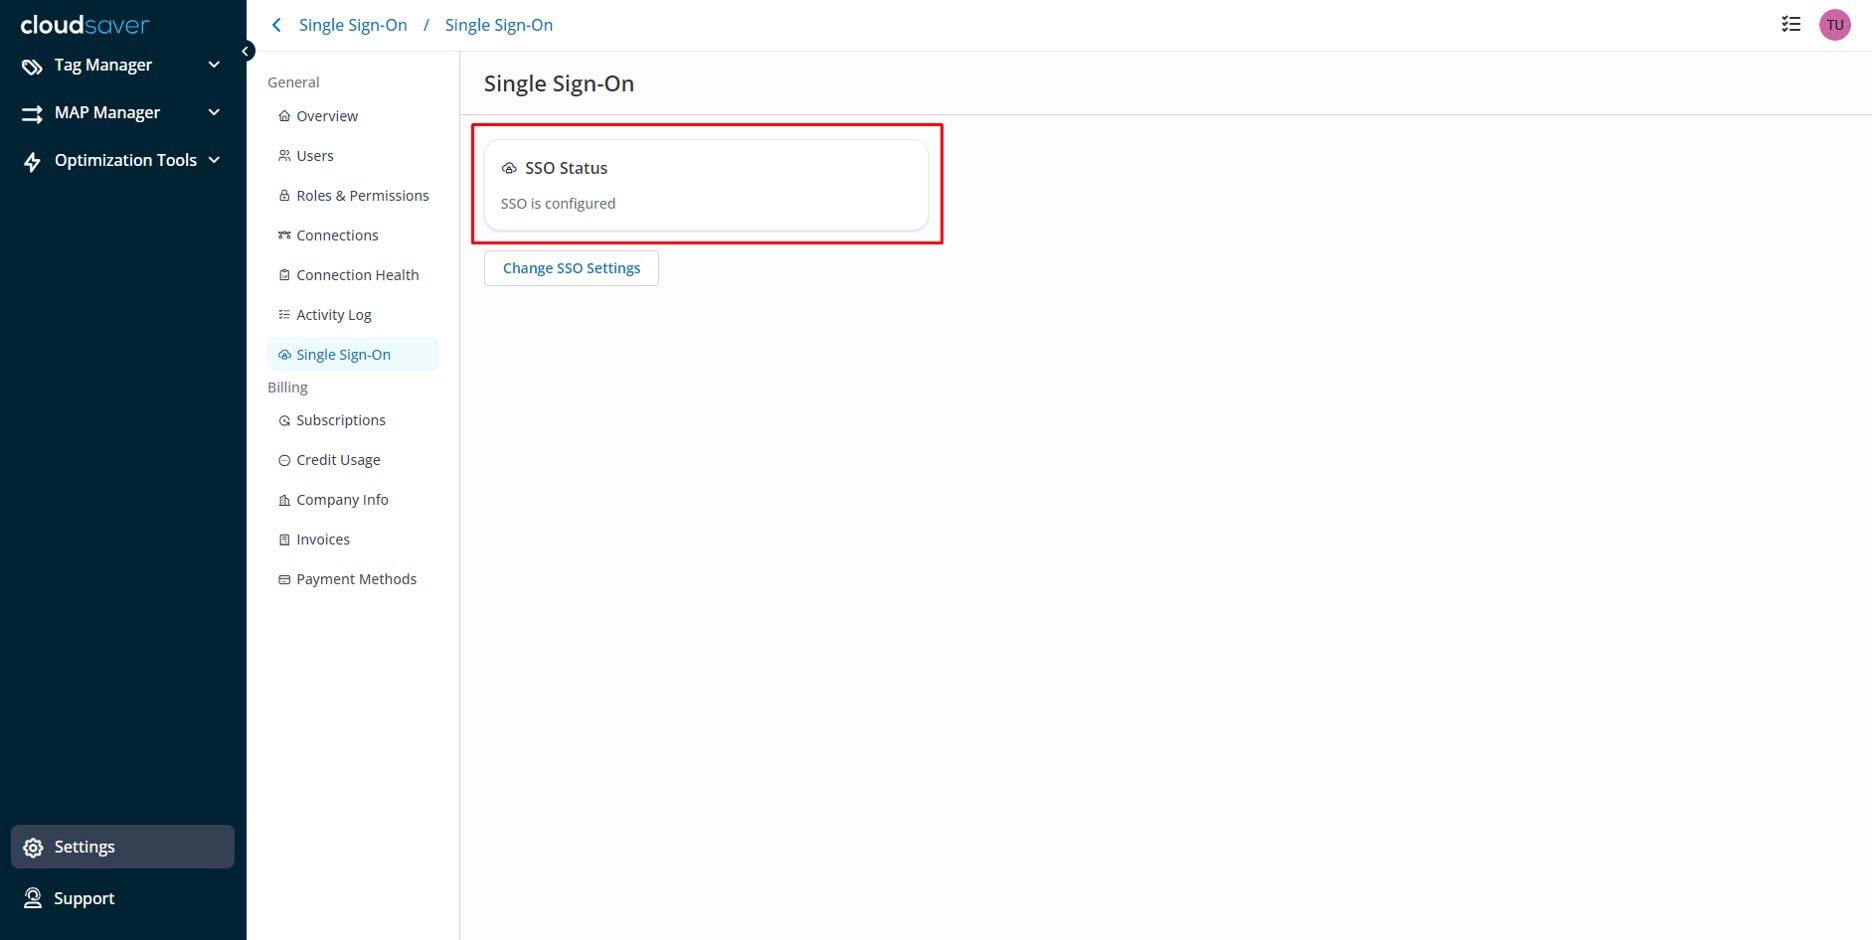
22. Configuration now completes.
In this article